March 26, 2026
Deploy NocoDB with Docker on Ubuntu on Hetzner Cloud
Learn how to deploy NocoDB, a self-hosted Airtable alternative, on a Hetzner Cloud server with Docker Compose, PostgreSQL, and a firewall.
Introduction
NocoDB is an open-source Airtable alternative that lets you turn an existing database into a spreadsheet-style interface. It supports REST APIs, team collaboration, and connections to MySQL or PostgreSQL.
In this tutorial, you will deploy NocoDB on a Hetzner Cloud server using Docker. For users who prefer GUI tools, applications such as Server Compass can automate parts of this process. However, this guide walks through the deployment step by step rather than hiding it behind a GUI.
NocoDB requires relatively little memory (around 256 MB), so even small Hetzner Cloud servers can run it comfortably. On a small Hetzner Cloud server, the whole deployment usually takes only a few minutes.
Prerequisites
- A Hetzner Cloud account
- A server running Ubuntu 24.04
- SSH access to the server
- (Optional) A graphical server management tool such as Server Compass, which offers a free tier supporting a single server and application
Overview
In this tutorial, you will:
- Create a Hetzner Cloud server running Ubuntu 24.04
- Configure SSH access to the server
- Install Docker on the server
- Deploy NocoDB using Docker Compose
- Verify the deployment and access the NocoDB web interface
Step 1 - Generate an SSH Key
An SSH key lets your computer connect securely to a remote server without a password. You can generate one using the following command:
ssh-keygen -t ed25519 -C "nocodb-server"
This saves a key pair to ~/.ssh/. To view your public key, run:
cat ~/.ssh/id_ed25519.pub
Copy the output and paste it into the SSH key field in the Hetzner Cloud Console in the next step.
If you prefer a graphical approach, tools such as Server Compass include a built-in key generator.
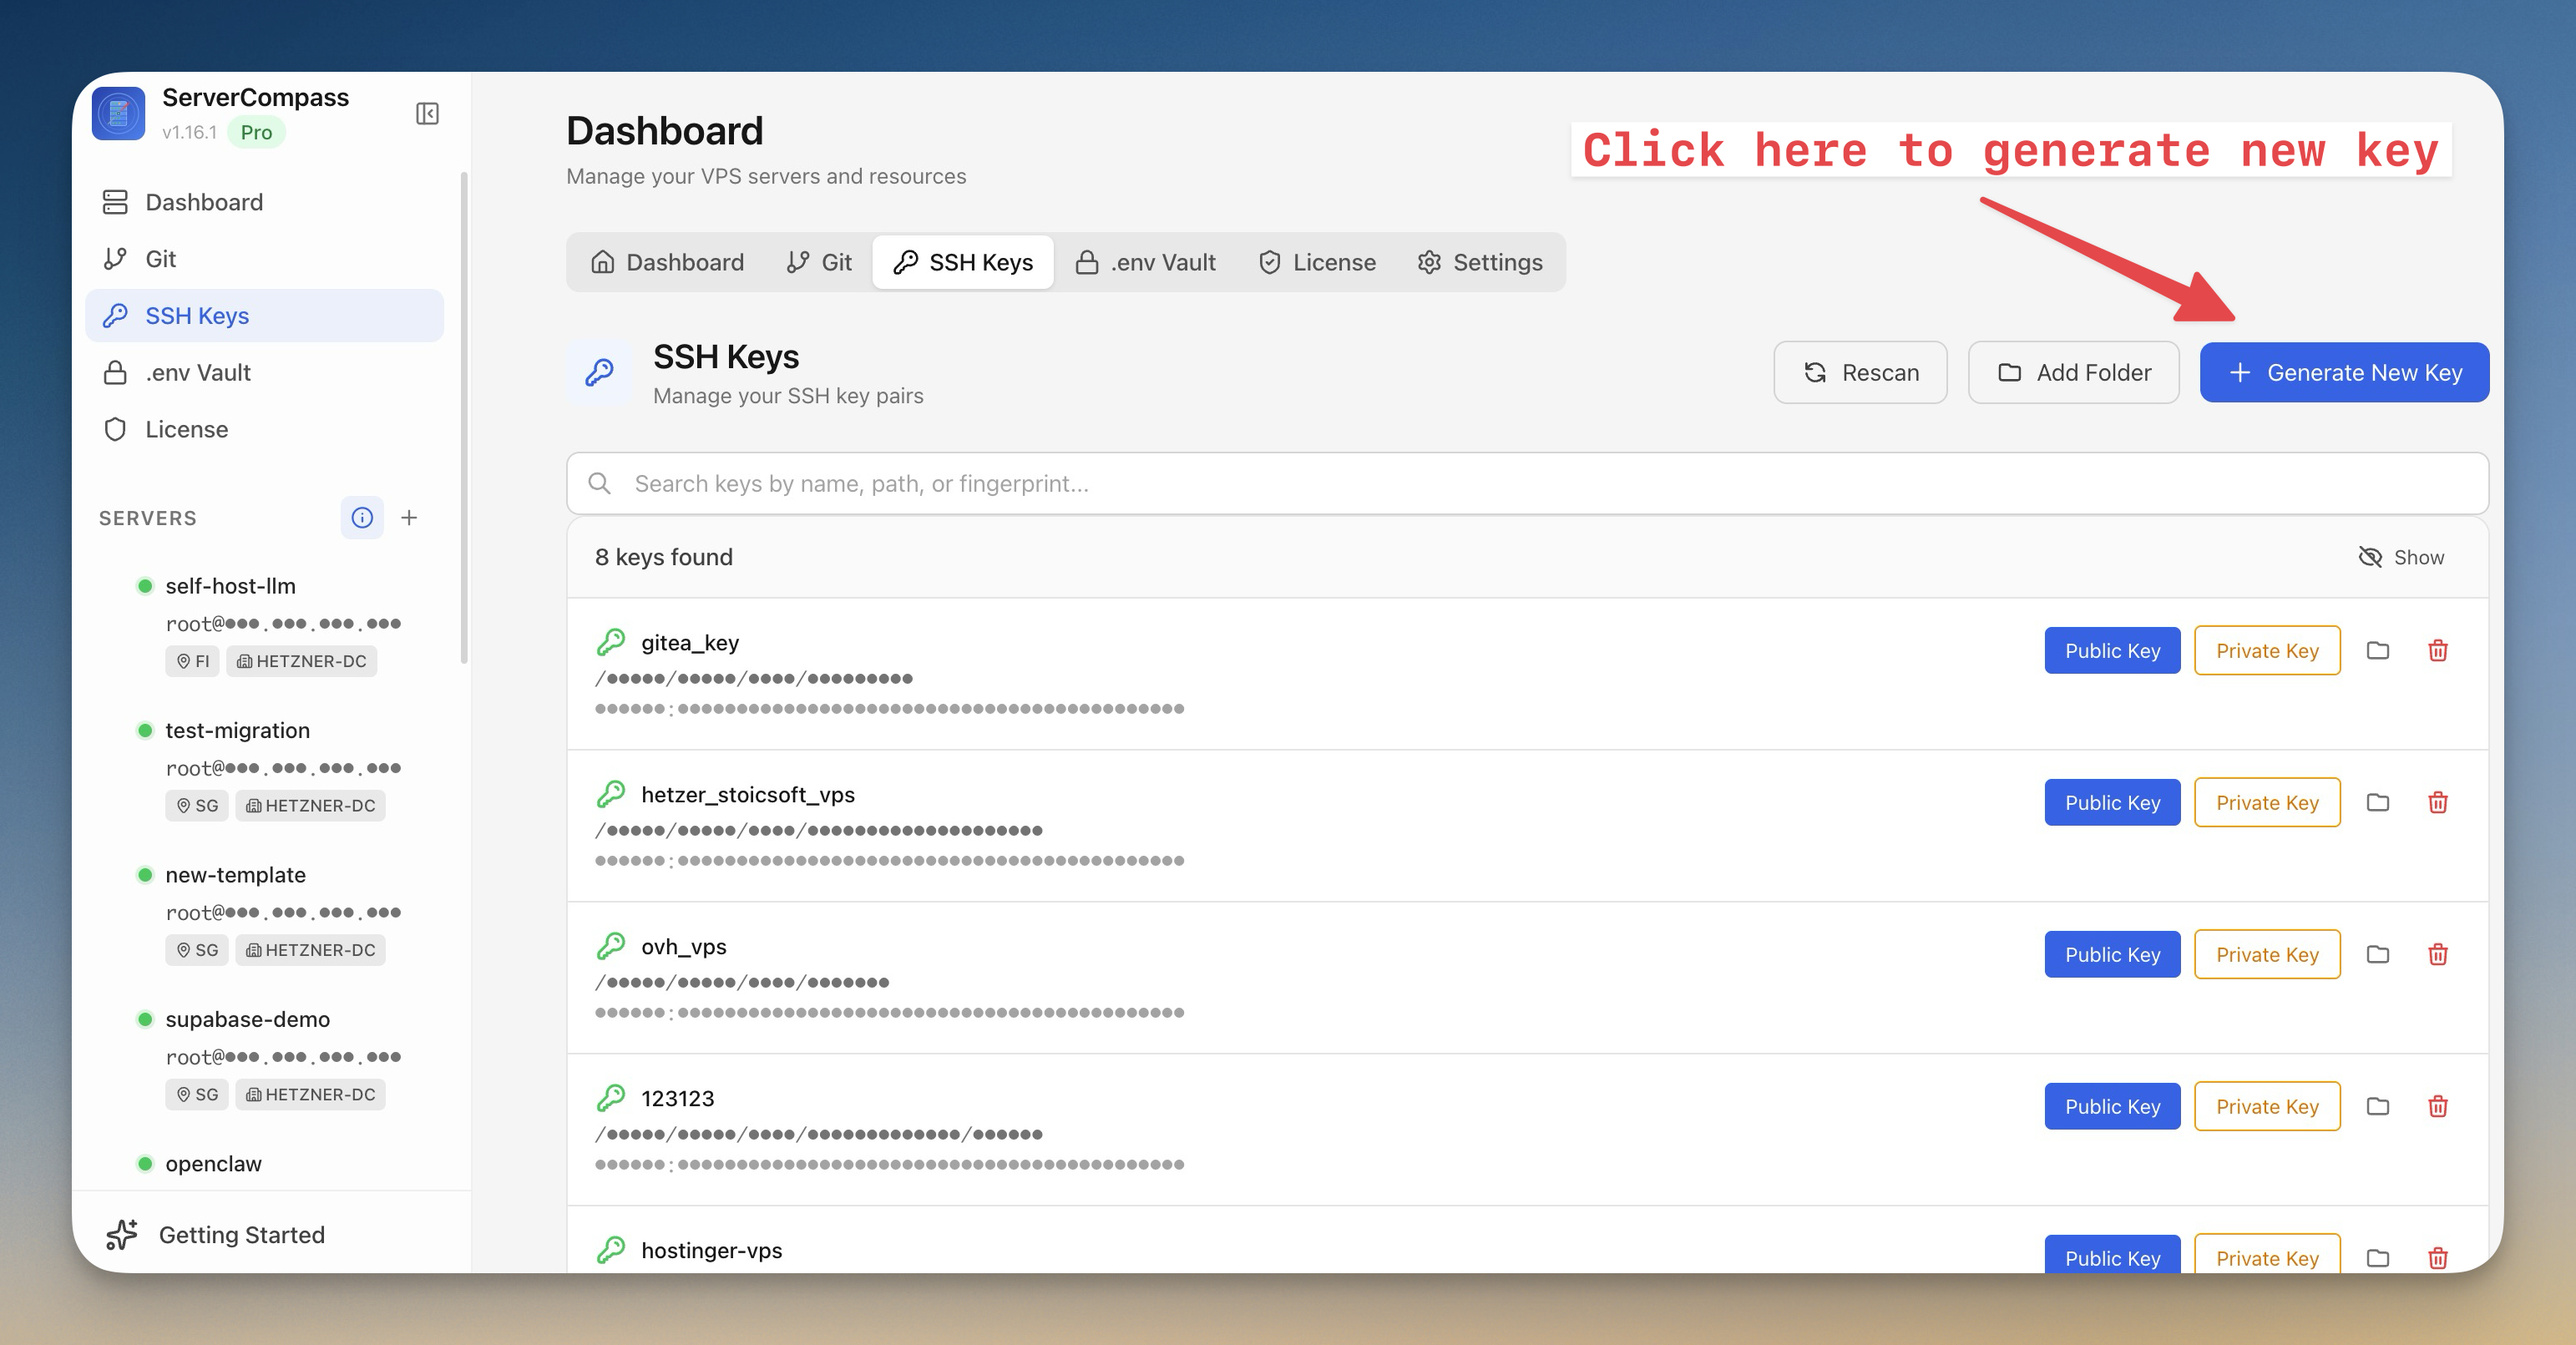
Using Server Compass (Optional)
- Open Server Compass
- Click SSH Keys in the left sidebar
- Click + Generate New Key in the top right
- Enter a name for your key (for example:
my-demo-vps) - Click Generate Key Pair
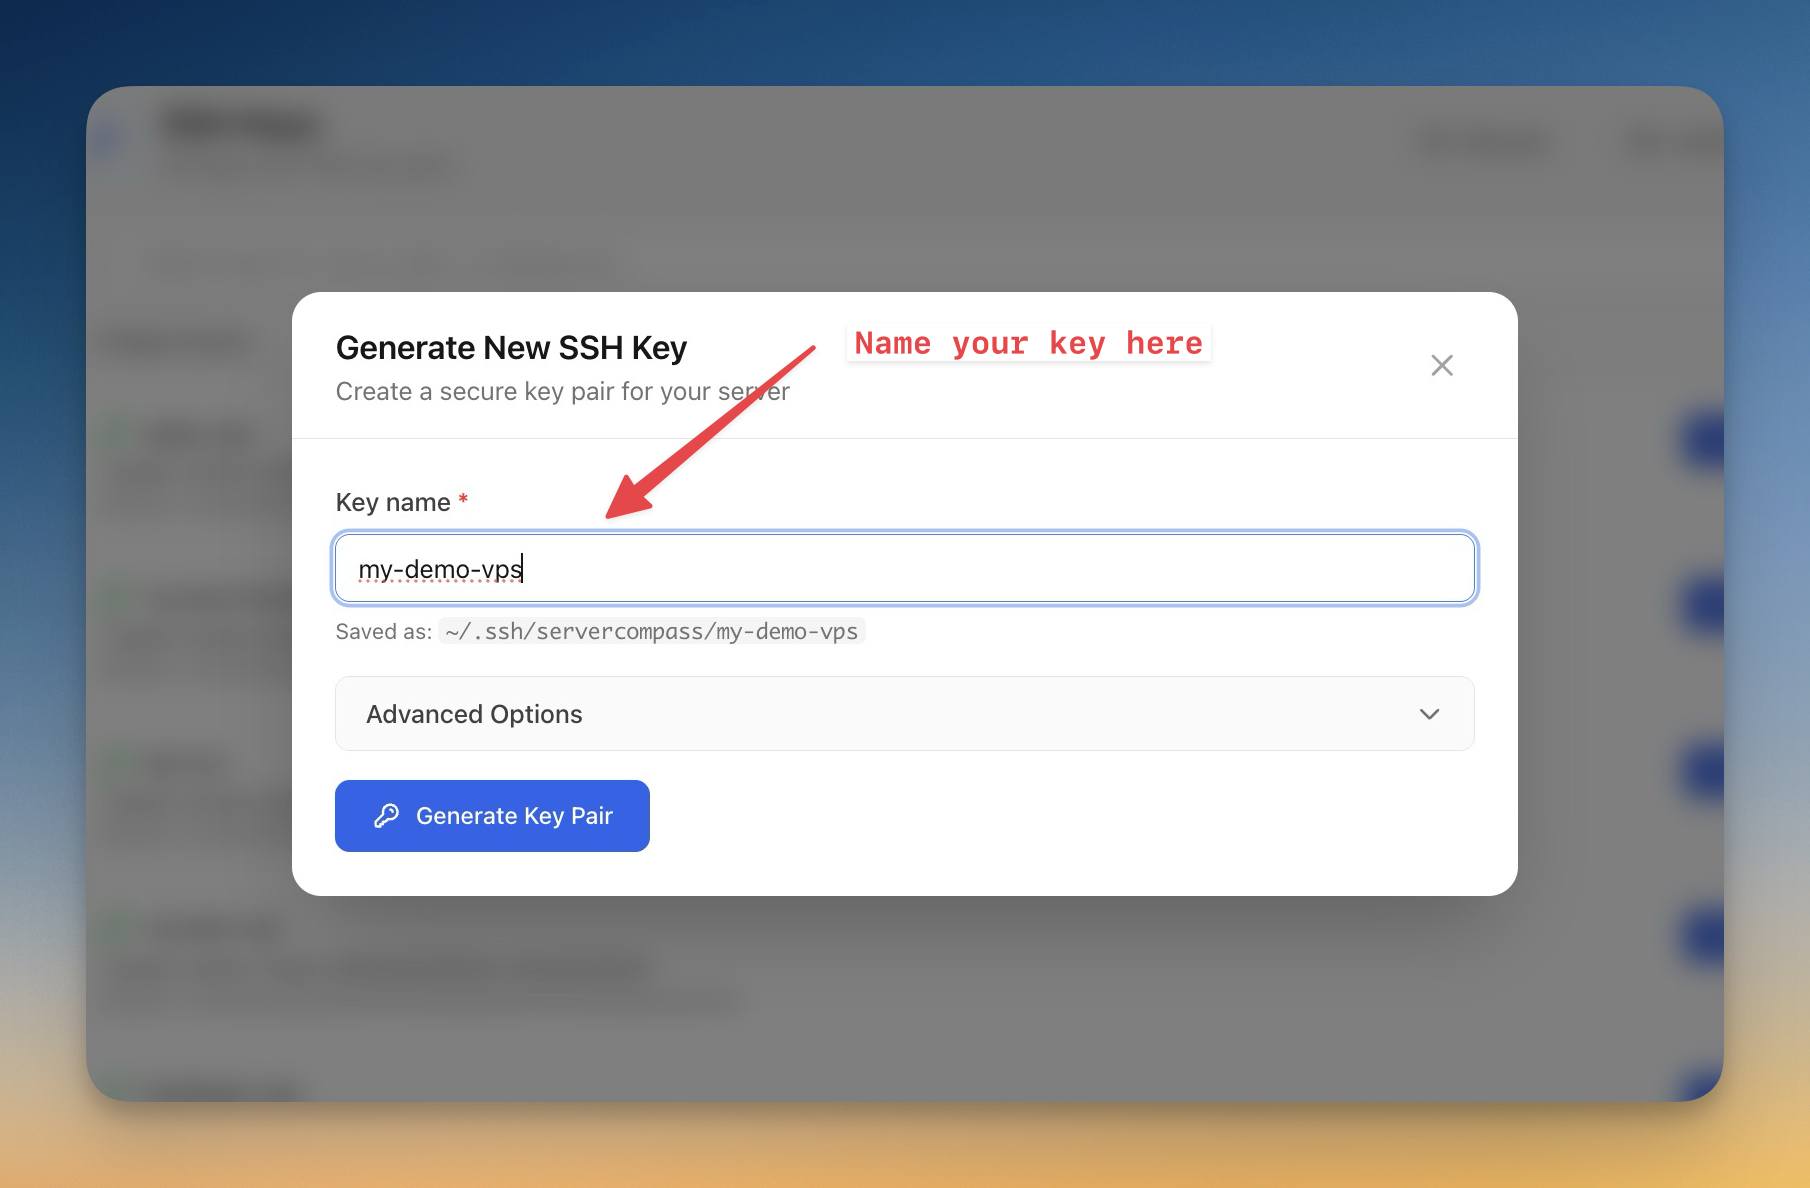
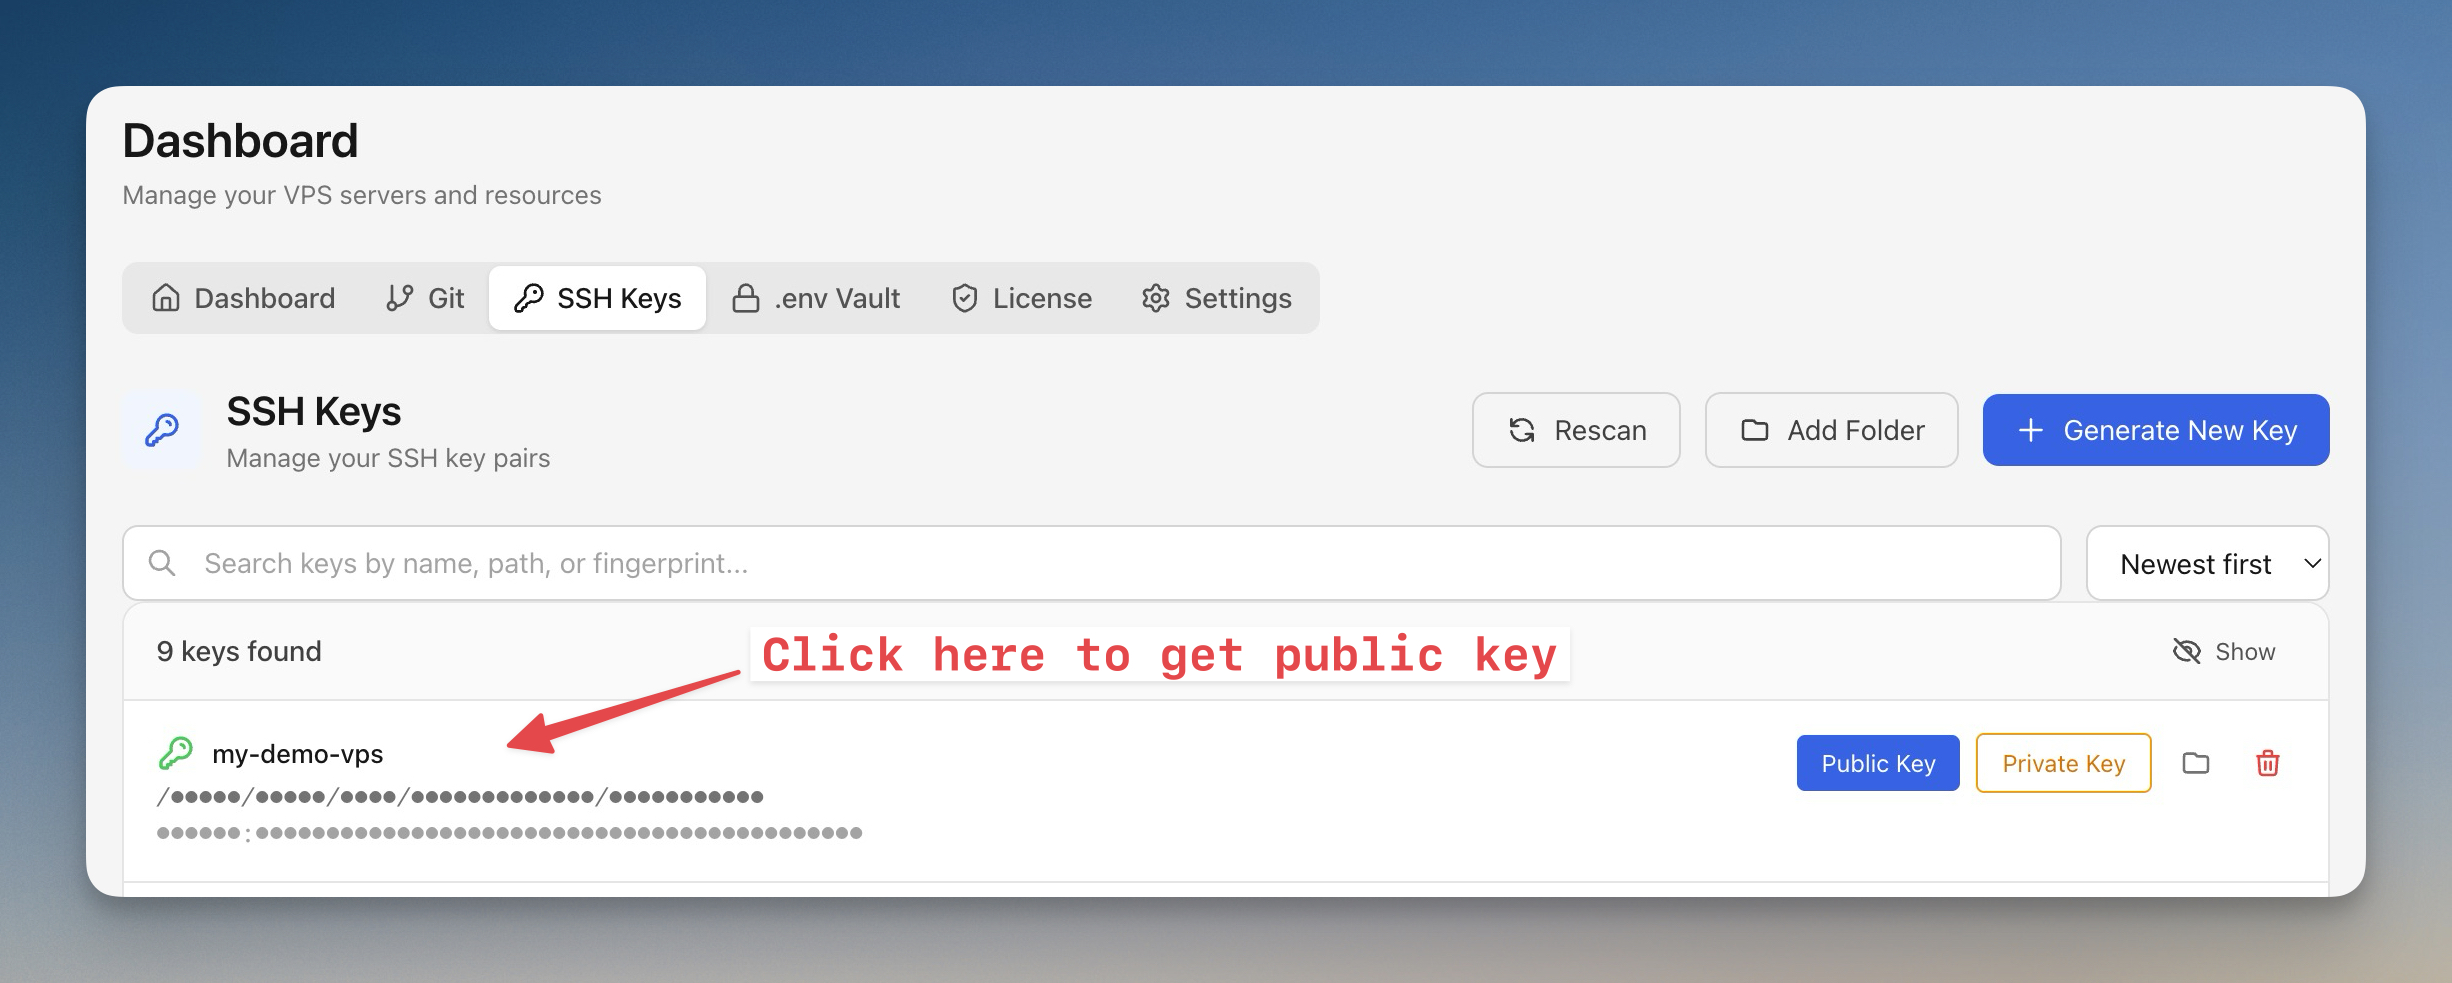
Server Compass generates a key pair and saves it on your computer.
- Find your new key in the list and click Public Key to copy it to your clipboard
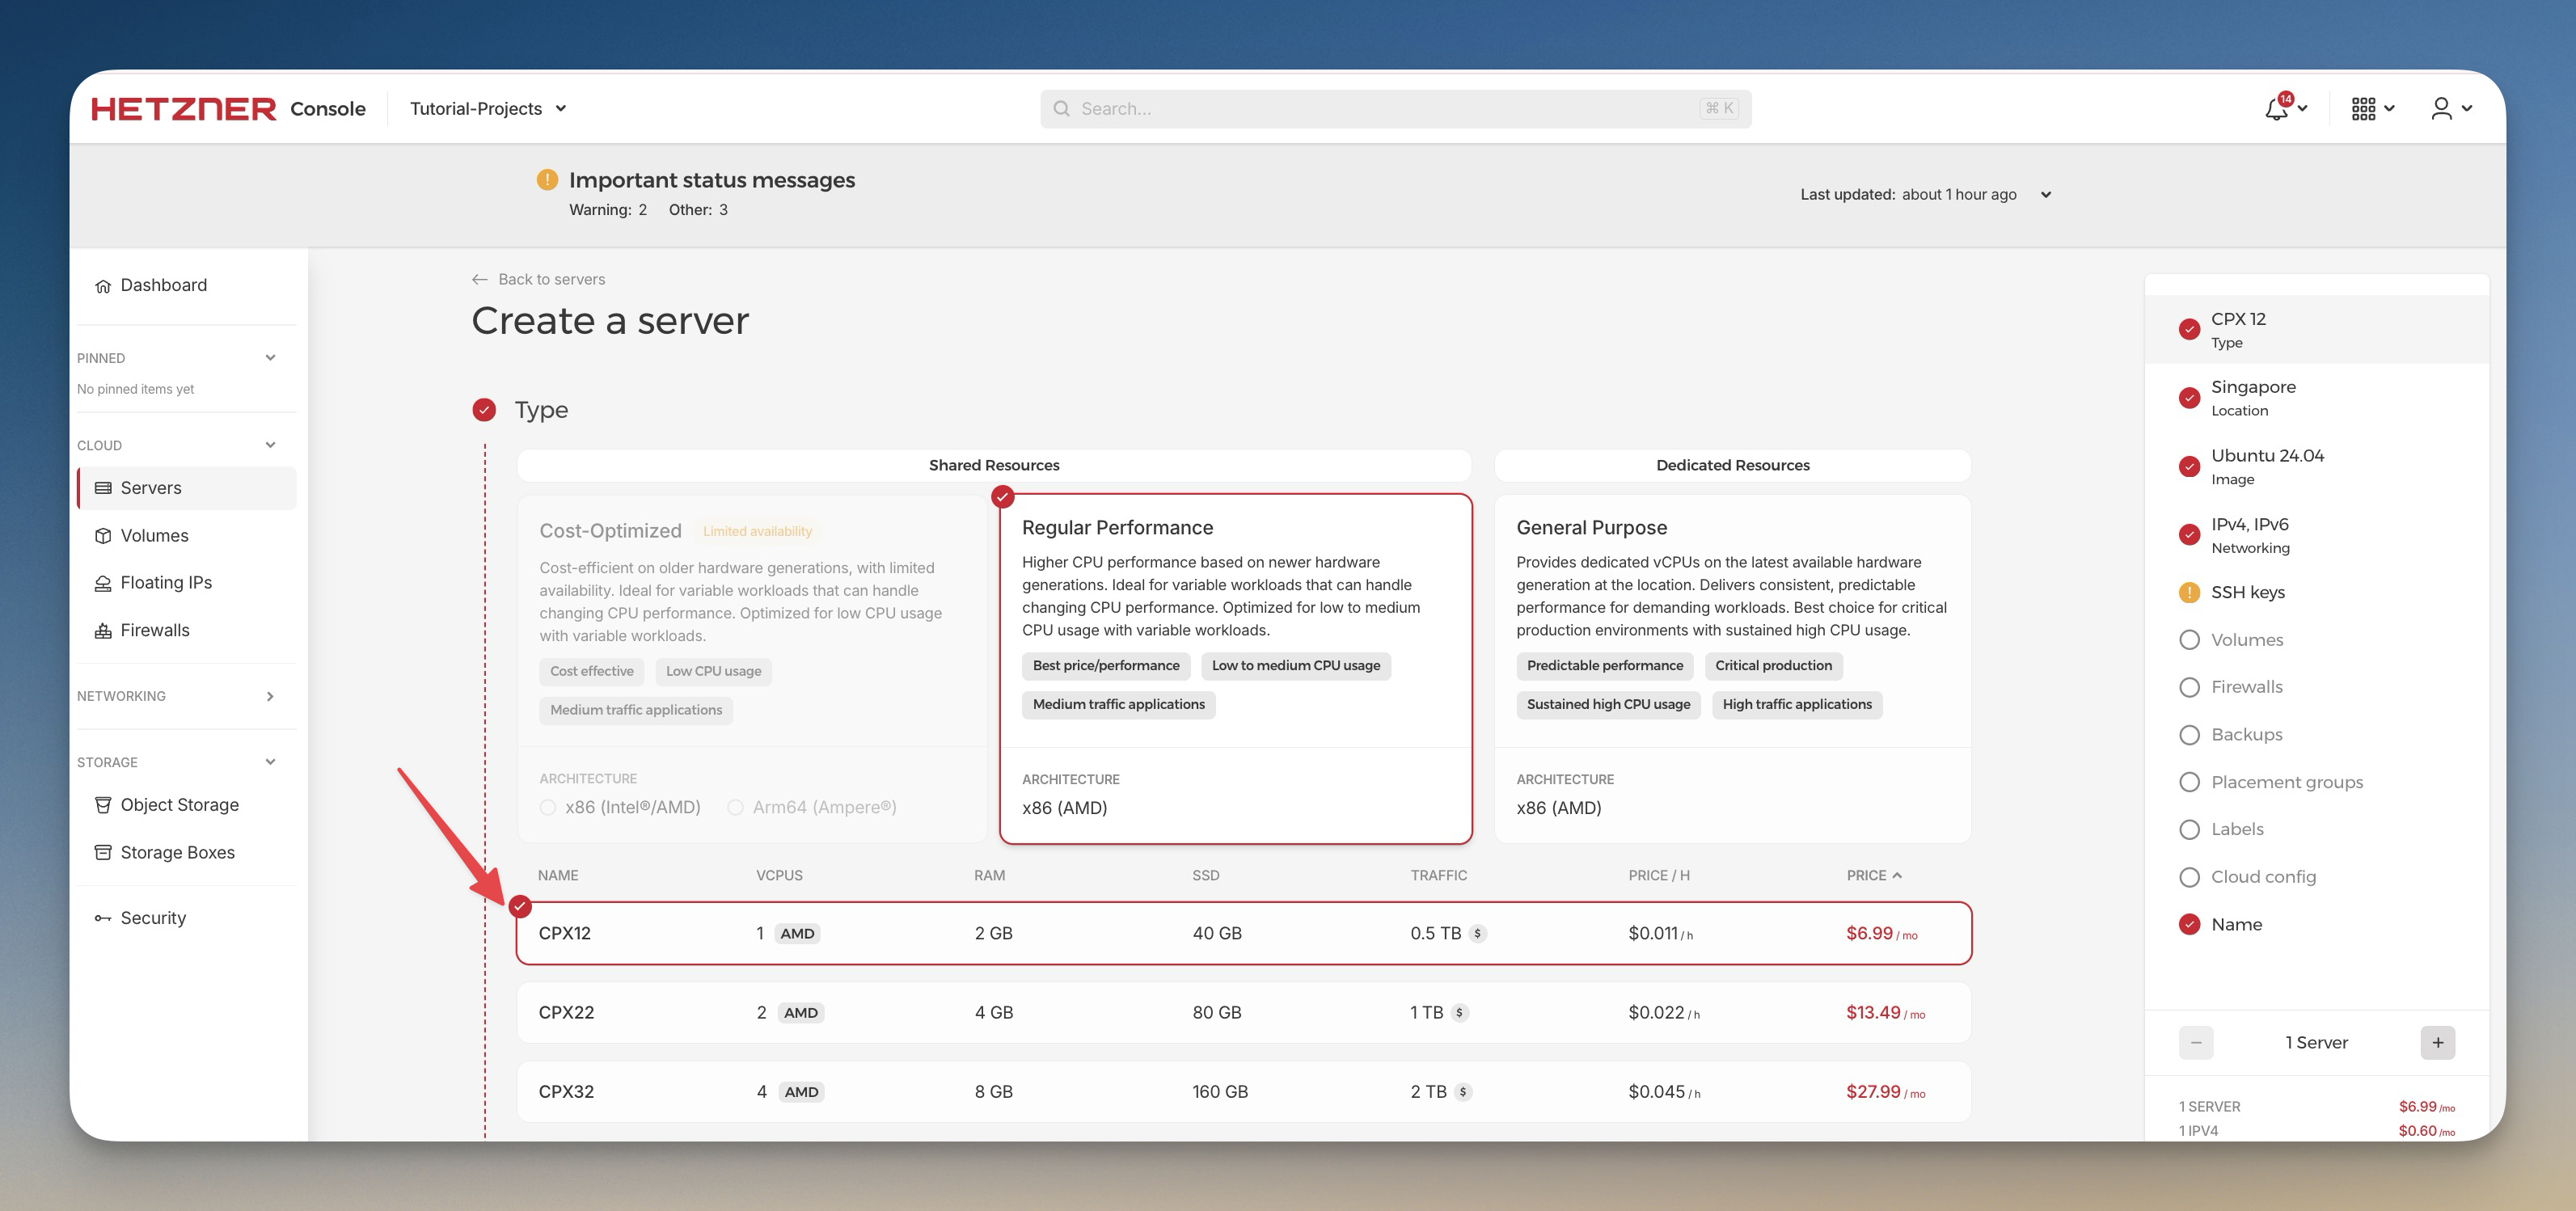
Step 2 - Create a Hetzner Cloud Server
Log into the Hetzner Cloud Console and create a server that will run NocoDB.
- Select your project (or create a new one by clicking + New Project)
- Click Add Server
- Choose a Location closest to your users
- Choose Ubuntu 24.04 as the image
- Choose the CPX12 server type (1 vCPU, 2 GB RAM) — the cheapest option works fine since NocoDB only needs 256 MB of RAM
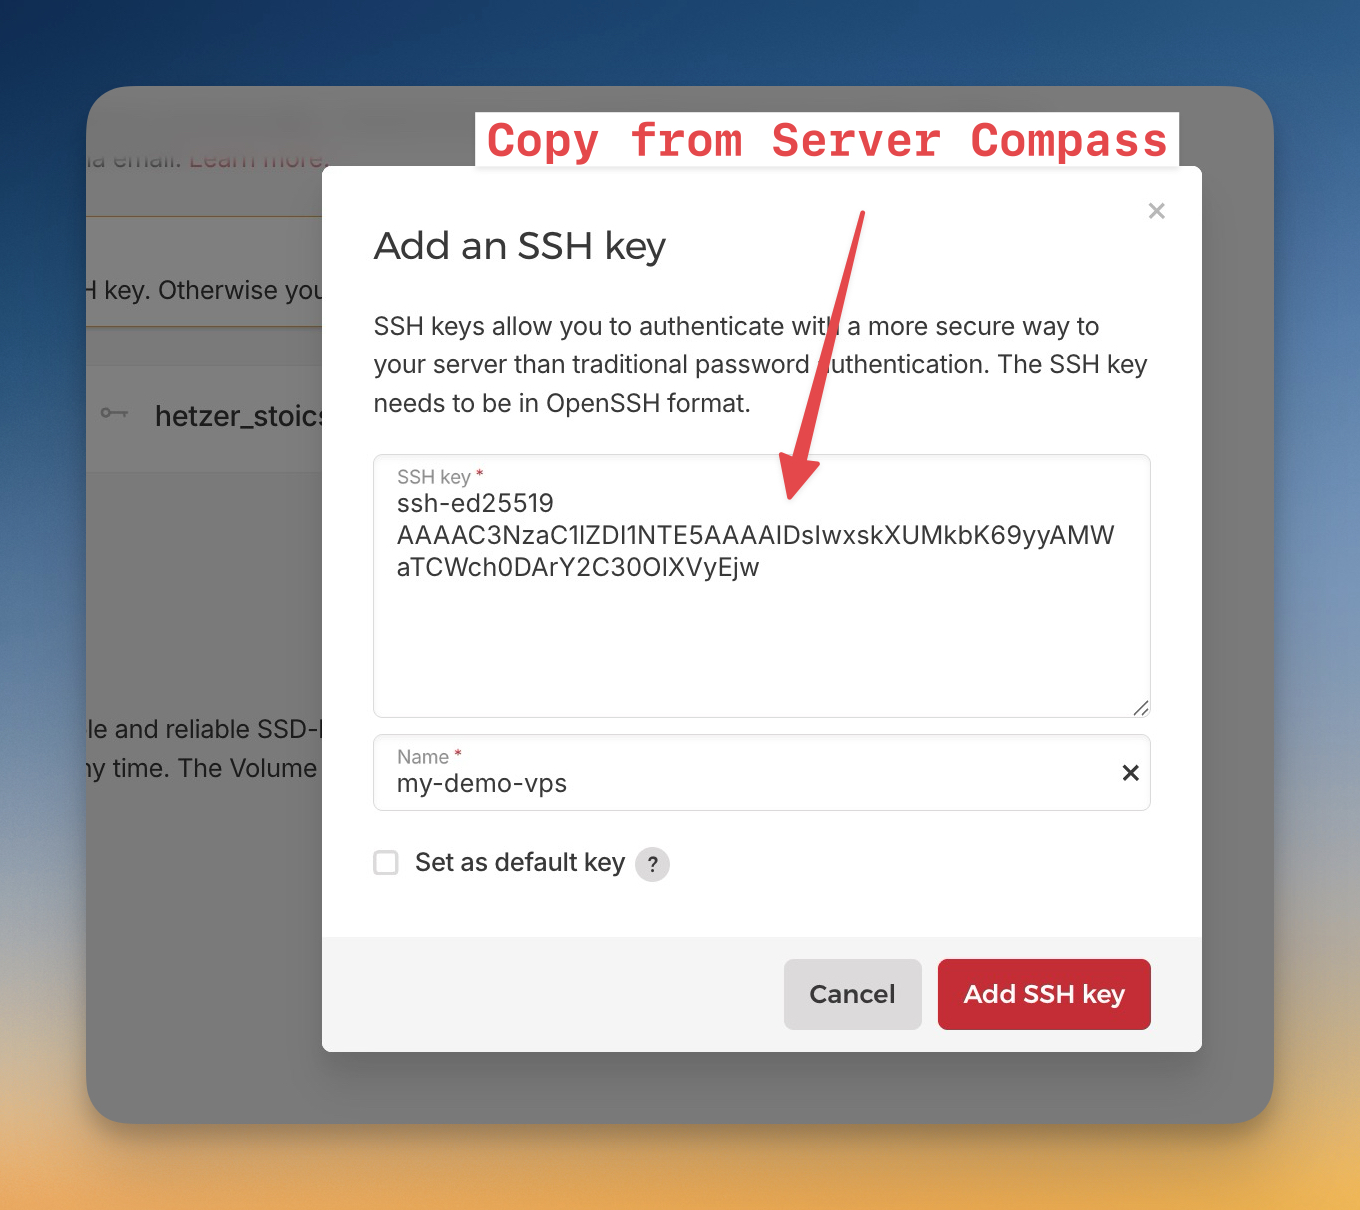
- In the SSH Keys section, click + Add SSH key

- Paste the public key you generated in Step 1
- Enter a name (for example:
my-demo-vps) - Click Add SSH key
- Set the server name to
my-demo-production - Click Create & Buy Now
Your server will be ready in about 30 seconds. Note the IPv4 address displayed — you will need it in the following steps.
Step 3 - Connect to Your Server
Using the terminal
Connect to your server using SSH:
ssh root@<YOUR_SERVER_IP>
Replace <YOUR_SERVER_IP> with the IPv4 address from Step 2.
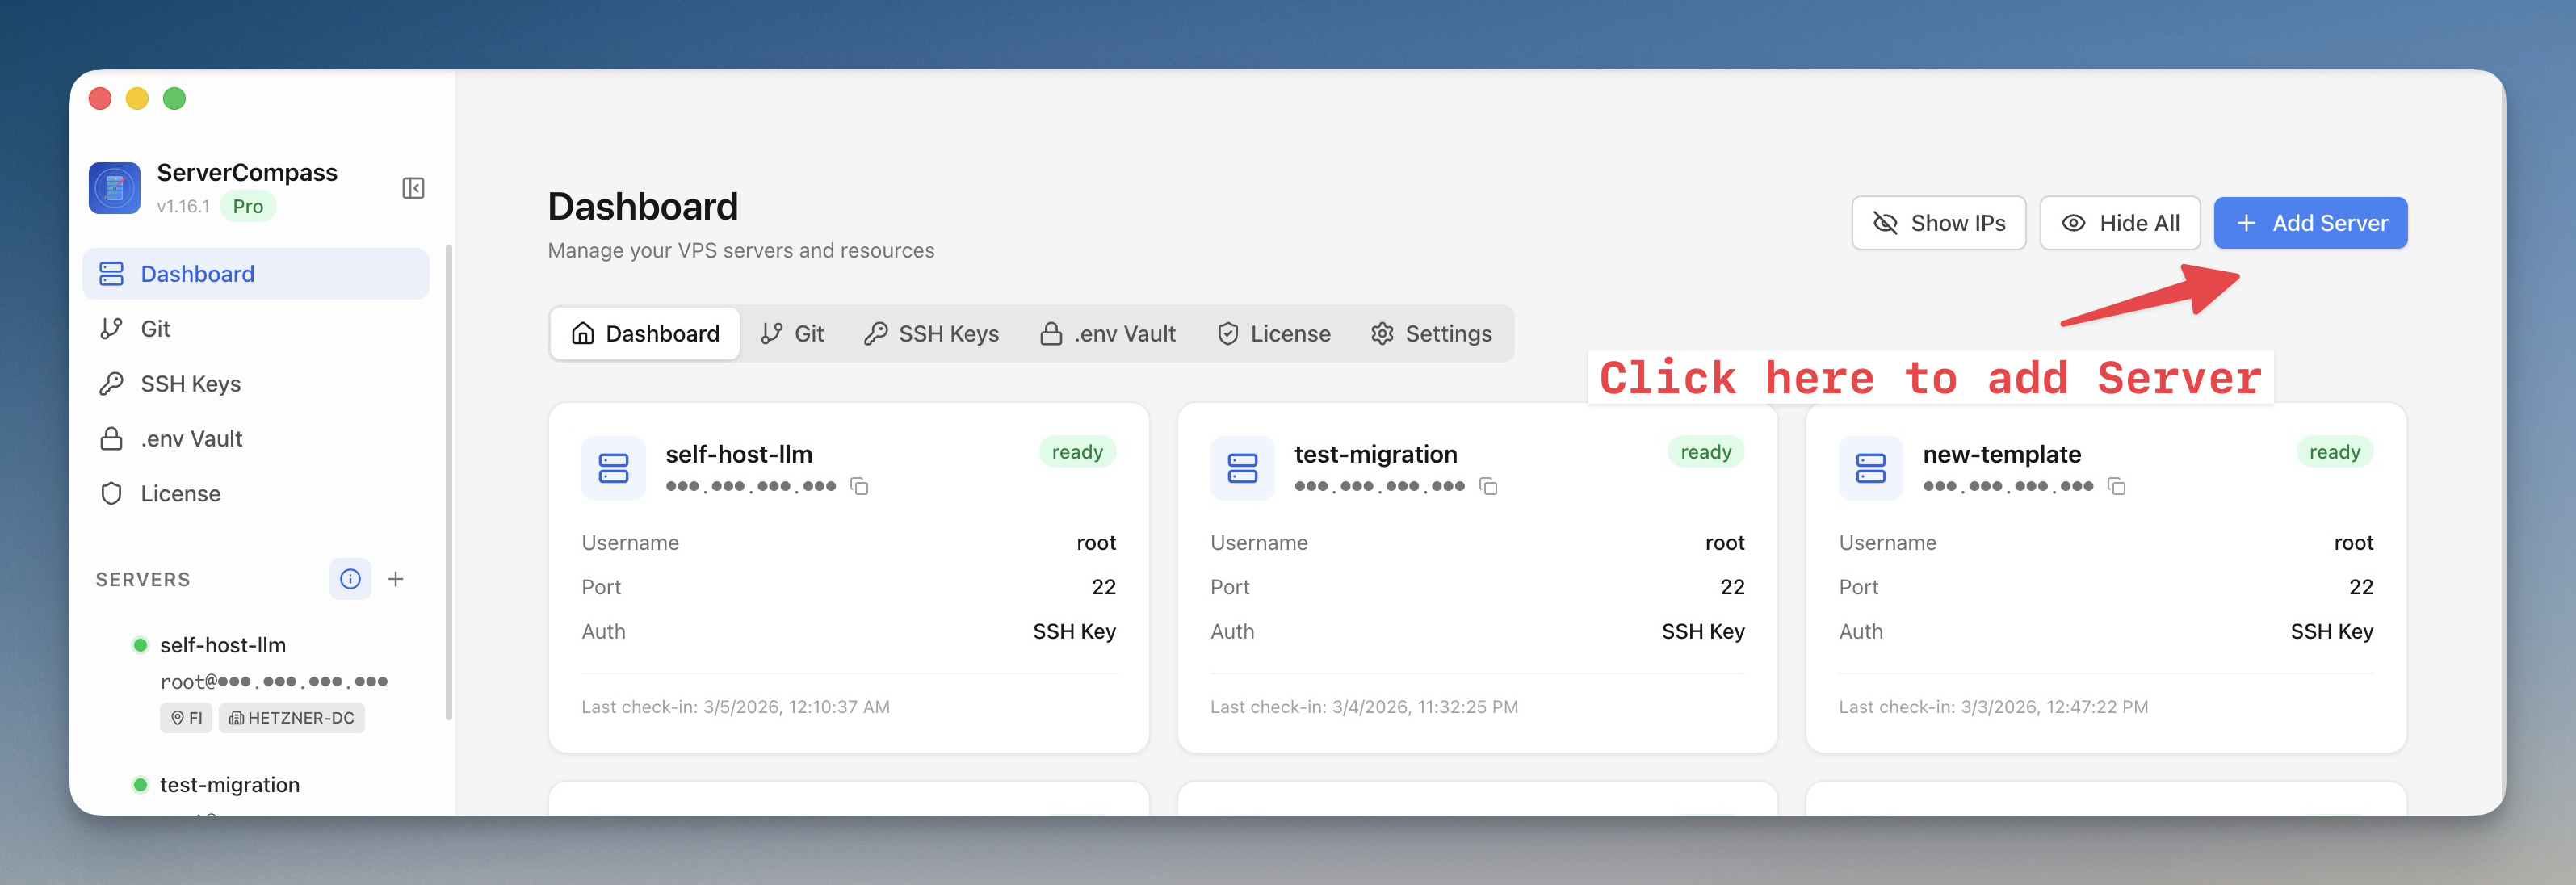
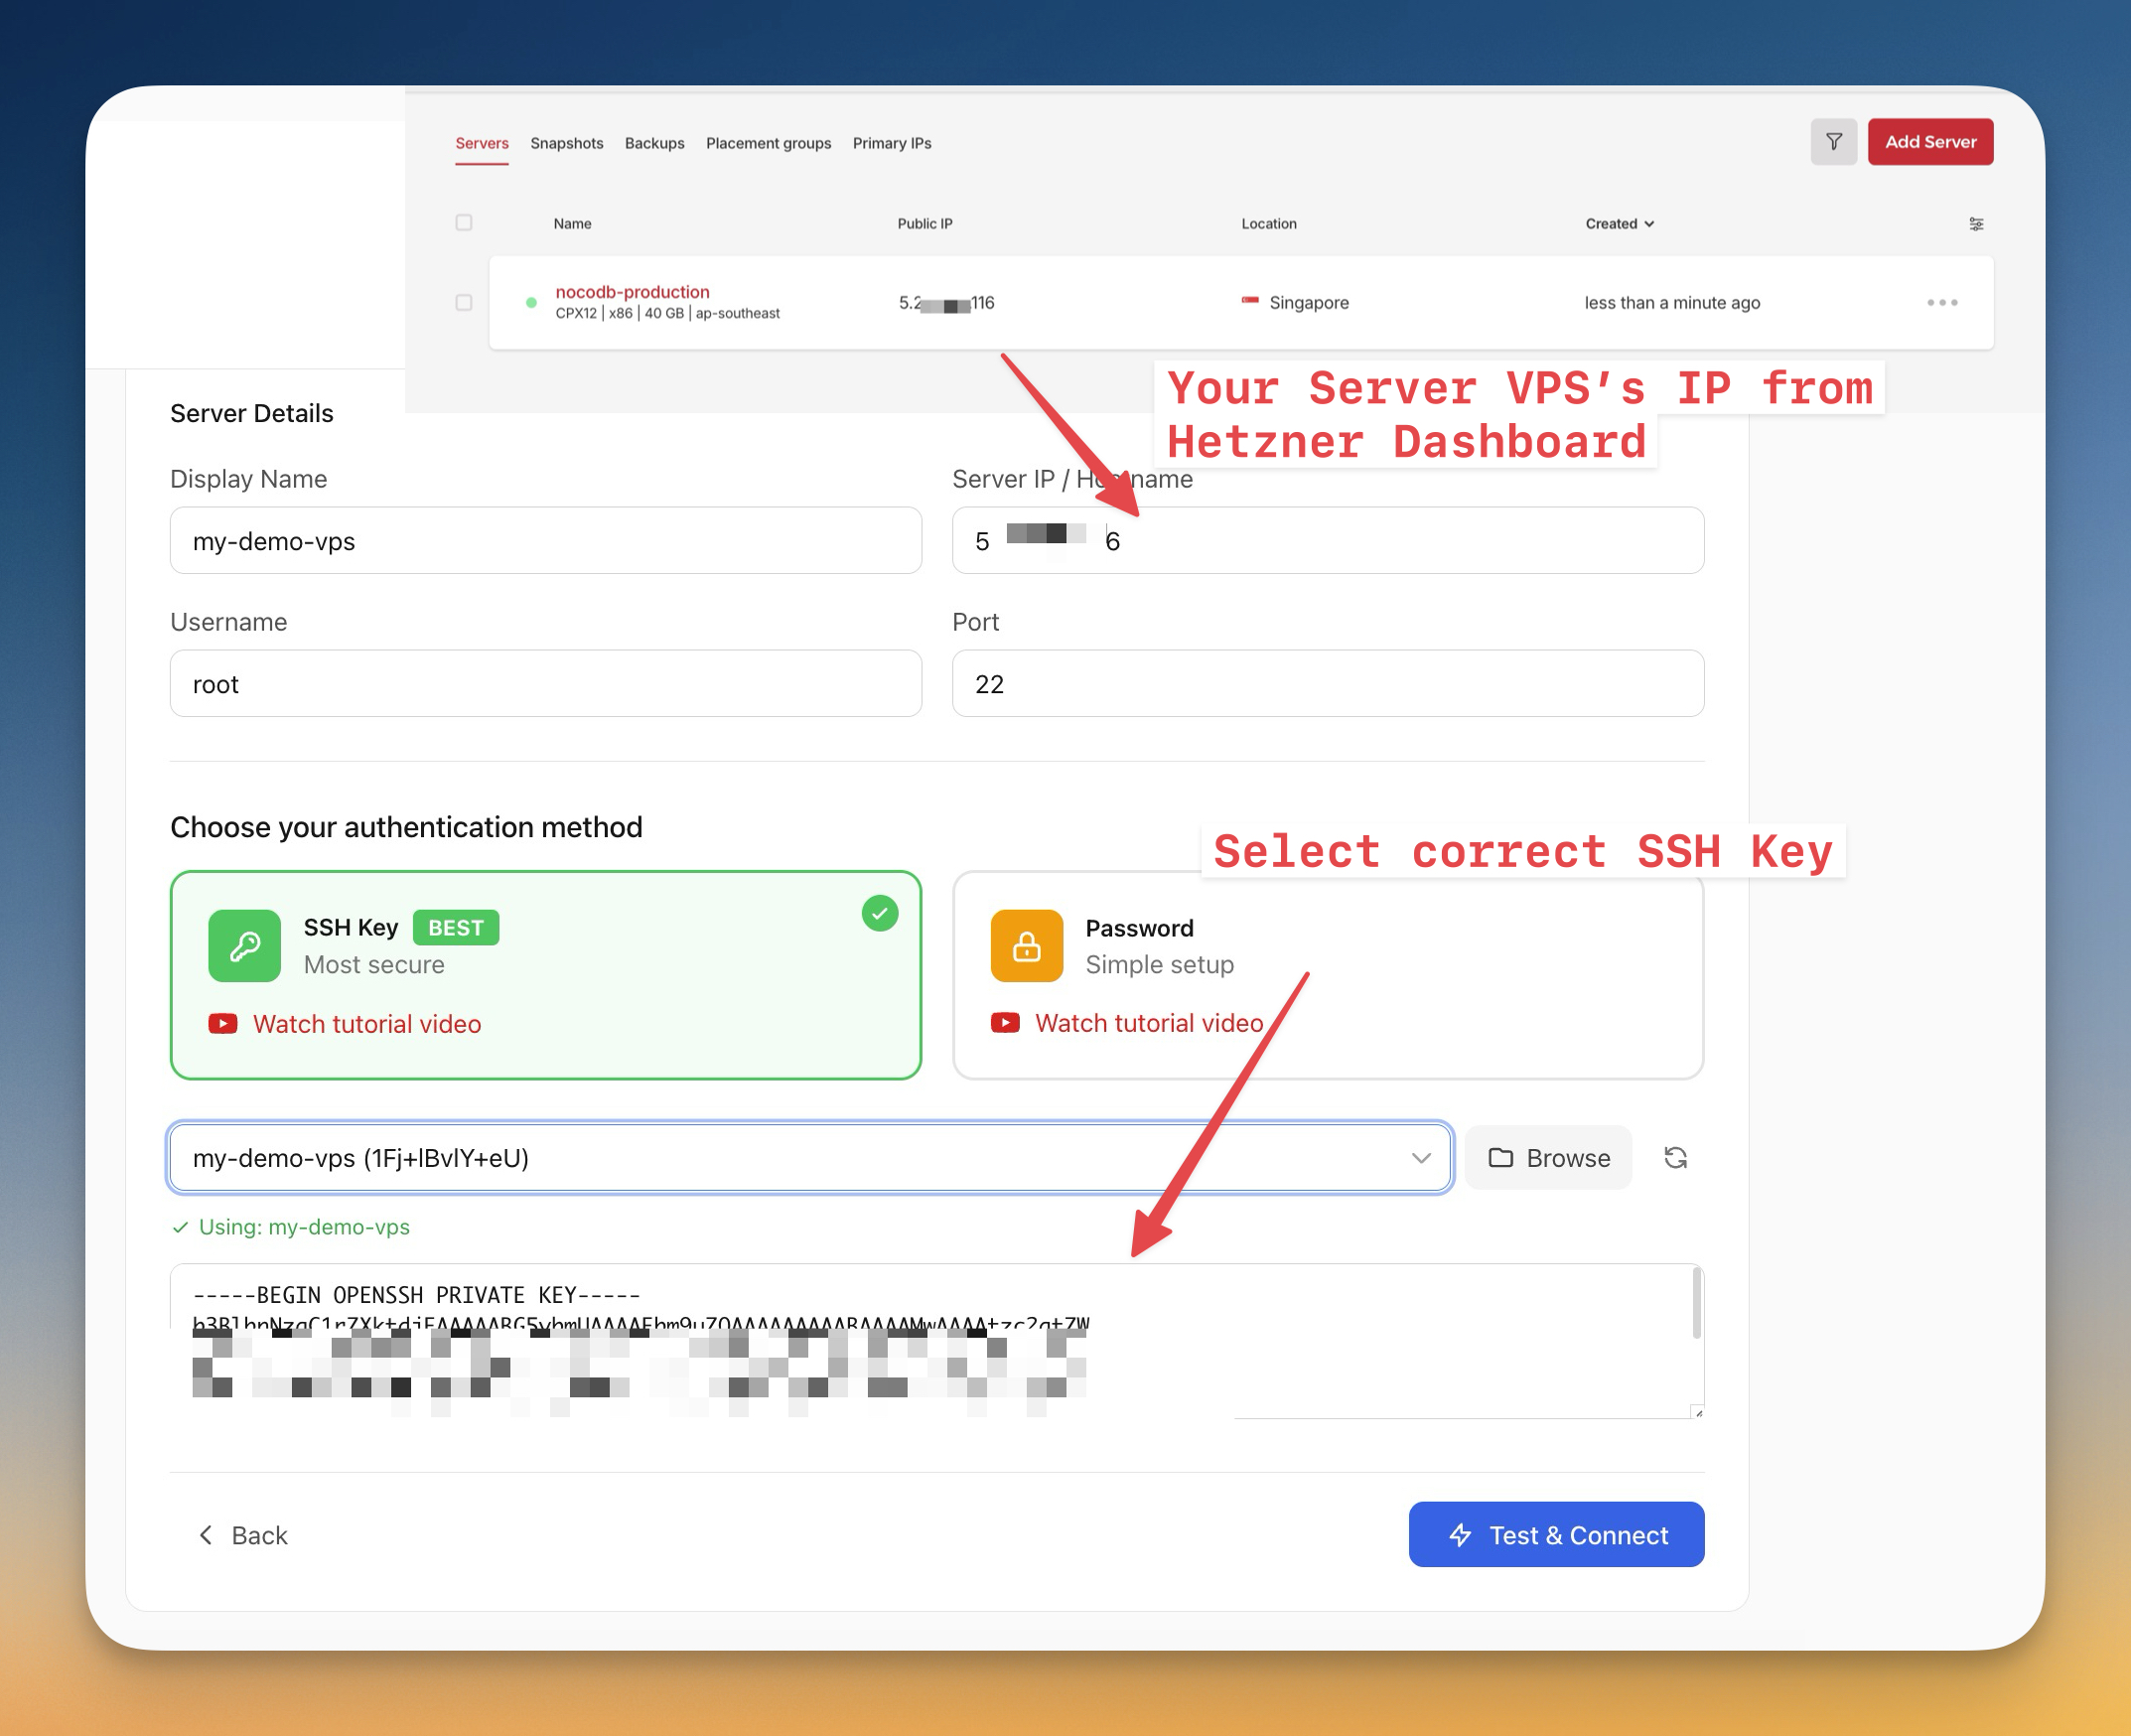
Using Server Compass (Optional)
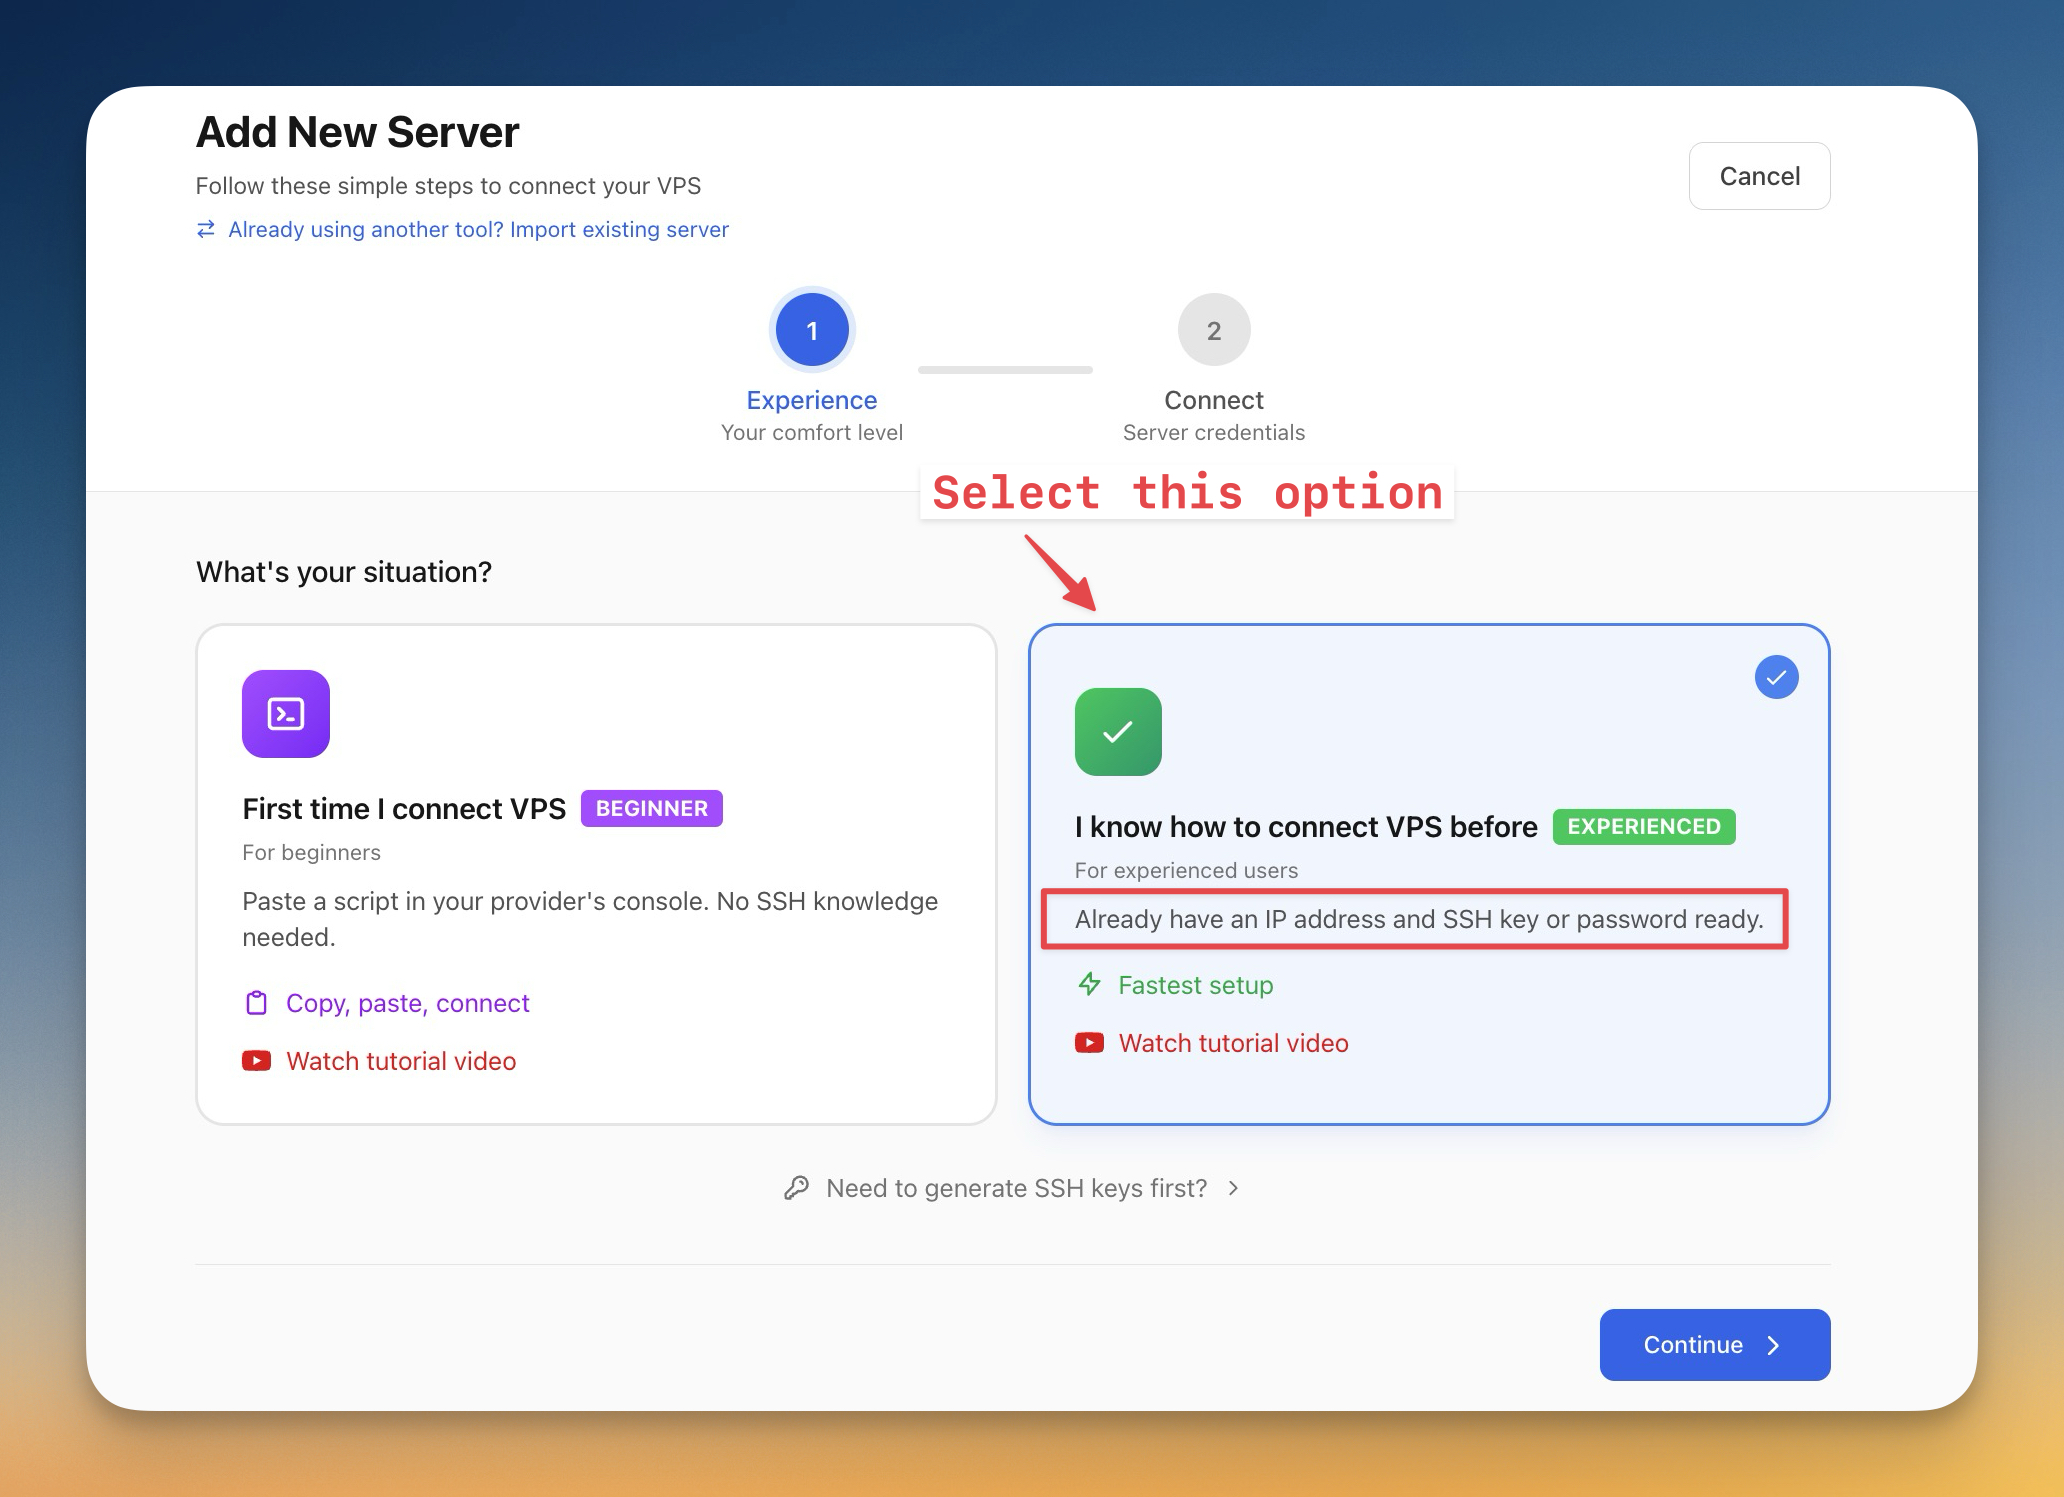
- In Server Compass, click Add Server
- In the next screen, select
I know how to connect VPS before
- Fill in the following details:
Field
Value
Display Name
my-demo-vps
Server IP / Hostname
Your server's IPv4 address from Step 2
Username
root
Port
22
- Under Choose your authentication method, select SSH Key
- Select the key you created in Step 1 from the dropdown
- Click Test & Connect
Step 4 - Install Docker
Install Docker and Docker Compose on the server.
Update and upgrade the package lists:
apt update && apt upgrade -y
Install Docker:
apt install docker.io docker-compose-plugin -y
Enable Docker to start automatically on boot:
systemctl enable docker
systemctl start docker
Verify the installation:
docker --version
You should see output similar to Docker version 24.x.x.
Step 5 - Deploy NocoDB with Docker
Configure a Firewall
Enable a firewall to restrict open ports:
ufw allow OpenSSH
ufw allow 8080
ufw enable
This allows SSH access and the NocoDB web interface while blocking other incoming connections.
Deploy Using Docker Compose
Create a directory for NocoDB and navigate into it:
mkdir -p ~/apps/nocodb && cd ~/apps/nocodb
Create a docker-compose.yml file:
nano docker-compose.yml
Paste the following configuration:
Note: The passwords shown below are for demonstration purposes only. For production environments, replace them with secure randomly generated values before deploying.
services:
  nocodb:
    image: nocodb/nocodb:latest
    ports:
      - "8080:8080"
    environment:
      - NC_DB=pg://db:5432?u=nocodb&p=CHANGE_THIS_PASSWORD&d=nocodb
      - NC_AUTH_JWT_SECRET=CHANGE_THIS_SECRET
      - NC_PUBLIC_URL=http://<YOUR_SERVER_IP>:8080
      - NC_DISABLE_TELE=false
    volumes:
      - nocodb_data:/usr/app/data
    restart: unless-stopped
    depends_on:
      db:
        condition: service_healthy

  db:
    image: postgres:16-alpine
    environment:
      - POSTGRES_DB=nocodb
      - POSTGRES_USER=nocodb
      - POSTGRES_PASSWORD=CHANGE_THIS_PASSWORD
    volumes:
      - db_data:/var/lib/postgresql/data
    restart: unless-stopped
    healthcheck:
      test: ["CMD-SHELL", "pg_isready -U nocodb -d nocodb"]
      interval: 10s
      timeout: 5s
      retries: 5
      start_period: 30s

volumes:
  nocodb_data:
  db_data:
Replace <YOUR_SERVER_IP> with your actual server IPv4 address, and both instances of CHANGE_THIS_PASSWORD and CHANGE_THIS_SECRET with secure values.
Save the file (Ctrl+O, then Enter, then Ctrl+X), then start the containers:
docker compose up -d
Docker will pull the NocoDB and PostgreSQL images and start both containers in the background.
Deploy Using Server Compass (Optional)
Server Compass can automate the same deployment using a preconfigured NocoDB template.
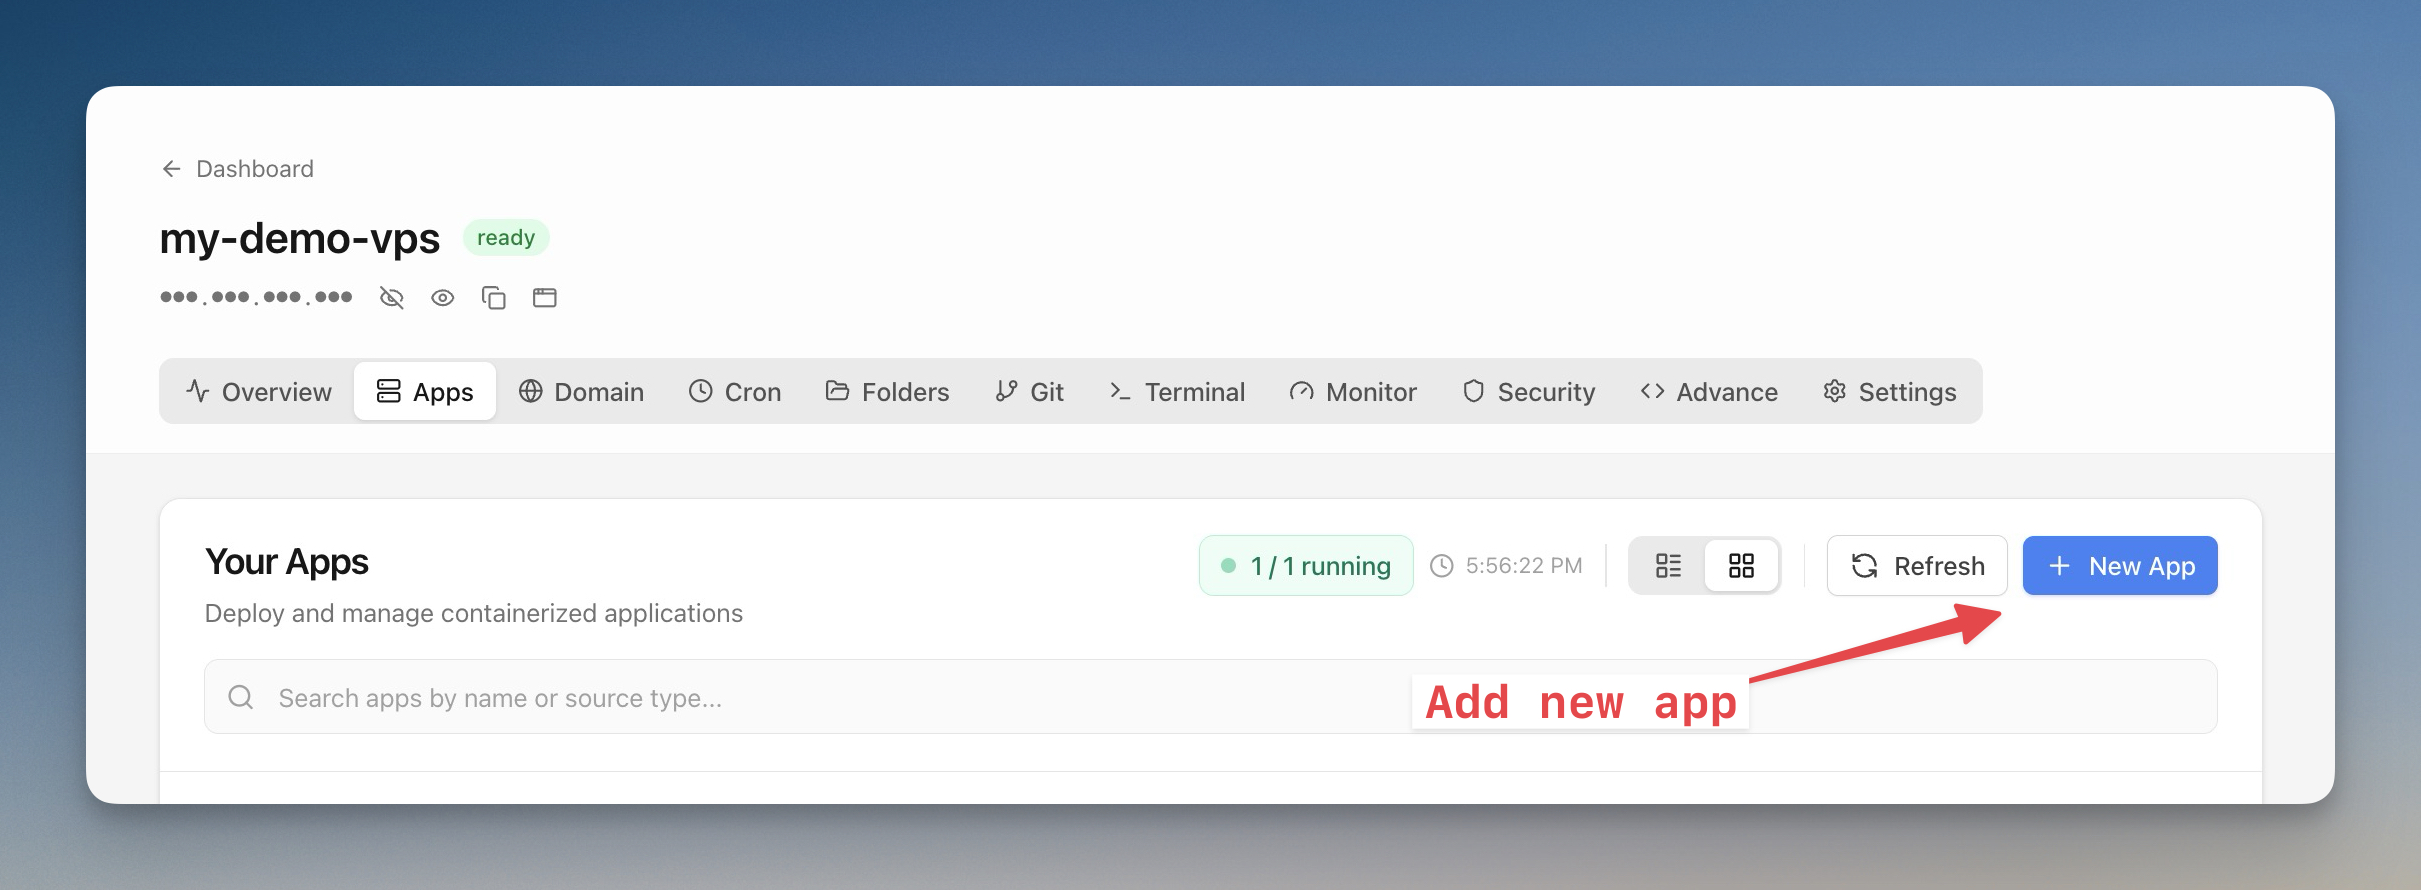
- Click on your server to open its detail page
- Click the Apps tab
- Click + New App in the top right
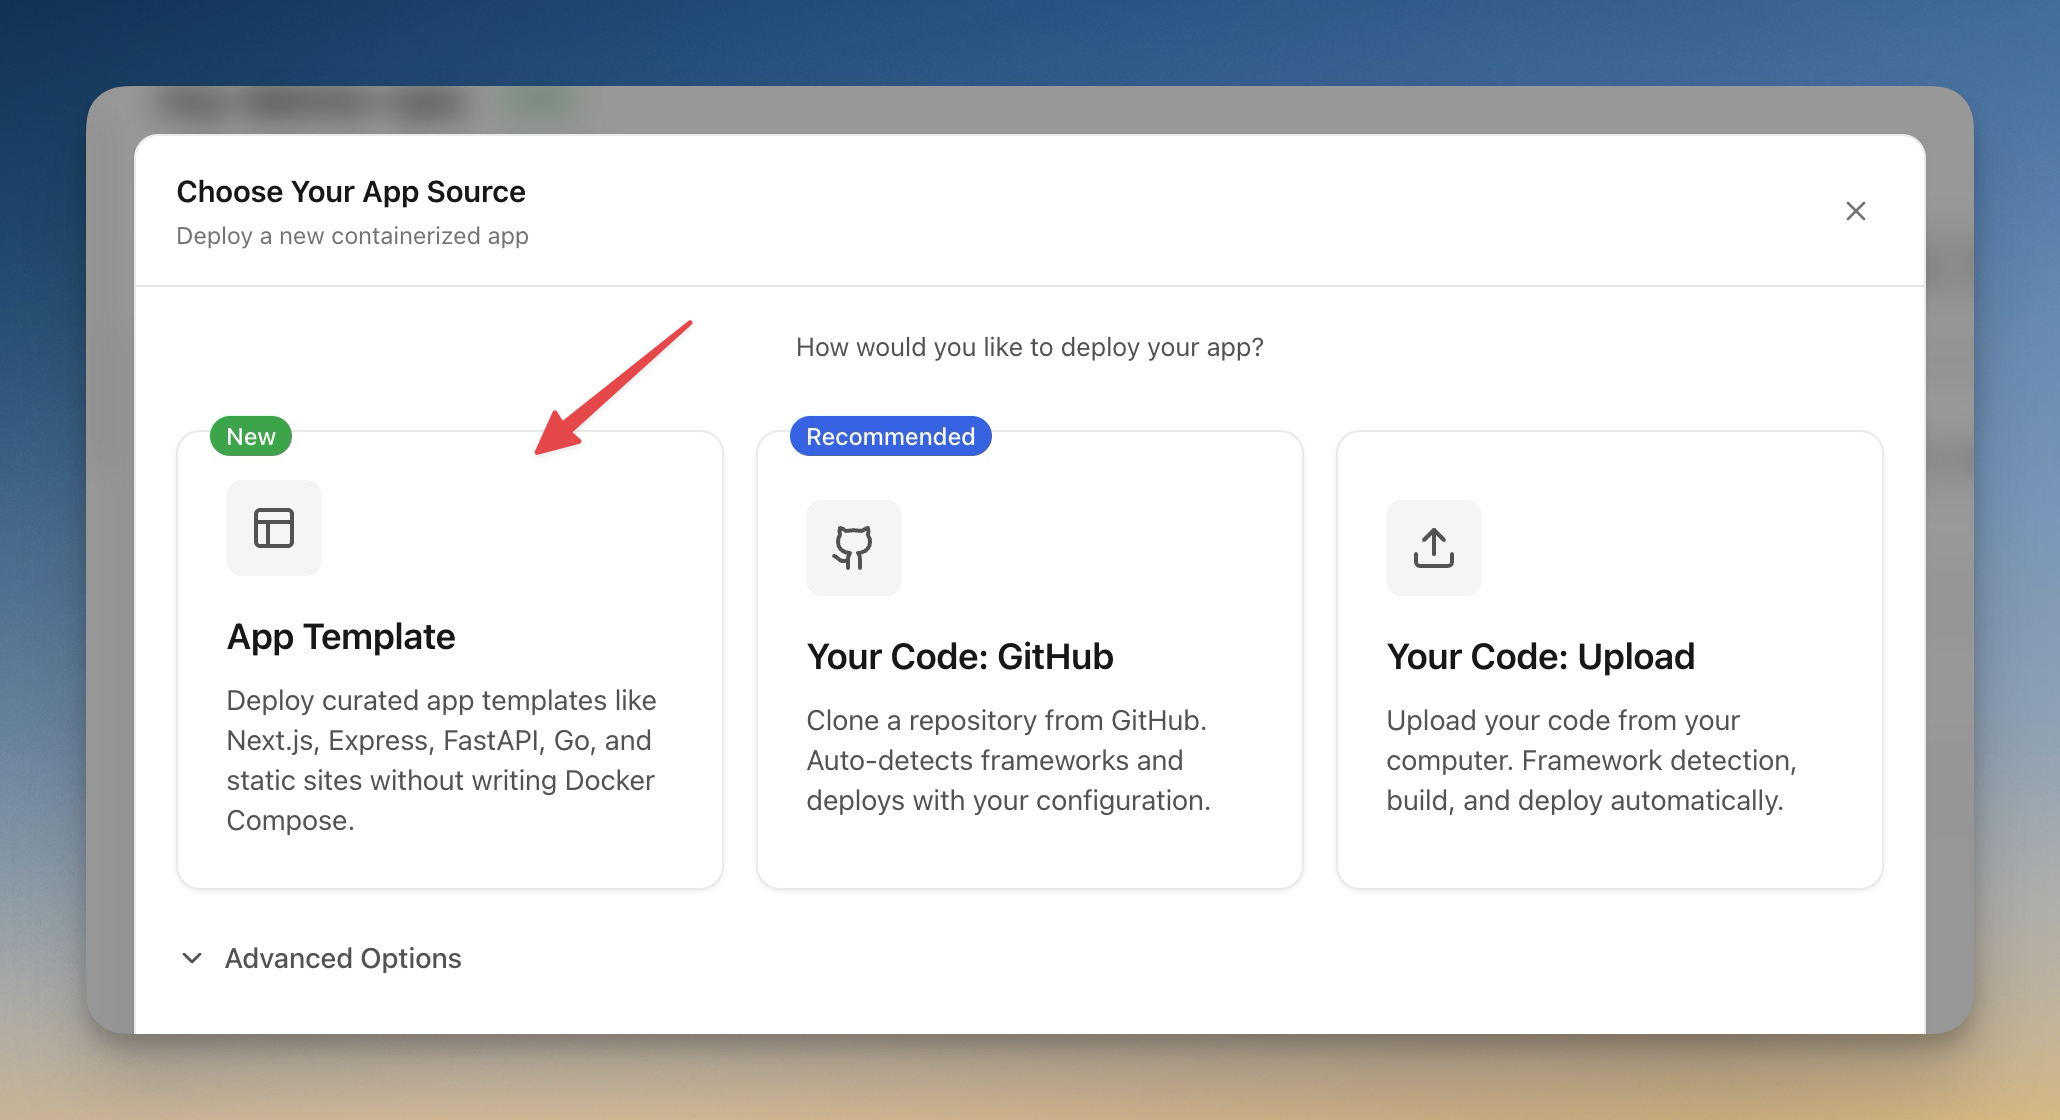
- Select App Template
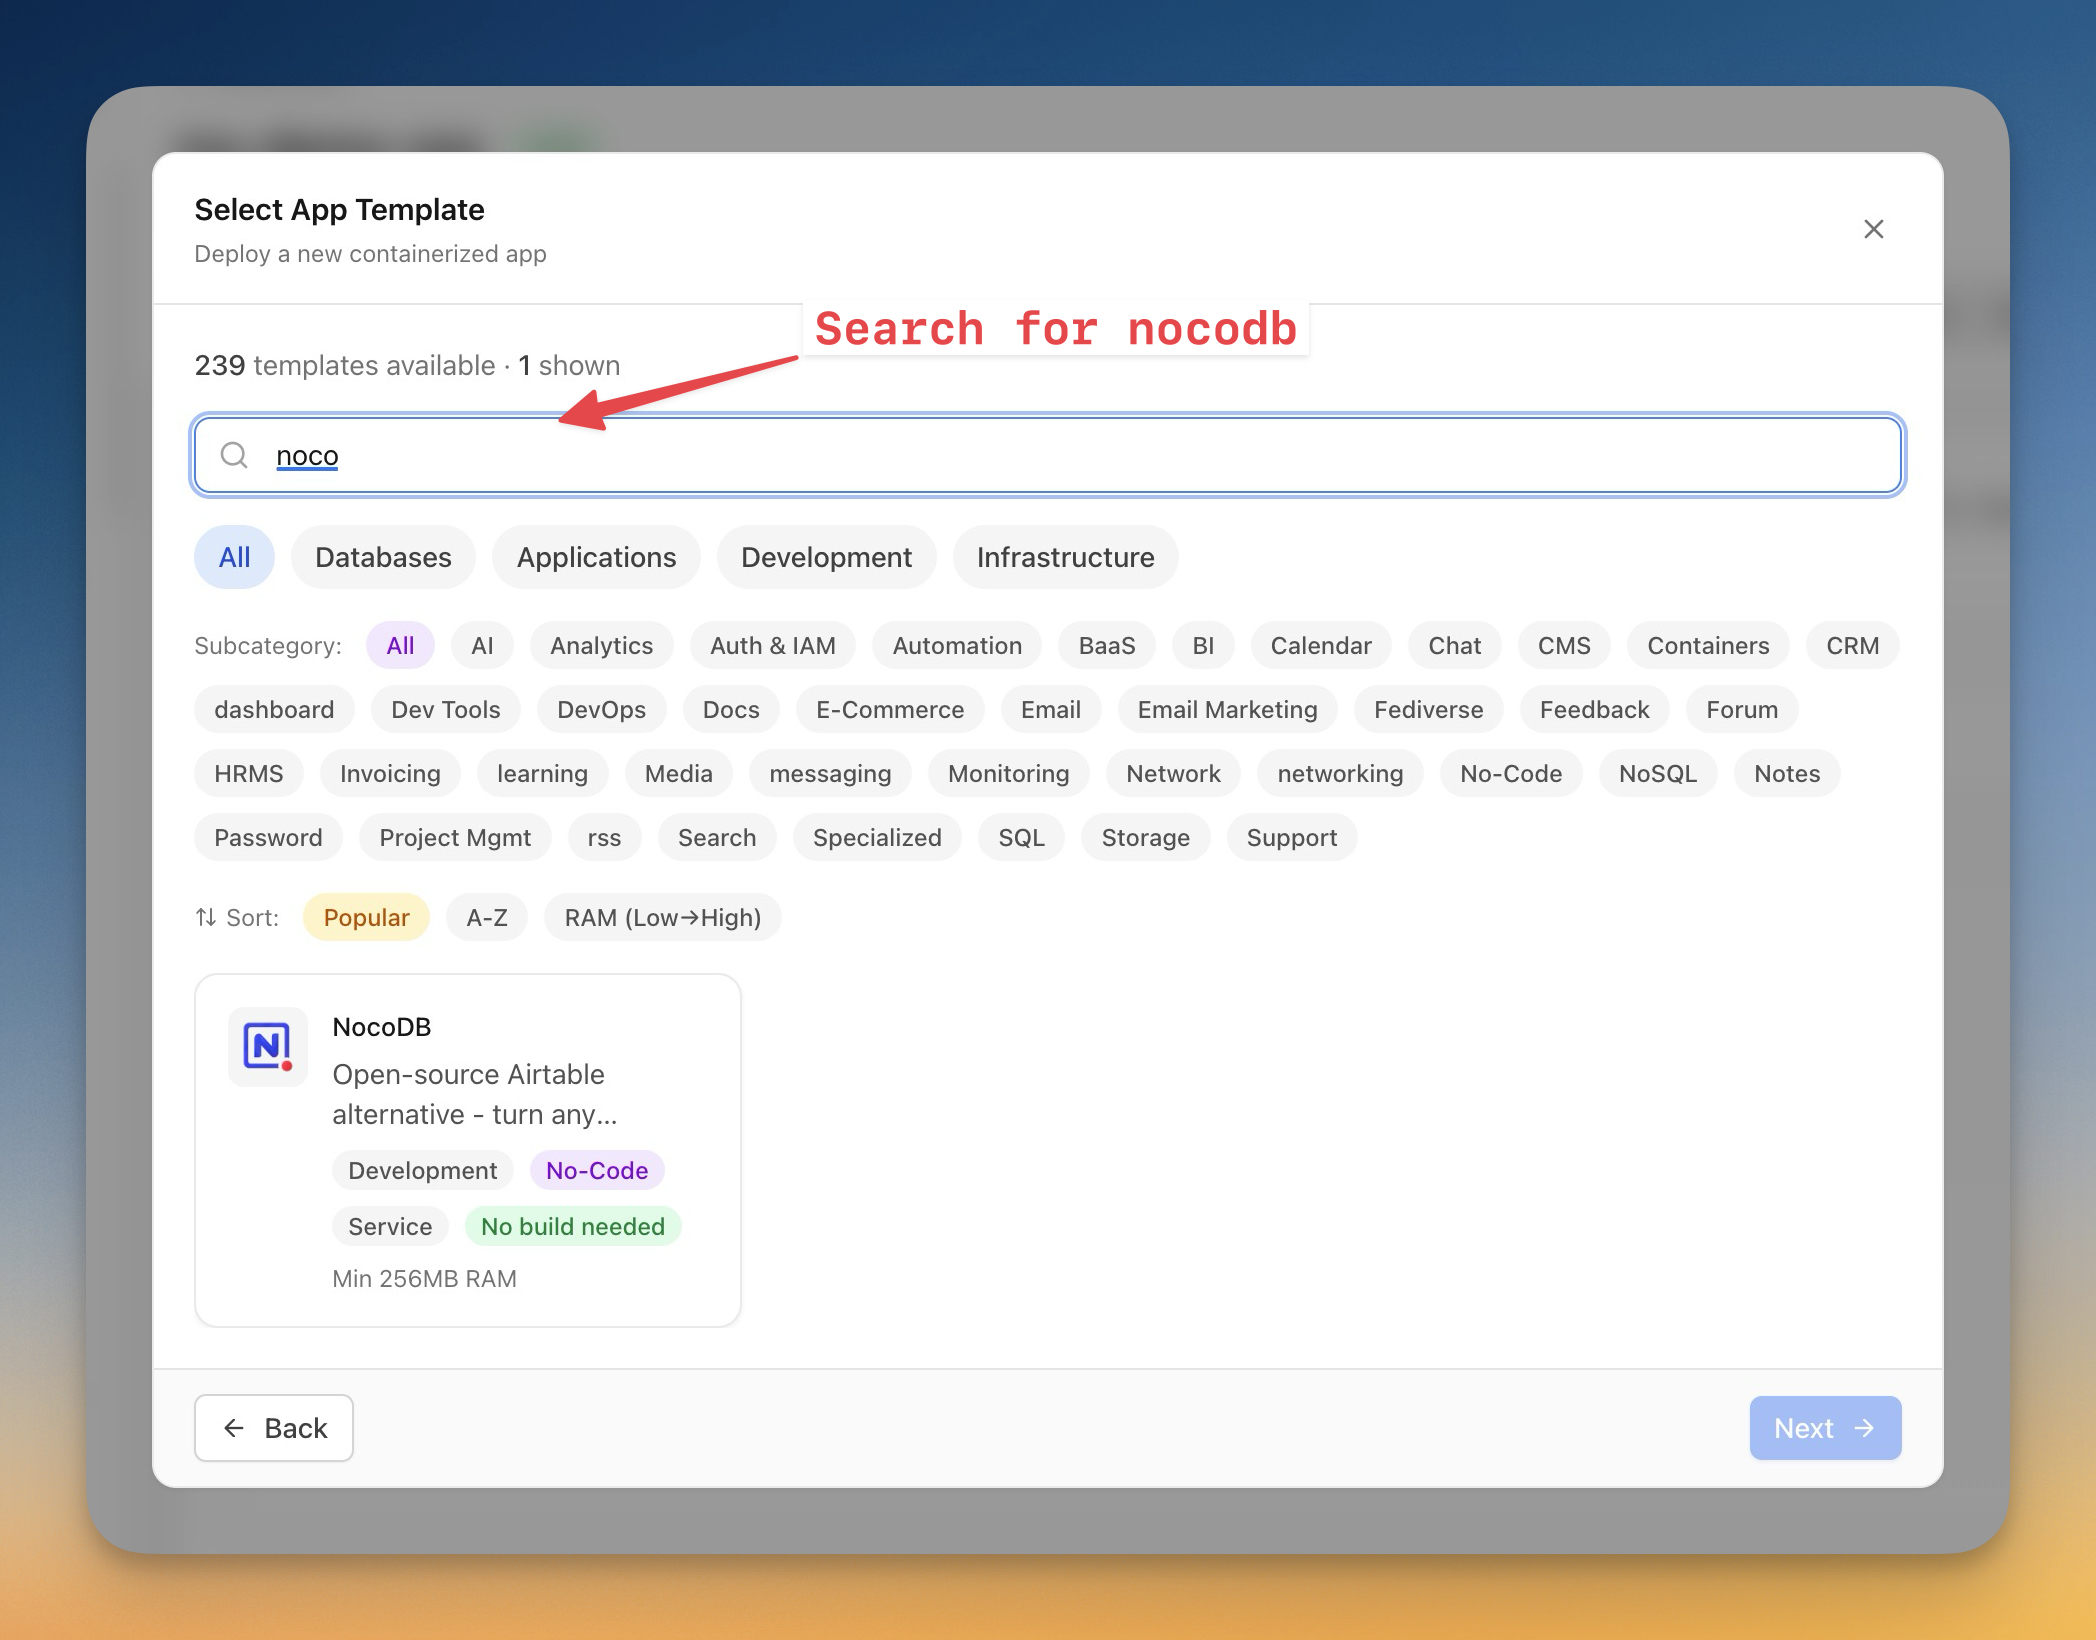
- Search for
nocodband select the NocoDB template, then click Next
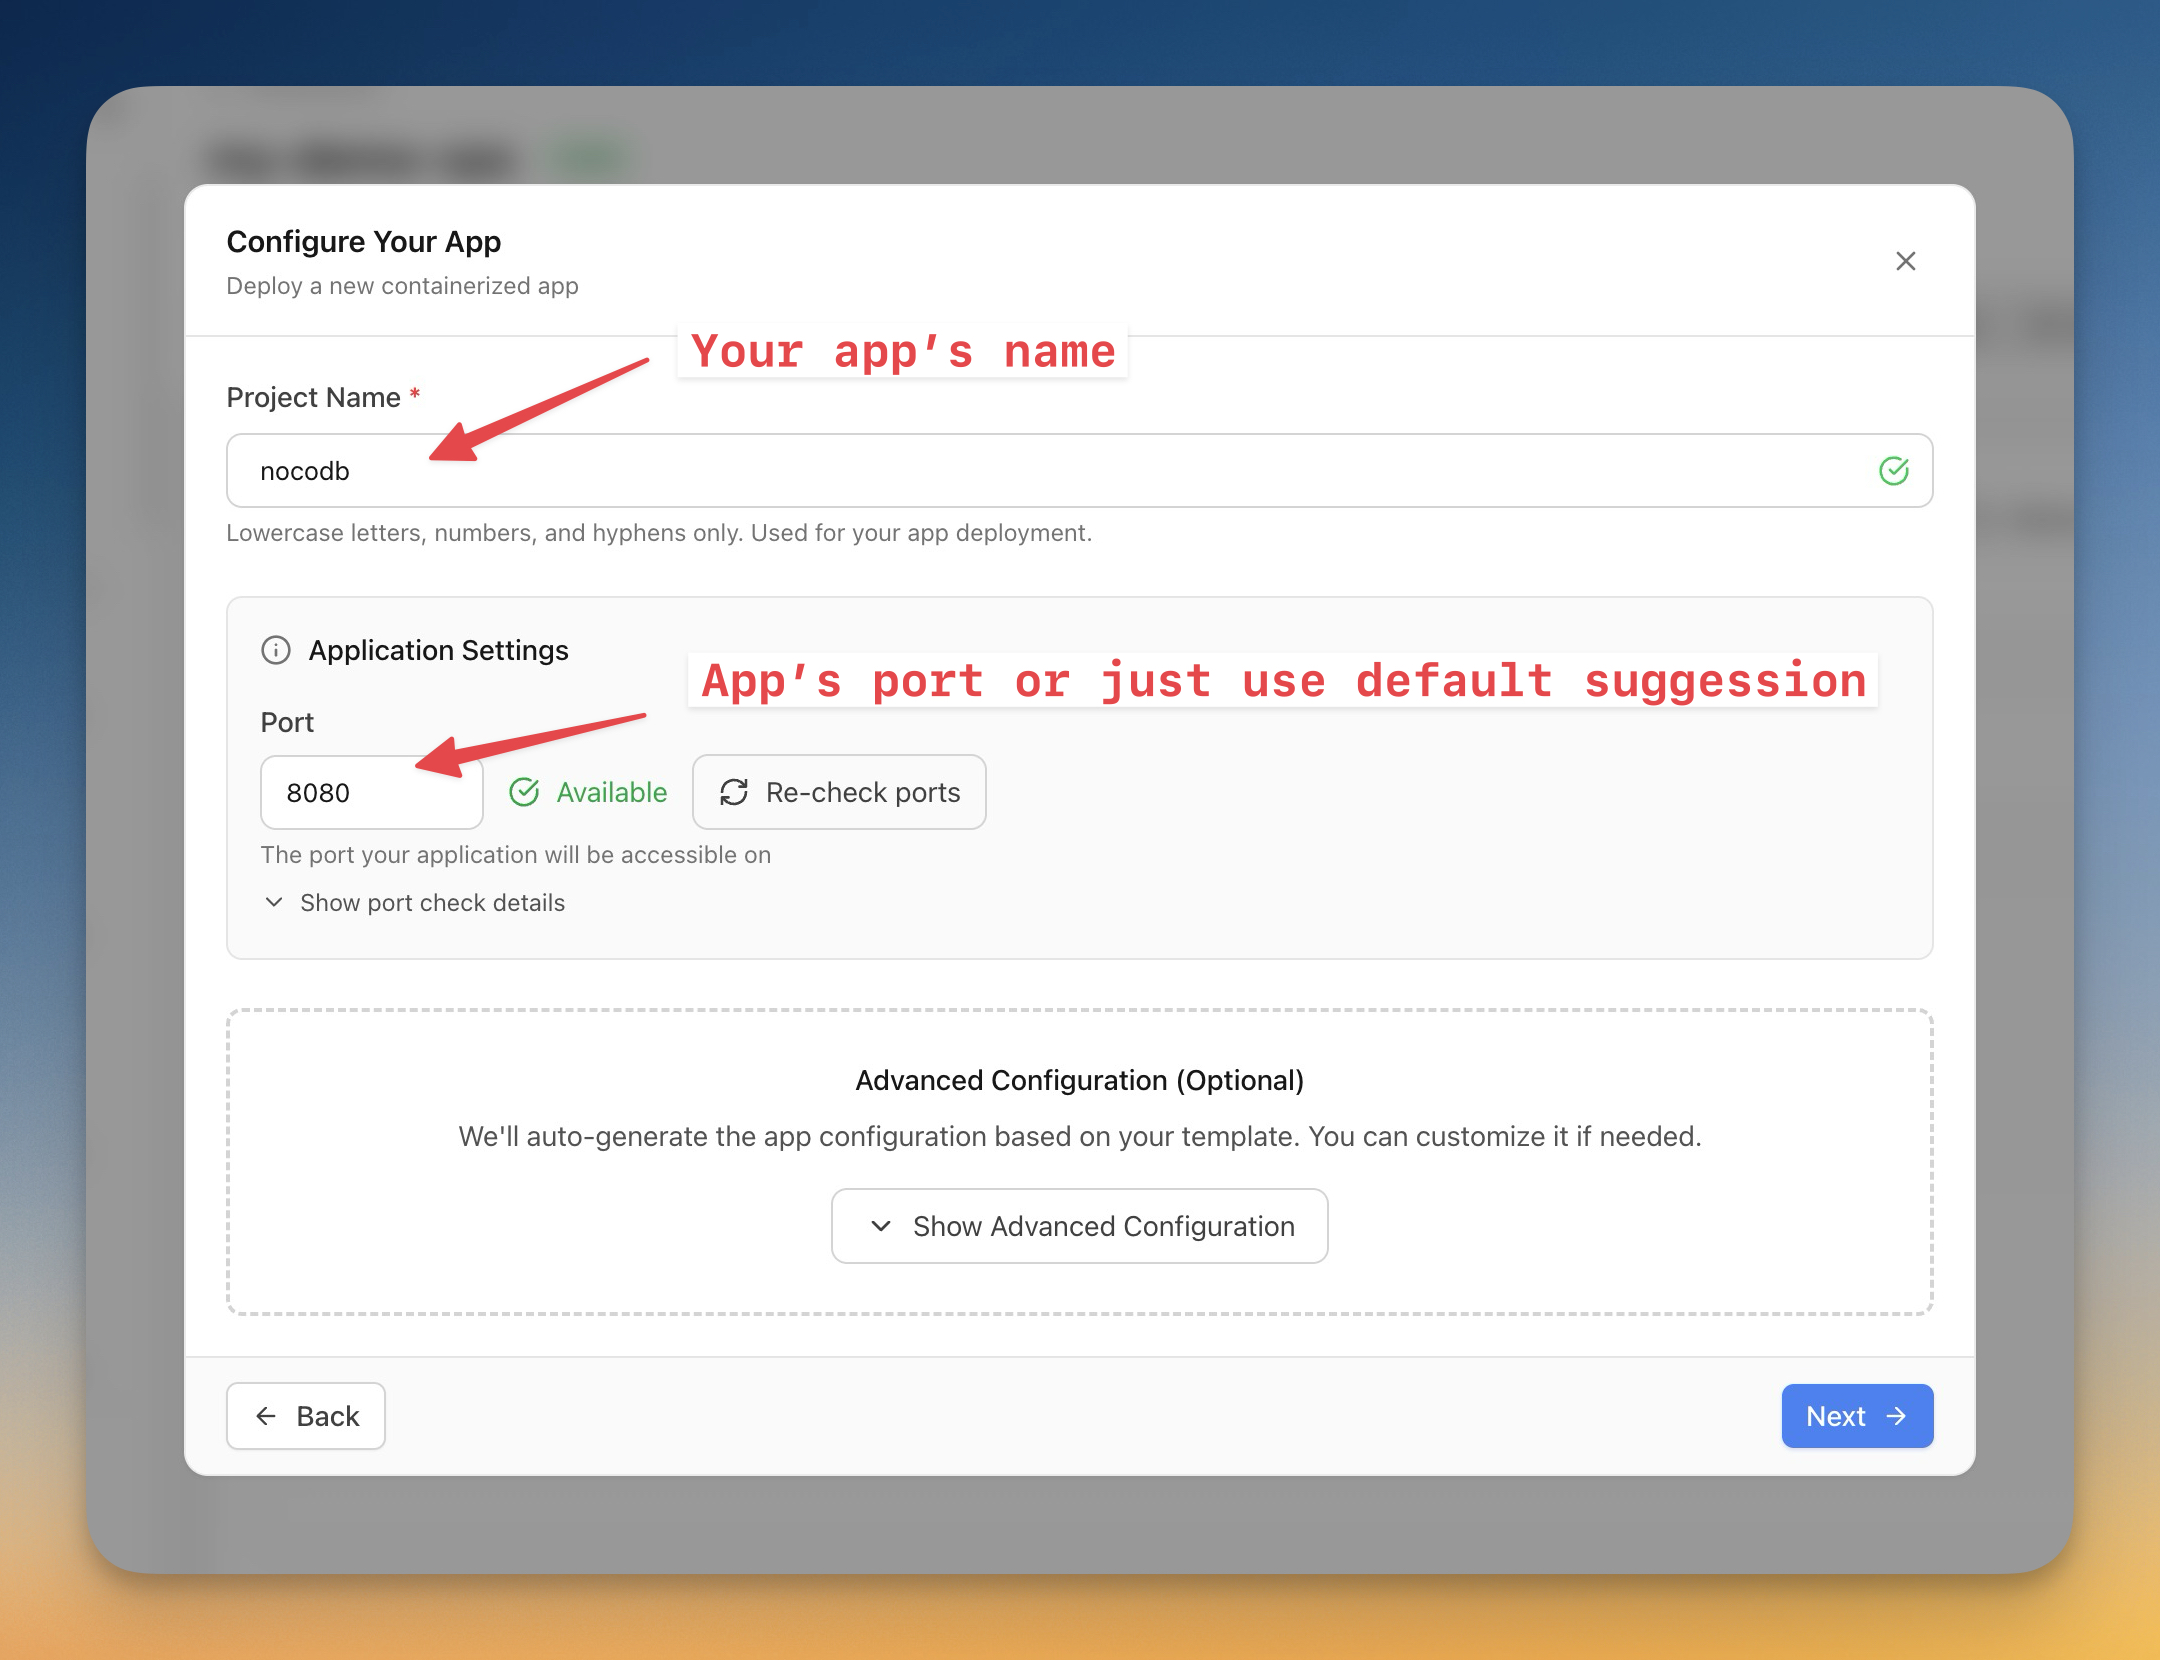
- Enter a Project Name (e.g.,
nocodb) and keep the default port8080, then click Next
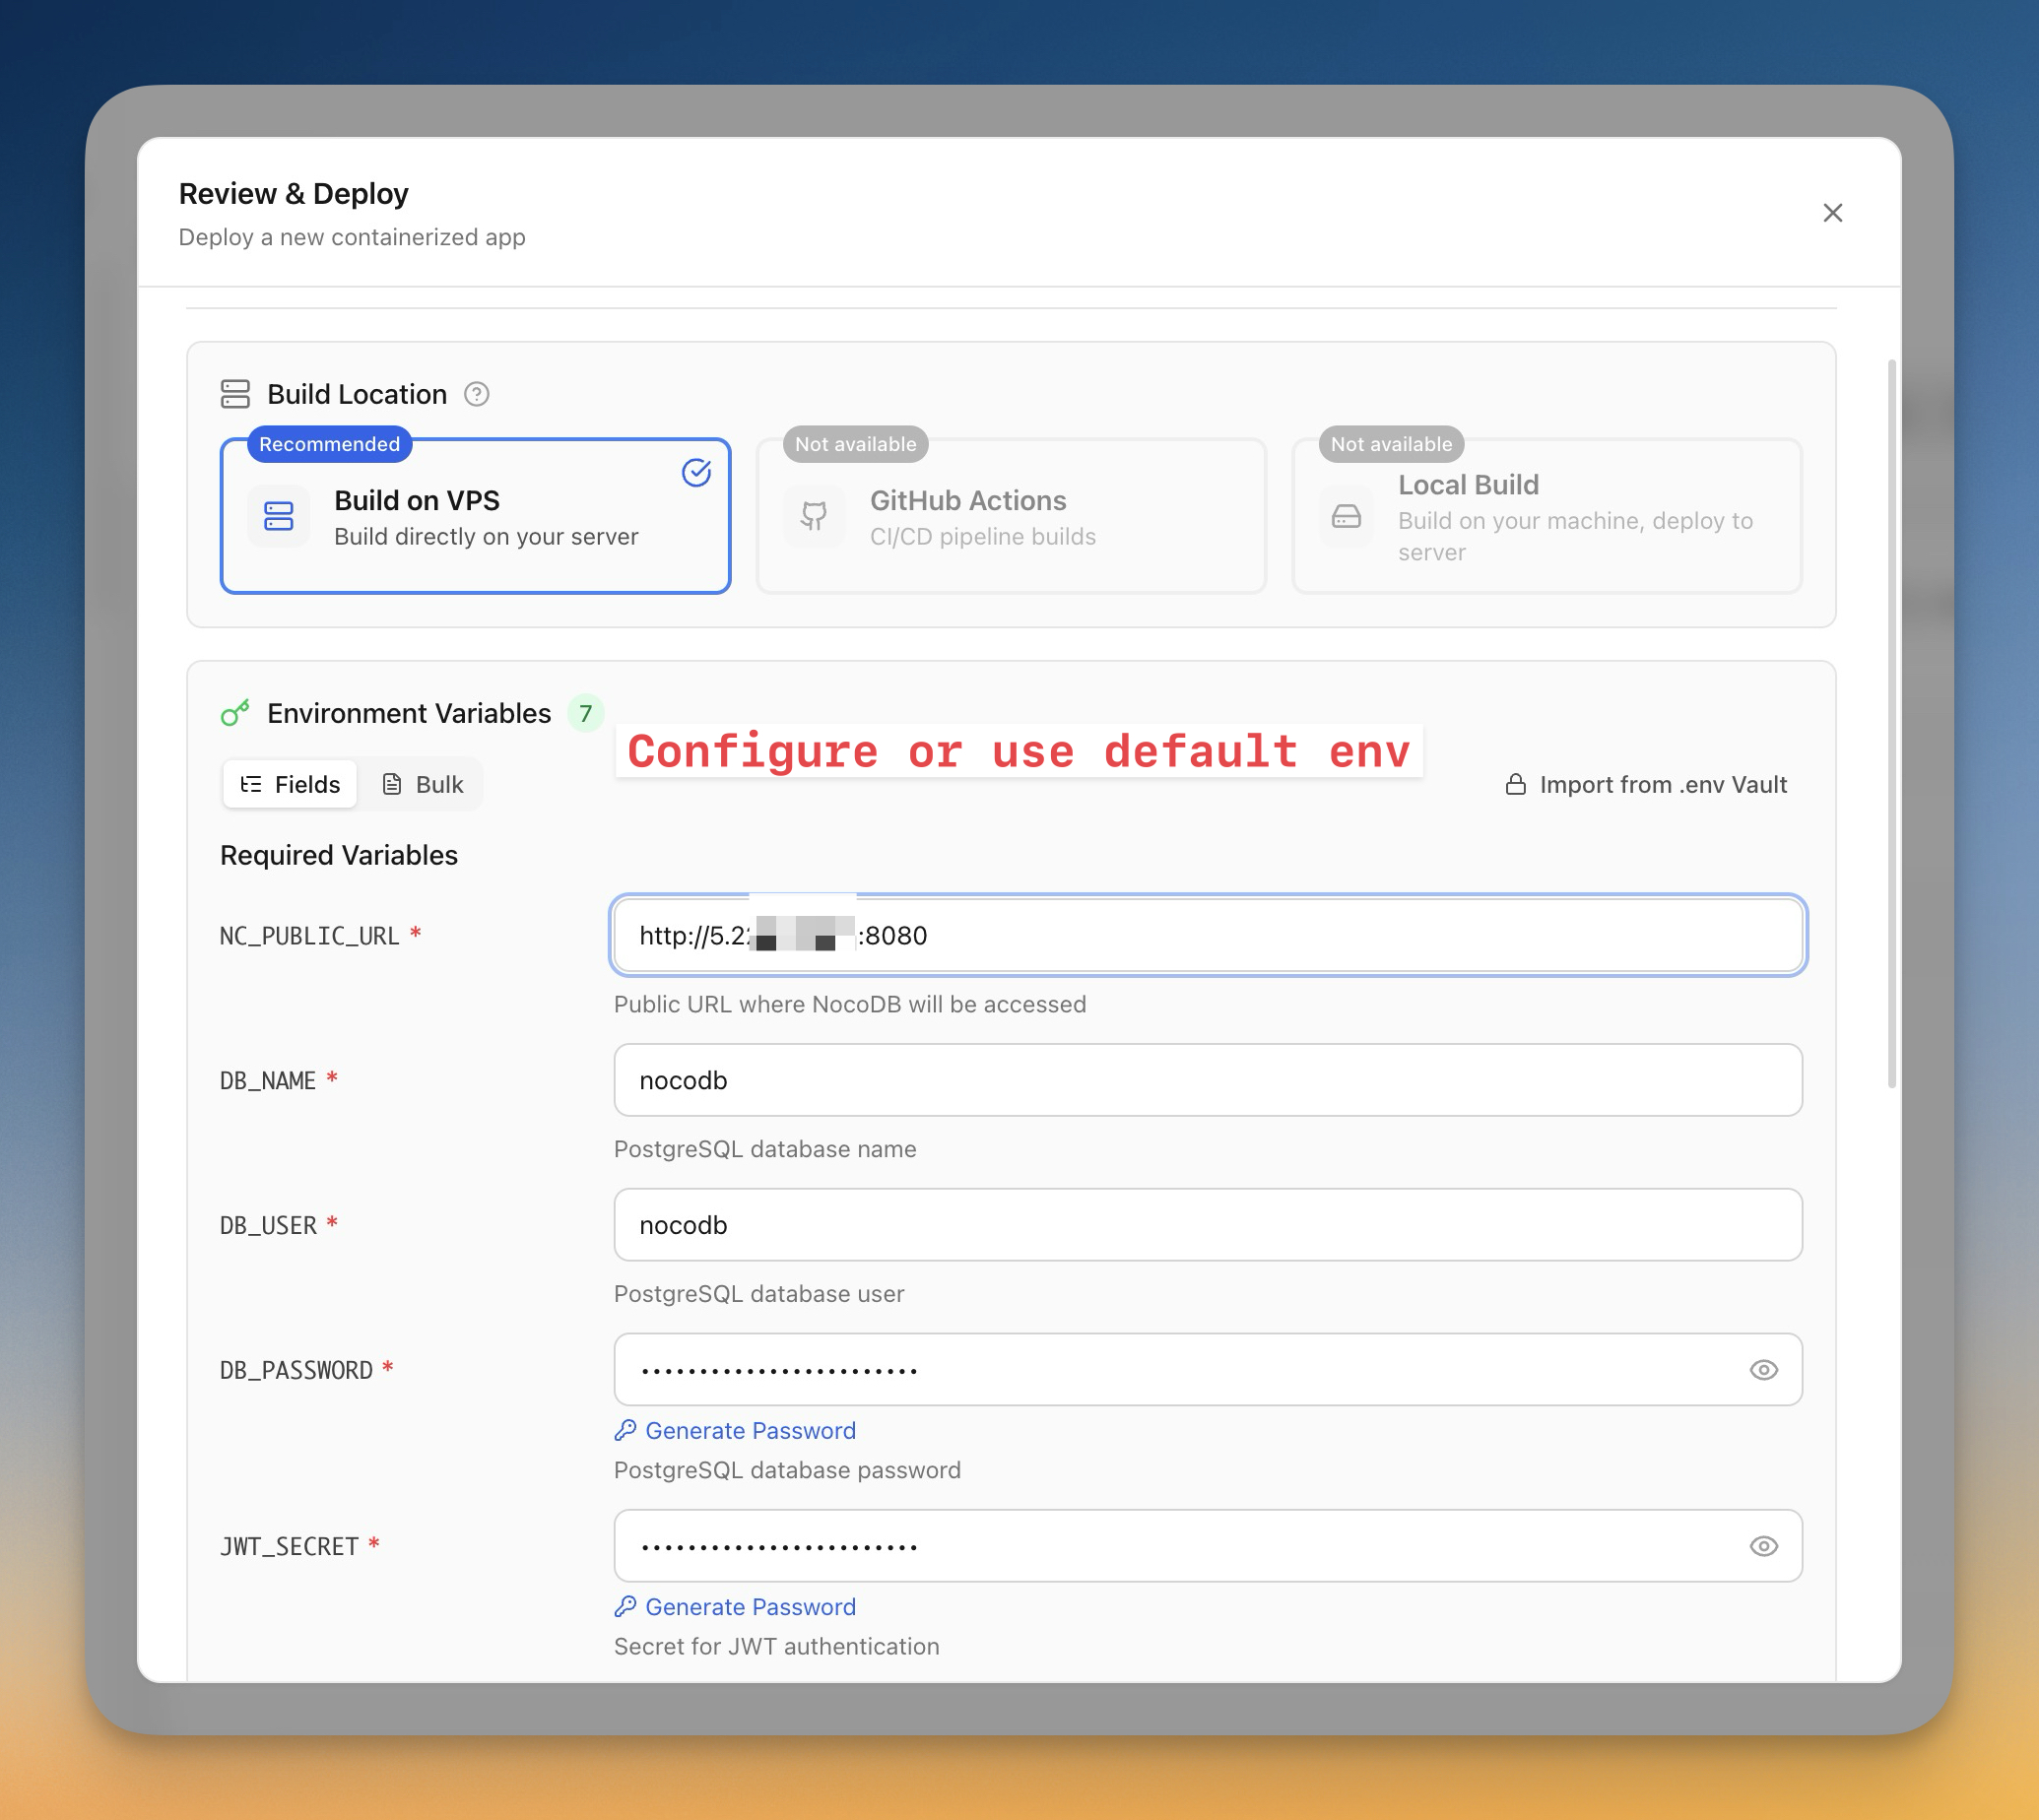
- Review the environment variables, then click Deploy
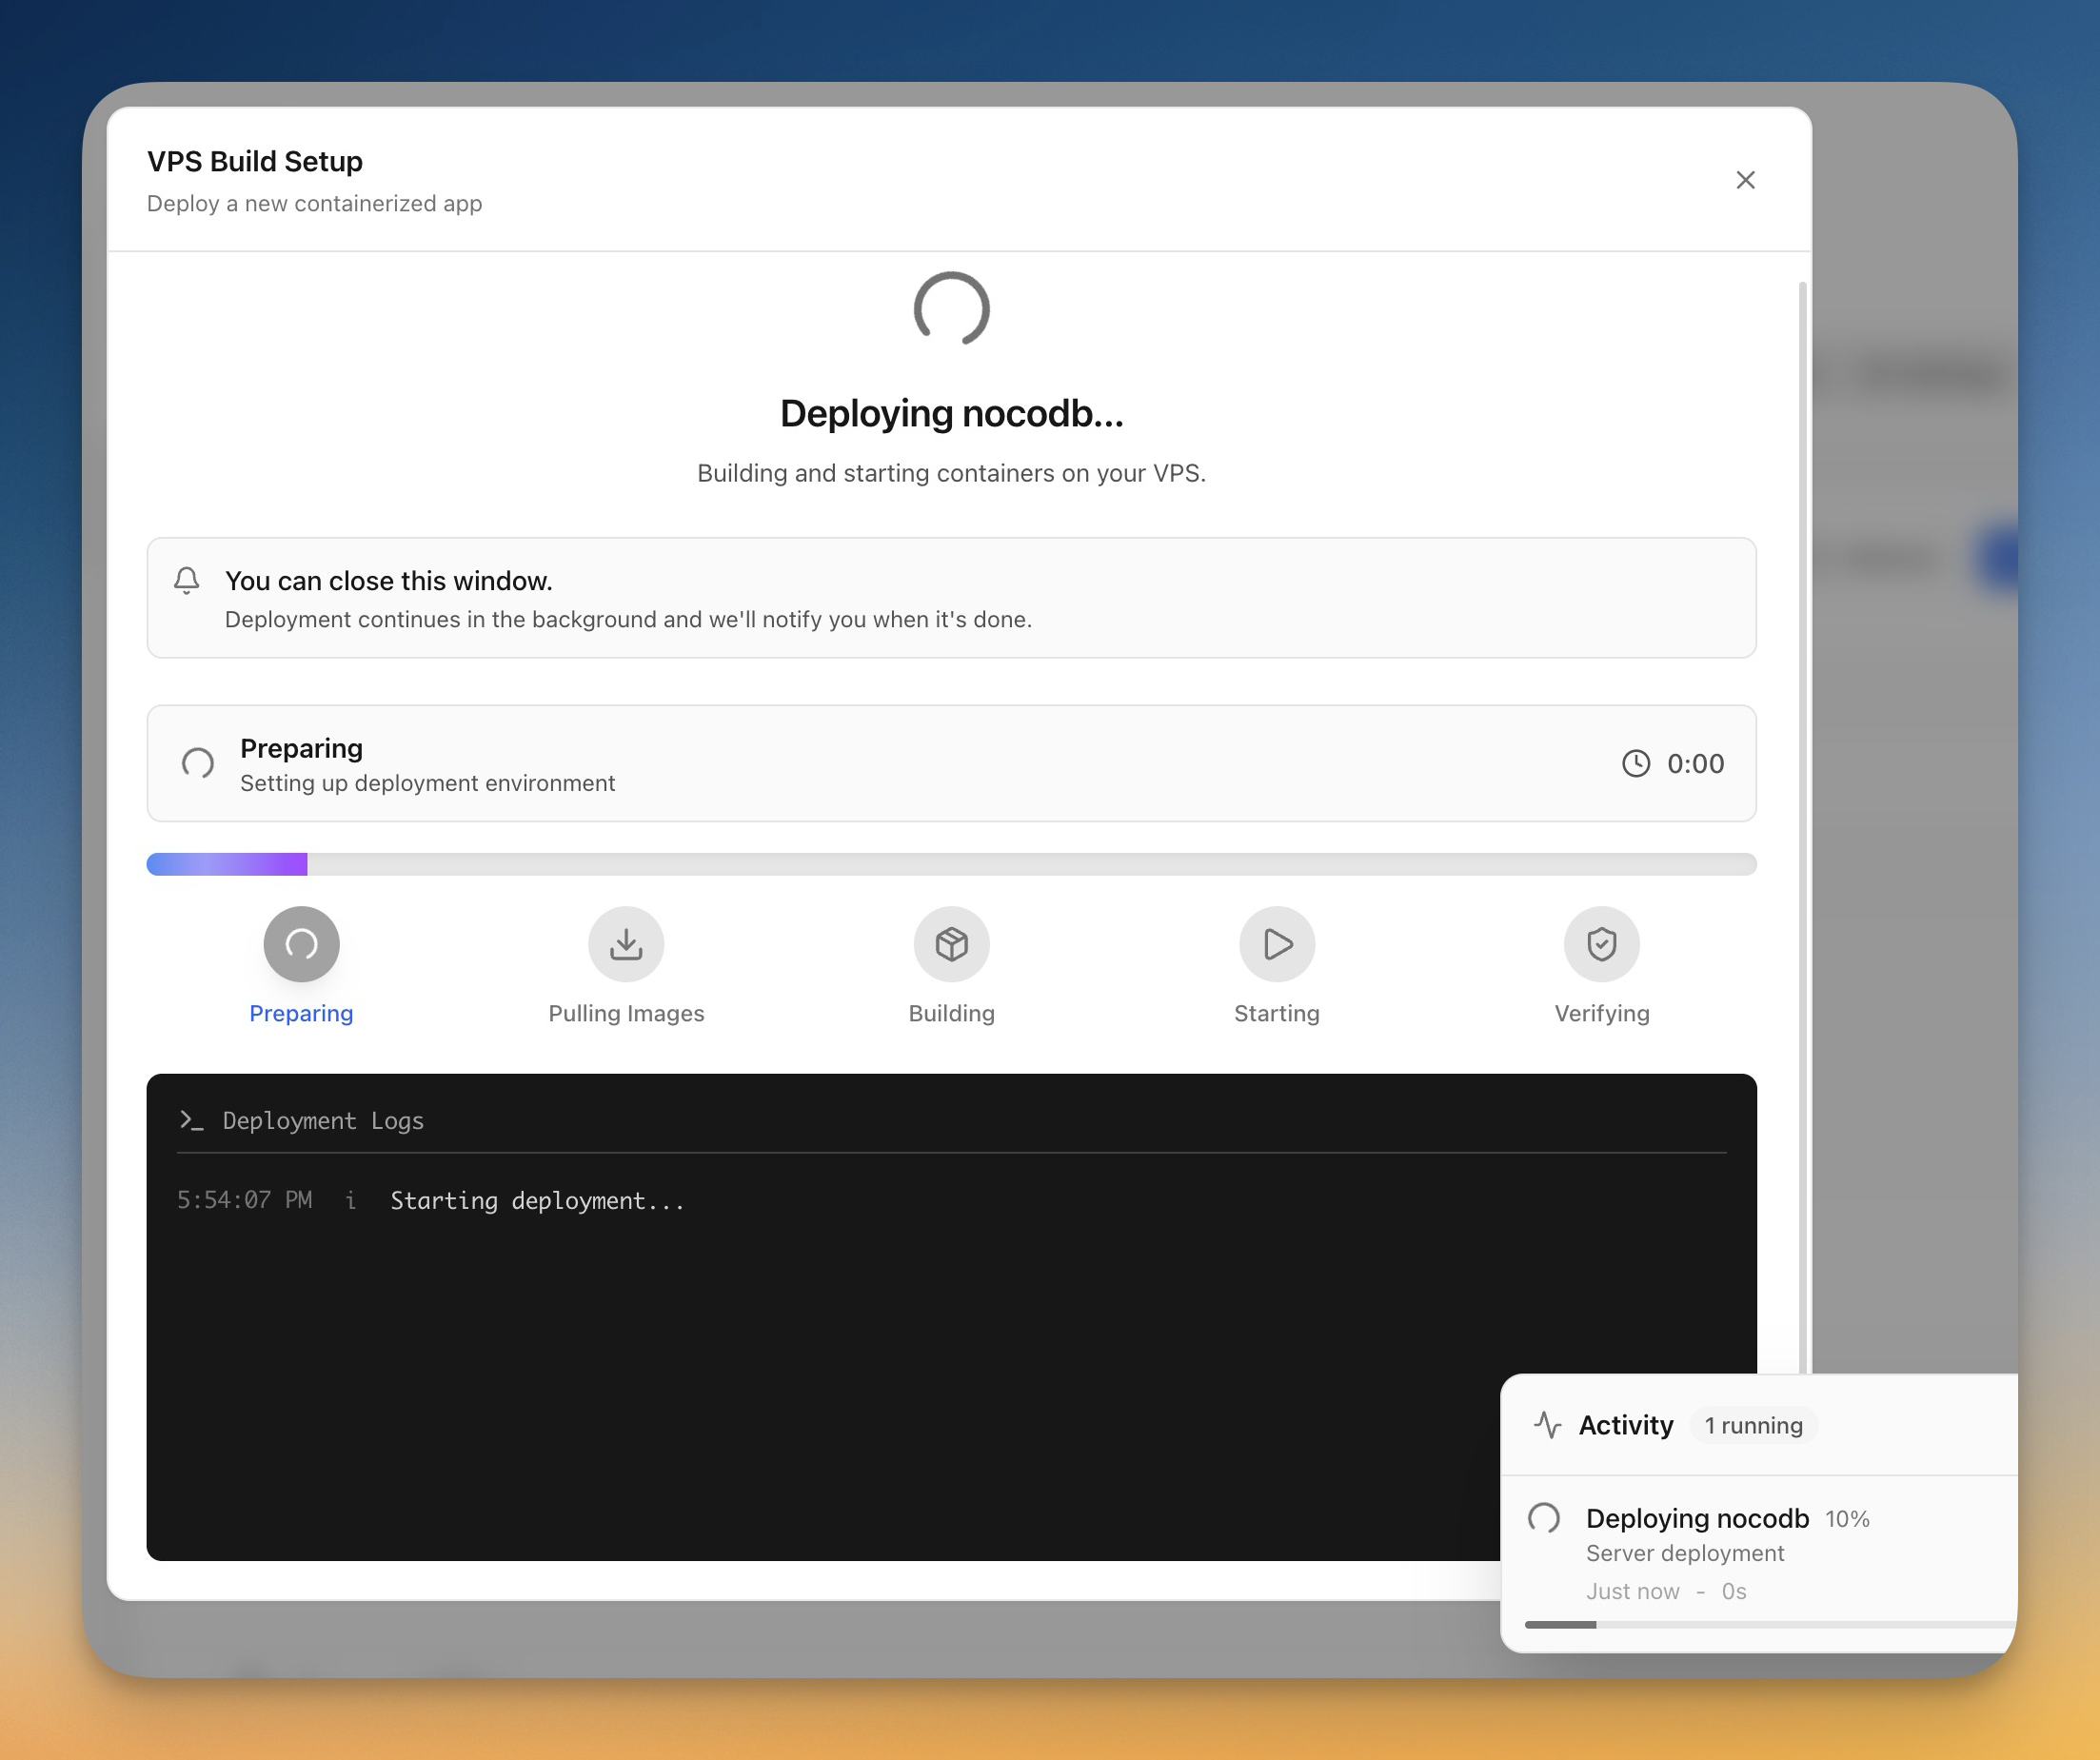
Server Compass will pull the Docker images, configure the containers, and start the application.
Step 6 - Verify the Deployment
Verify that the NocoDB containers are running:
docker ps
You should see output similar to:
CONTAINER ID   IMAGE                  COMMAND                  CREATED             STATUS                       PORTS                                         NAMES
fe105f3ec178   nocodb/nocodb:latest   "/usr/bin/dumb-init …"   About an hour ago   Up About an hour             0.0.0.0:8080->8080/tcp, [::]:8080->8080/tcp   nocodb-nocodb-1
789a818a5e36   postgres:16-alpine     "docker-entrypoint.s…"   About an hour ago   Up About an hour (healthy)   5432/tcp                                      nocodb-db-1
Both containers should show an Up status.
Note: On a fresh server, the PostgreSQL container usually needs around 20–40 seconds to pass its health check before NocoDB starts responding. If the NocoDB container shows
startingrather thanUp, wait a moment and rundocker psagain.
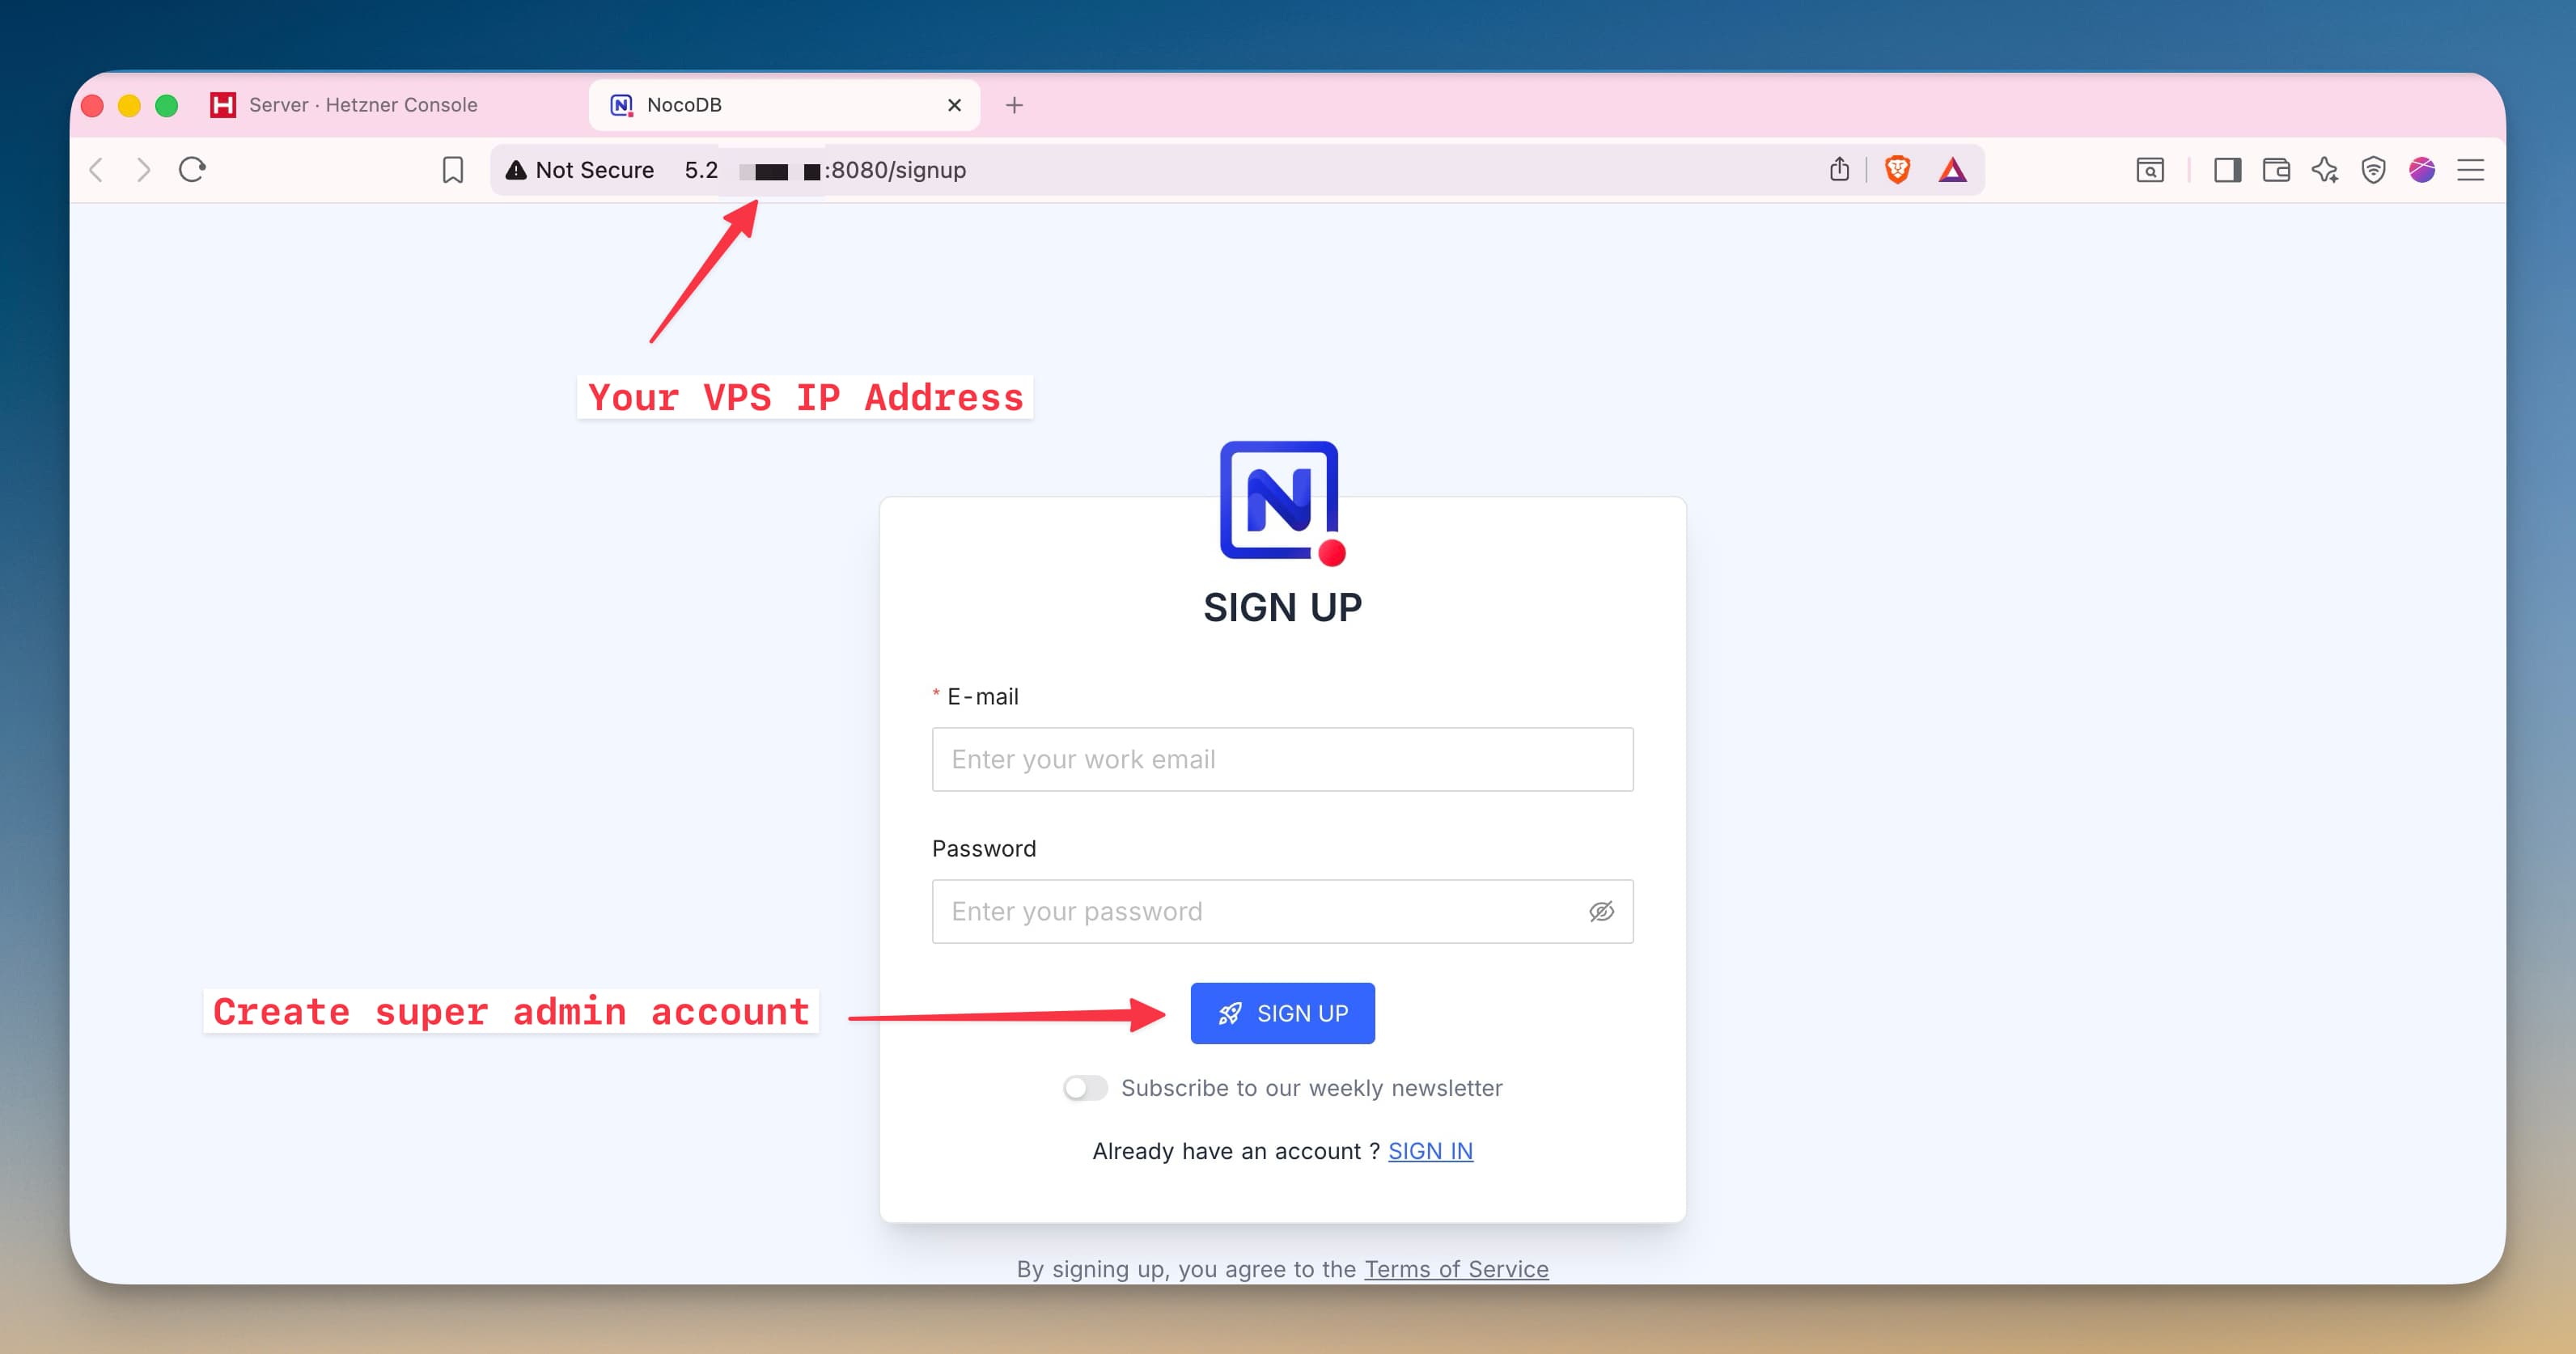
Step 7 - Access NocoDB
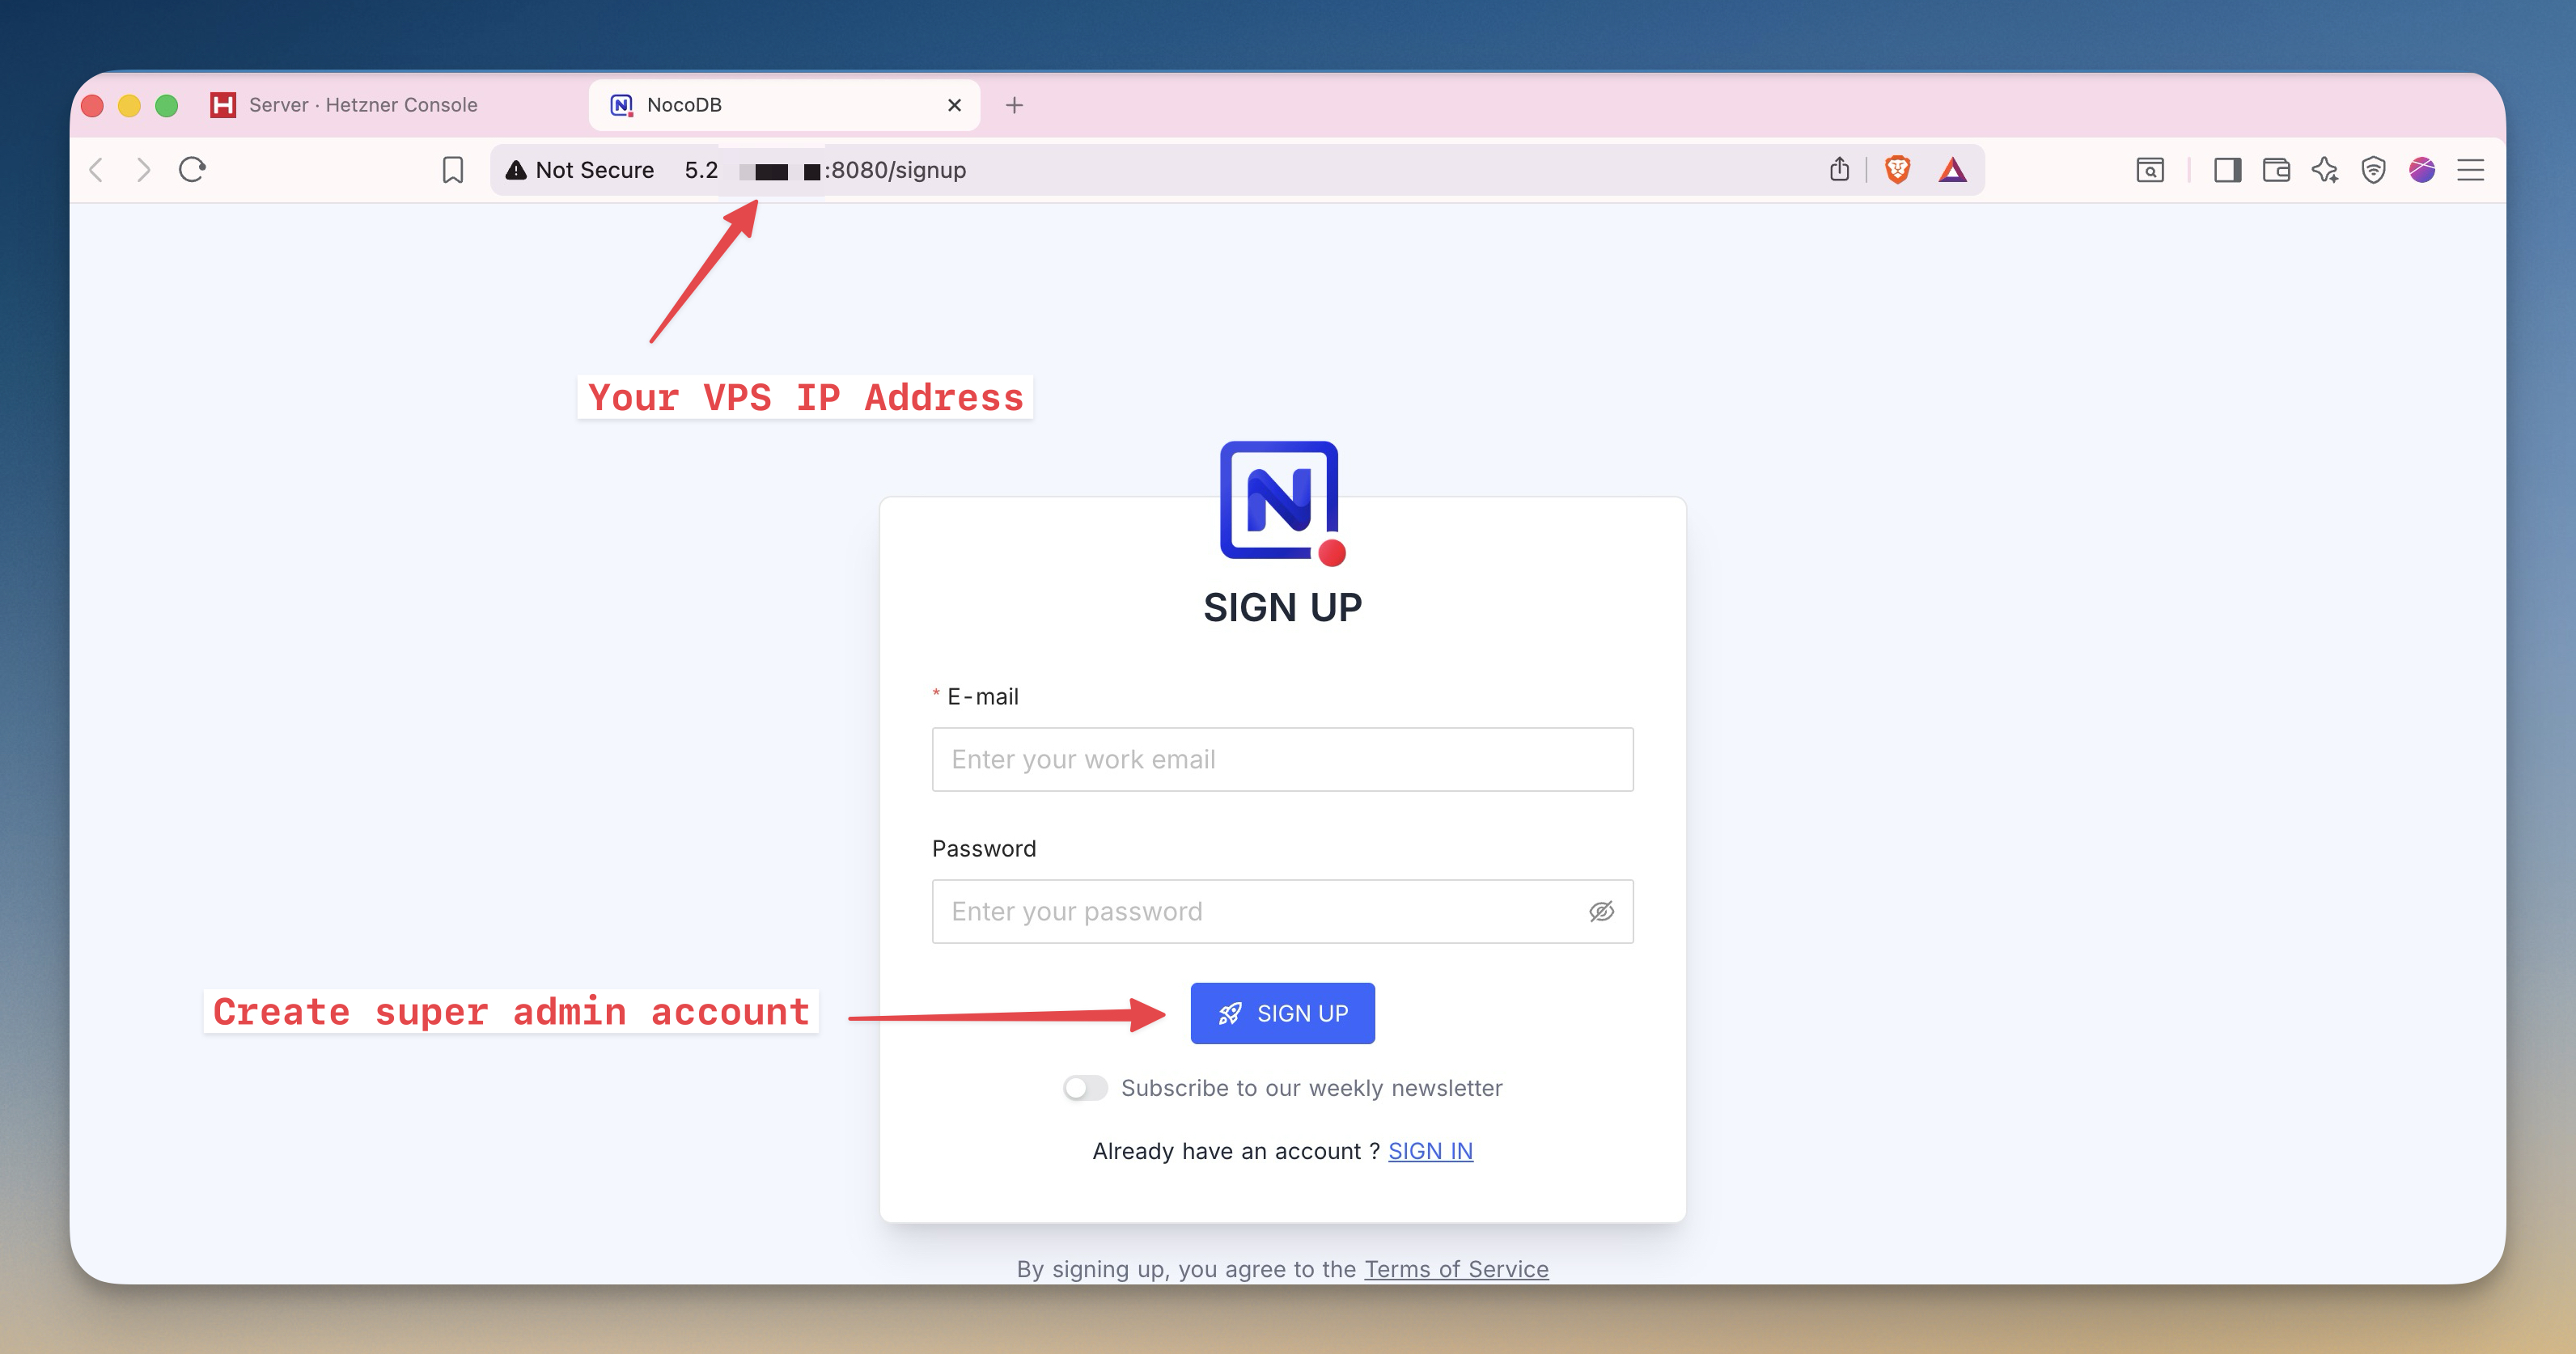
Open your browser and navigate to:
http://<YOUR_SERVER_IP>:8080
Replace <YOUR_SERVER_IP> with your server's actual IPv4 address from Step 2.
You will see the NocoDB sign-up page. Create your admin account to get started.
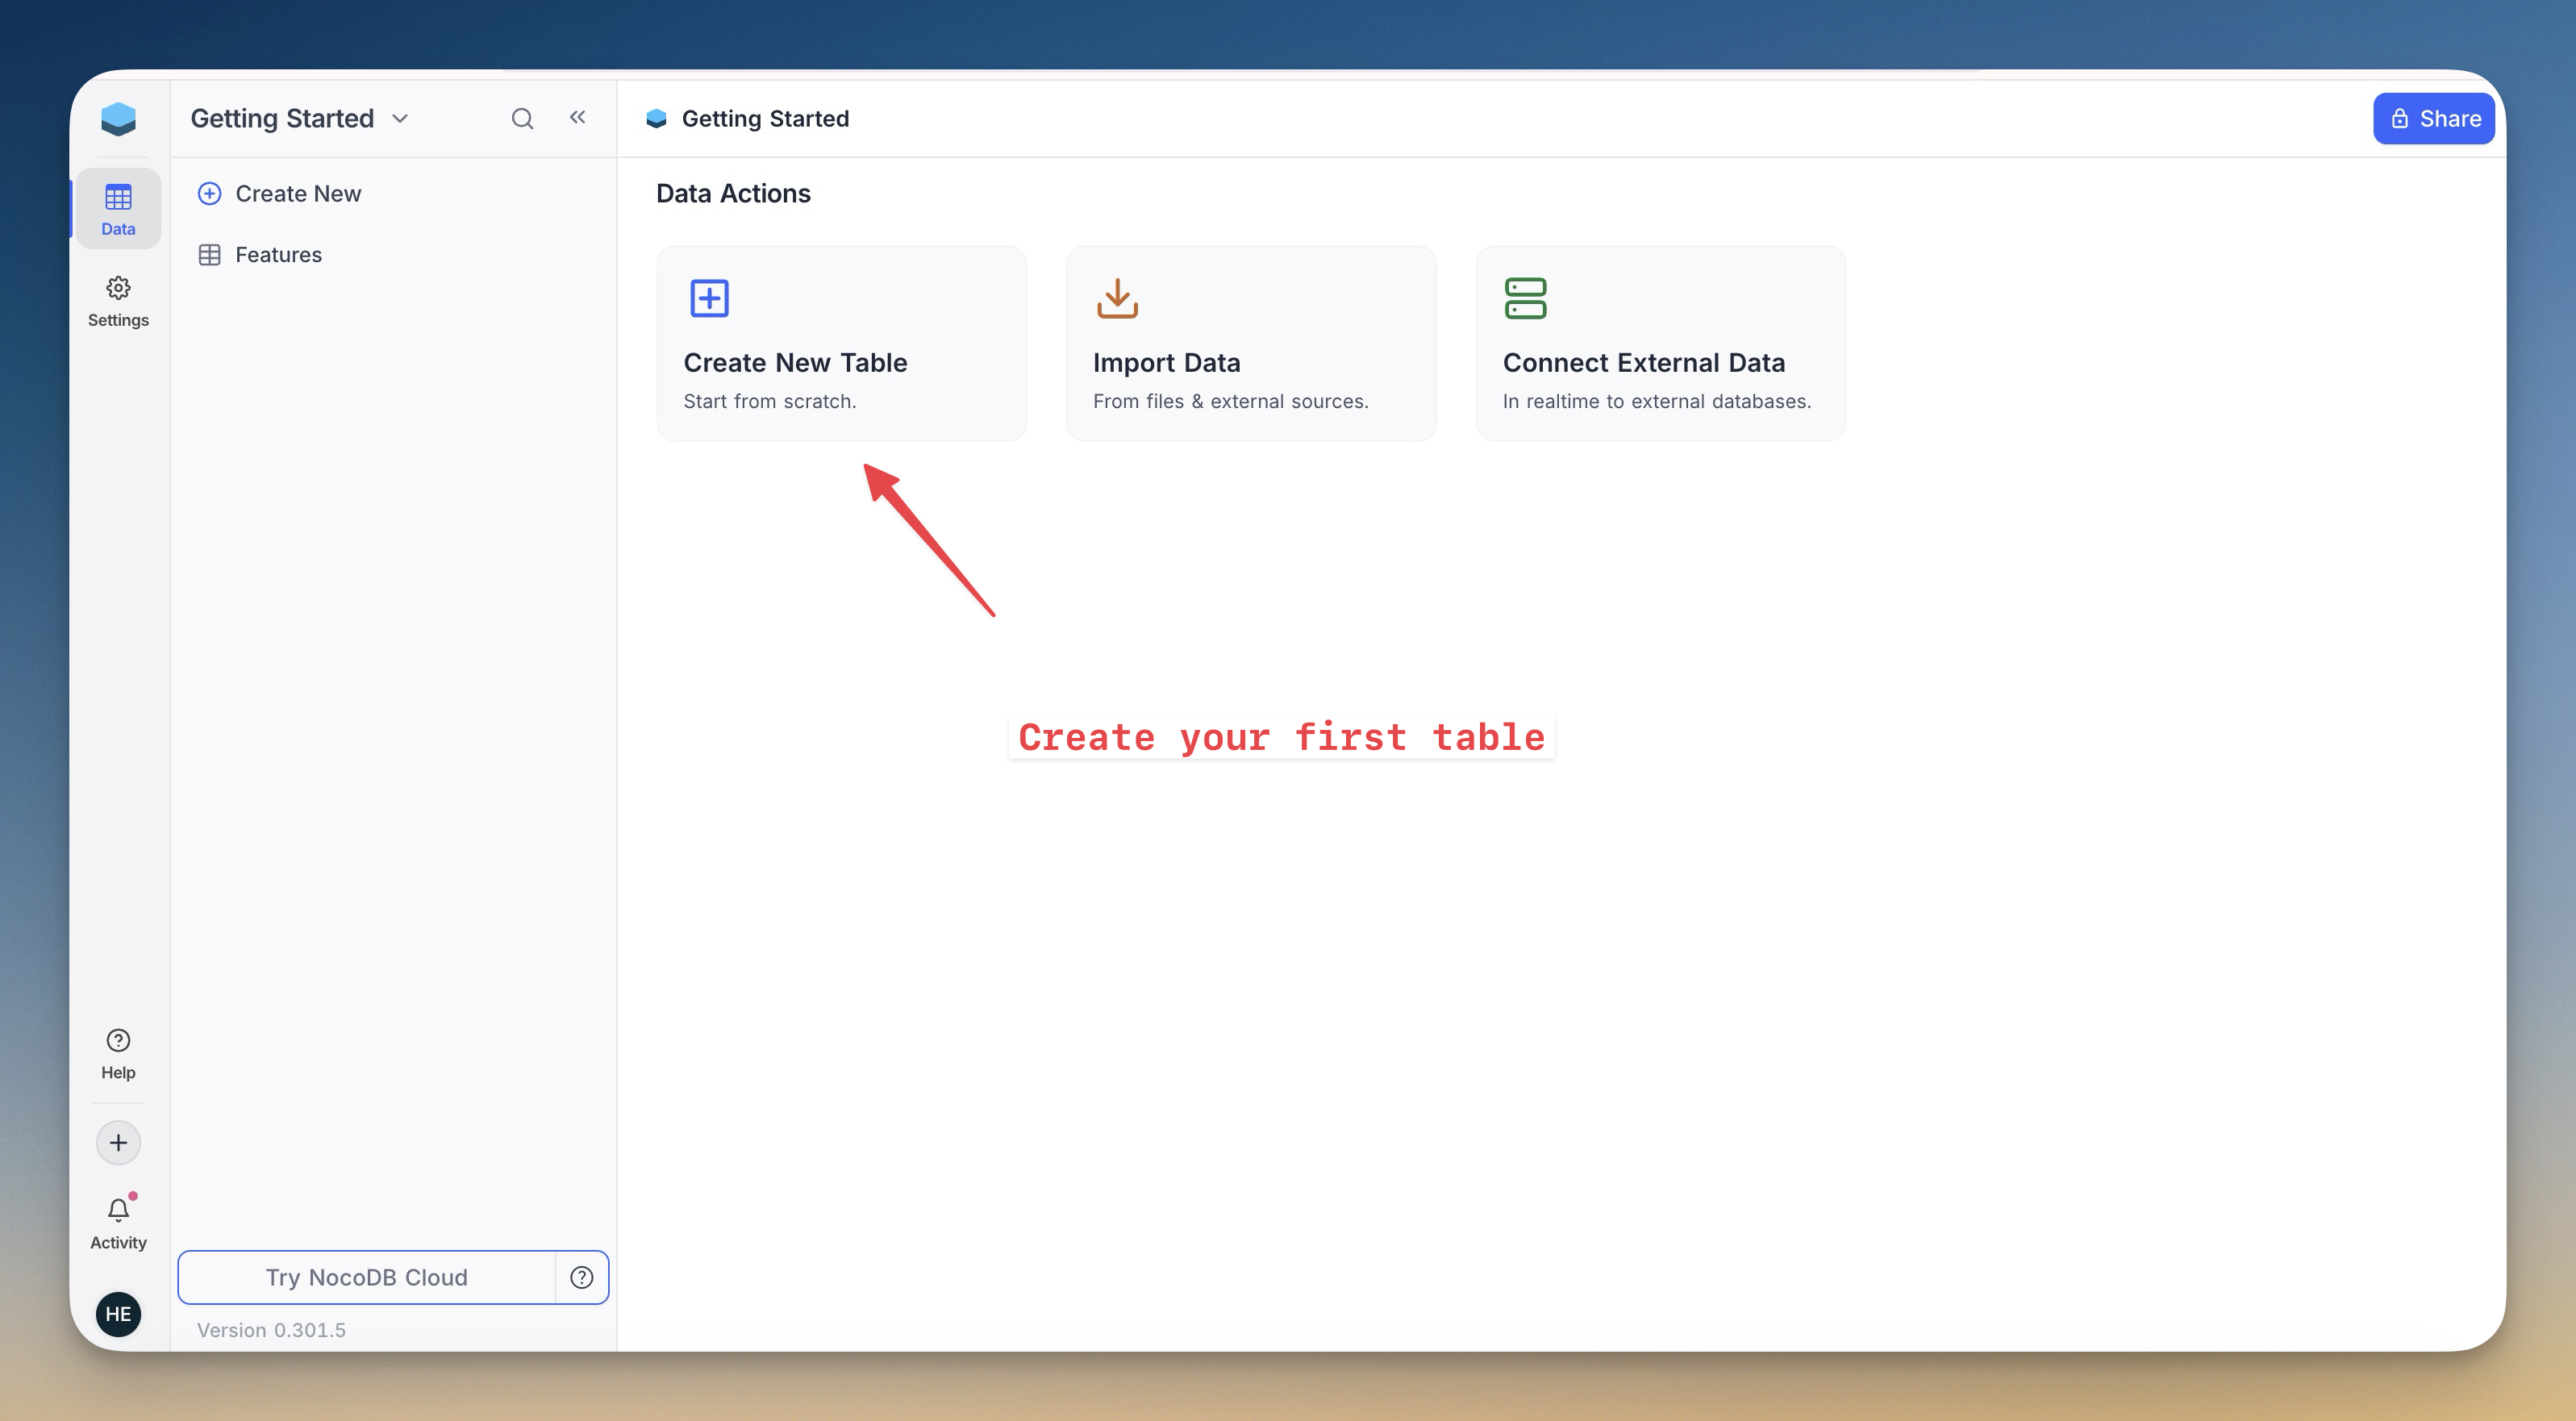
After signing in, you are ready to create your first table in NocoDB.
Note: Accessing the application through an IP address is fine for testing. For production deployments, it is recommended to configure a domain and HTTPS using a reverse proxy such as Nginx, Traefik, or Caddy.
Troubleshooting
If you cannot access the NocoDB interface, check the following:
Container status
Run docker ps to check if both containers are running. If a container is missing, inspect the logs:
docker compose logs nocodb
Port access
Confirm that port 8080 is allowed by your firewall:
ufw status
If port 8080 is not listed, add it:
ufw allow 8080
Server IP address
Verify you are using the correct IPv4 address from the Hetzner Cloud Console. IPv6 addresses will not work unless NocoDB is specifically configured for them.
Container startup time
The PostgreSQL container runs a health check before NocoDB starts. Wait 30–60 seconds after running docker compose up -d before accessing the interface.
Conclusion
NocoDB is now running on your server and ready to use. Because the application runs in Docker containers, updating or restarting it later is as simple as running docker compose pull and docker compose up.
docker compose pull && docker compose up -d
Next steps:
- Configure a domain name and HTTPS using a reverse proxy
- Create your first NocoDB project
- Configure backups for the PostgreSQL volume
Related in the StoicSoft network
If you're self-hosting on a VPS or working through a deployment guide like the one above, DeployToVPS is the StoicSoft network's handbook for VPS deployment recipes — docker-compose, nginx, traefik, and common app self-hosts.
From across the StoicSoft network
Hand-curated reads on the same topic from sister sites in the StoicSoft family.
 1DevTool11 min read
Self-Hosted AI Coding Assistant Workflow: Practical Setup Guide
A self-hosted AI coding workflow needs more than model hosting. You need environment control, connector governance, and reproducible operations. This guide covers the practical stack.
Read on 1devtool.com 1DevTool10 min read
Docker Desktop Alternatives for Developers in 2026
Developers want a Docker workflow that stays close to code, logs, and AI agents. This comparison breaks down Docker Desktop alternatives by performance, observability, and daily usability.
Read on 1devtool.com