March 6, 2026
Deploy Python FastAPI on VPS with Docker (2026 Guide)
Complete guide to deploy FastAPI on your VPS with Docker. Learn how to create optimized Dockerfiles, configure docker-compose, set up Nginx/Traefik reverse proxy, SSL certificates, and production-ready Uvicorn settings for high-performance Python APIs.
FastAPI has become the go-to framework for building high-performance Python APIs. Its async support, automatic OpenAPI documentation, and type hints make it a joy to work with. But when it comes to deploying FastAPI on a VPS, many developers hit a wall.
This guide walks you through deploying a production-ready FastAPI application on your VPS using Docker. By the end, you'll have a containerized API running behind a reverse proxy with SSL certificates, environment variable management, and optimized Uvicorn settings.
What you'll learn:
- Creating an optimized Dockerfile for FastAPI
- Setting up Docker Compose for multi-container deployments
- Configuring Nginx or Traefik as a reverse proxy
- Automating SSL certificates with Let's Encrypt
- Managing environment variables securely
- Tuning Uvicorn for production workloads
Why Deploy FastAPI on a VPS?
Before diving into the deployment steps, let's address why you might choose a VPS over managed platforms like AWS Lambda, Google Cloud Run, or Heroku.
- Cost efficiency — A $5-10/month VPS can handle thousands of requests per second. Serverless platforms charge per invocation, which adds up quickly for APIs with consistent traffic.
- Full control — You own the server. Install any Python package, configure system-level settings, and optimize for your specific workload.
- Persistent connections — FastAPI excels at WebSockets and Server-Sent Events. VPS deployments maintain long-lived connections without the cold start penalties of serverless.
- No vendor lock-in — Your Docker image runs anywhere. Move between providers without rewriting deployment configs.
- Data sovereignty — Keep your data on servers in your chosen region, under your control.
Prerequisites
Before you begin, make sure you have:
- A VPS — Any provider works: DigitalOcean, Hetzner, Linode, Vultr, or AWS EC2. Minimum 1GB RAM recommended for comfortable builds.
- SSH access — Root or sudo privileges on your server.
- A domain name — Point an A record to your VPS IP address (required for SSL).
- Docker installed locally — For building and testing images before deployment.
- A FastAPI project — If you don't have one, we'll create a sample in the next section.
Step 1: Create Your FastAPI Application
If you already have a FastAPI project, skip to Step 2. Otherwise, let's create a simple API to demonstrate the deployment process.
Create a new directory and set up the project structure:
my-fastapi-app/
├── app/
│   ├── __init__.py
│   ├── main.py
│   ├── routers/
│   │   ├── __init__.py
│   │   └── items.py
│   └── models/
│       ├── __init__.py
│       └── item.py
├── requirements.txt
├── Dockerfile
└── docker-compose.yml
Create app/main.py with your FastAPI application:
from fastapi import FastAPI
from fastapi.middleware.cors import CORSMiddleware
from app.routers import items
import os

app = FastAPI(
    title="My FastAPI App",
    description="A production-ready FastAPI application",
    version="1.0.0",
    docs_url="/docs",
    redoc_url="/redoc",
)

# CORS configuration
origins = os.getenv("CORS_ORIGINS", "http://localhost:3000").split(",")

app.add_middleware(
    CORSMiddleware,
    allow_origins=origins,
    allow_credentials=True,
    allow_methods=["*"],
    allow_headers=["*"],
)

# Include routers
app.include_router(items.router, prefix="/api/v1", tags=["items"])

@app.get("/health")
async def health_check():
    """Health check endpoint for load balancers and monitoring."""
    return {"status": "healthy", "version": "1.0.0"}

@app.get("/")
async def root():
    return {"message": "Welcome to My FastAPI App"}
Create app/routers/items.py for your API routes:
from fastapi import APIRouter, HTTPException
from pydantic import BaseModel
from typing import Optional
from uuid import uuid4

router = APIRouter()

# In-memory storage (replace with database in production)
items_db: dict = {}

class ItemCreate(BaseModel):
    name: str
    description: Optional[str] = None
    price: float

class Item(ItemCreate):
    id: str

@router.get("/items")
async def list_items():
    """List all items."""
    return list(items_db.values())

@router.post("/items", response_model=Item)
async def create_item(item: ItemCreate):
    """Create a new item."""
    item_id = str(uuid4())
    db_item = Item(id=item_id, **item.model_dump())
    items_db[item_id] = db_item
    return db_item

@router.get("/items/", response_model=Item)
async def get_item(item_id: str):
    """Get a specific item by ID."""
    if item_id not in items_db:
        raise HTTPException(status_code=404, detail="Item not found")
    return items_db[item_id]

@router.delete("/items/")
async def delete_item(item_id: str):
    """Delete an item."""
    if item_id not in items_db:
        raise HTTPException(status_code=404, detail="Item not found")
    del items_db[item_id]
    return {"message": "Item deleted"}
Create requirements.txt with your dependencies:
fastapi==0.109.0
uvicorn[standard]==0.27.0
pydantic==2.5.3
python-multipart==0.0.6
httpx==0.26.0
Step 2: Create an Optimized Dockerfile for FastAPI
A well-crafted Dockerfile is crucial for production deployments. We'll use a multi-stage build to minimize the final image size and a non-root user for security.
Create your Dockerfile:
# Stage 1: Build dependencies
FROM python:3.12-slim as builder

WORKDIR /app

# Install build dependencies
RUN apt-get update && apt-get install -y --no-install-recommends \\
    build-essential \\
    && rm -rf /var/lib/apt/lists/*

# Create virtual environment
RUN python -m venv /opt/venv
ENV PATH="/opt/venv/bin:$PATH"

# Install Python dependencies
COPY requirements.txt .
RUN pip install --no-cache-dir --upgrade pip && \\
    pip install --no-cache-dir -r requirements.txt


# Stage 2: Production image
FROM python:3.12-slim as production

WORKDIR /app

# Create non-root user for security
RUN groupadd -r appgroup && useradd -r -g appgroup appuser

# Copy virtual environment from builder
COPY --from=builder /opt/venv /opt/venv
ENV PATH="/opt/venv/bin:$PATH"

# Copy application code
COPY --chown=appuser:appgroup ./app ./app

# Switch to non-root user
USER appuser

# Expose the application port
EXPOSE 8000

# Health check
HEALTHCHECK --interval=30s --timeout=10s --start-period=5s --retries=3 \\
    CMD python -c "import httpx; httpx.get('http://localhost:8000/health')" || exit 1

# Run with Uvicorn
CMD ["uvicorn", "app.main:app", "--host", "0.0.0.0", "--port", "8000"]
Key optimizations in this Dockerfile:
- Multi-stage build — Build dependencies are discarded, reducing image size by 50-70%.
- Virtual environment — Keeps dependencies isolated and makes the final COPY cleaner.
- Non-root user — Runs the app as
appuserinstead of root for security. - Health check — Enables automatic container restart if the app becomes unresponsive.
- Slim base image — Uses
python:3.12-sliminstead of the full image (100MB vs 1GB+).
Need help generating Dockerfiles? The Dockerfile Generator creates optimized Dockerfiles for Python, Node.js, Go, and more with best practices built in.
Step 3: Docker Compose Setup
Docker Compose orchestrates your containers and makes deployment reproducible. Create docker-compose.yml:
version: "3.9"

services:
  fastapi:
    build:
      context: .
      dockerfile: Dockerfile
    container_name: fastapi-app
    restart: unless-stopped
    ports:
      - "8000:8000"
    environment:
      - CORS_ORIGINS=https://yourdomain.com
      - LOG_LEVEL=info
    env_file:
      - .env
    healthcheck:
      test: ["CMD", "python", "-c", "import httpx; httpx.get('http://localhost:8000/health')"]
      interval: 30s
      timeout: 10s
      retries: 3
      start_period: 10s
    networks:
      - app-network

  # Optional: Add PostgreSQL database
  postgres:
    image: postgres:16-alpine
    container_name: fastapi-postgres
    restart: unless-stopped
    environment:
      POSTGRES_USER: \${POSTGRES_USER:-fastapi}
      POSTGRES_PASSWORD: \${POSTGRES_PASSWORD:?error}
      POSTGRES_DB: \${POSTGRES_DB:-fastapi_db}
    volumes:
      - postgres_data:/var/lib/postgresql/data
    healthcheck:
      test: ["CMD-SHELL", "pg_isready -U \${POSTGRES_USER:-fastapi}"]
      interval: 10s
      timeout: 5s
      retries: 5
    networks:
      - app-network

  # Optional: Add Redis for caching
  redis:
    image: redis:7-alpine
    container_name: fastapi-redis
    restart: unless-stopped
    command: redis-server --appendonly yes
    volumes:
      - redis_data:/data
    healthcheck:
      test: ["CMD", "redis-cli", "ping"]
      interval: 10s
      timeout: 5s
      retries: 5
    networks:
      - app-network

networks:
  app-network:
    driver: bridge

volumes:
  postgres_data:
  redis_data:
This compose file includes optional PostgreSQL and Redis services. Remove them if you don't need a database or cache.
Create a .env file for your environment variables (never commit this to Git):
# Database
POSTGRES_USER=fastapi
POSTGRES_PASSWORD=your-secure-password-here
POSTGRES_DB=fastapi_db
DATABASE_URL=postgresql://fastapi:your-secure-password-here@postgres:5432/fastapi_db

# Redis
REDIS_URL=redis://redis:6379/0

# Application
SECRET_KEY=your-secret-key-generate-with-openssl-rand-hex-32
CORS_ORIGINS=https://yourdomain.com,https://www.yourdomain.com
LOG_LEVEL=info
DEBUG=false
Looking for more Docker Compose examples? Check out our Python templates for pre-configured stacks including FastAPI with PostgreSQL, Django, and Flask deployments.
Step 4: Connect to Your VPS and Deploy
Now let's deploy to your VPS. First, SSH into your server:
ssh root@your-server-ip
Install Docker and Docker Compose if they're not already installed:
# Install Docker
curl -fsSL https://get.docker.com | sh

# Add your user to the docker group (optional, for non-root)
usermod -aG docker $USER

# Verify installation
docker --version
docker compose version
Create a directory for your application and transfer your files:
# On your VPS
mkdir -p /var/www/fastapi-app
cd /var/www/fastapi-app

# From your local machine (run this locally, not on VPS)
scp -r ./app ./requirements.txt ./Dockerfile ./docker-compose.yml ./.env root@your-server-ip:/var/www/fastapi-app/
Alternatively, if your code is on GitHub, clone the repository:
# On your VPS
cd /var/www/fastapi-app
git clone https://github.com/yourusername/your-repo.git .

# Create .env file (don't store secrets in git)
nano .env
Build and start your containers:
cd /var/www/fastapi-app

# Build the image
docker compose build

# Start in detached mode
docker compose up -d

# Check if containers are running
docker compose ps

# View logs
docker compose logs -f fastapi
Test that your API is running:
curl http://localhost:8000/health
# {"status":"healthy","version":"1.0.0"}

curl http://localhost:8000/docs
# Should return the OpenAPI documentation HTML
Step 5: Configure Nginx or Traefik Reverse Proxy
Running FastAPI directly on port 80/443 is not recommended. A reverse proxy handles SSL termination, load balancing, and security headers. Choose either Nginx or Traefik.
Option A: Nginx Reverse Proxy
Add Nginx to your docker-compose.yml:
  nginx:
    image: nginx:alpine
    container_name: nginx-proxy
    restart: unless-stopped
    ports:
      - "80:80"
      - "443:443"
    volumes:
      - ./nginx/nginx.conf:/etc/nginx/nginx.conf:ro
      - ./nginx/conf.d:/etc/nginx/conf.d:ro
      - ./certbot/conf:/etc/letsencrypt:ro
      - ./certbot/www:/var/www/certbot:ro
    depends_on:
      - fastapi
    networks:
      - app-network
Create nginx/conf.d/default.conf:
upstream fastapi_backend {
    server fastapi:8000;
    keepalive 32;
}

server {
    listen 80;
    server_name yourdomain.com www.yourdomain.com;

    location /.well-known/acme-challenge/ {
        root /var/www/certbot;
    }

    location / {
        return 301 https://$host$request_uri;
    }
}

server {
    listen 443 ssl http2;
    server_name yourdomain.com www.yourdomain.com;

    ssl_certificate /etc/letsencrypt/live/yourdomain.com/fullchain.pem;
    ssl_certificate_key /etc/letsencrypt/live/yourdomain.com/privkey.pem;

    # SSL settings
    ssl_protocols TLSv1.2 TLSv1.3;
    ssl_ciphers ECDHE-ECDSA-AES128-GCM-SHA256:ECDHE-RSA-AES128-GCM-SHA256;
    ssl_prefer_server_ciphers off;
    ssl_session_cache shared:SSL:10m;
    ssl_session_timeout 1d;

    # Security headers
    add_header X-Frame-Options "SAMEORIGIN" always;
    add_header X-Content-Type-Options "nosniff" always;
    add_header X-XSS-Protection "1; mode=block" always;
    add_header Referrer-Policy "strict-origin-when-cross-origin" always;

    # Gzip compression
    gzip on;
    gzip_vary on;
    gzip_types application/json text/plain application/javascript;

    location / {
        proxy_pass http://fastapi_backend;
        proxy_http_version 1.1;
        proxy_set_header Host $host;
        proxy_set_header X-Real-IP $remote_addr;
        proxy_set_header X-Forwarded-For $proxy_add_x_forwarded_for;
        proxy_set_header X-Forwarded-Proto $scheme;
        proxy_set_header Connection "";

        # WebSocket support
        proxy_set_header Upgrade $http_upgrade;
        proxy_set_header Connection "upgrade";

        # Timeouts
        proxy_connect_timeout 60s;
        proxy_send_timeout 60s;
        proxy_read_timeout 60s;
    }
}
Option B: Traefik Reverse Proxy
Traefik is a modern reverse proxy with automatic SSL and Docker integration. Update your docker-compose.yml:
{`version: "3.9"

services:
  traefik:
    image: traefik:v3.0
    container_name: traefik
    restart: unless-stopped
    command:
      - "--api.dashboard=true"
      - "--providers.docker=true"
      - "--providers.docker.exposedbydefault=false"
      - "--entrypoints.web.address=:80"
      - "--entrypoints.websecure.address=:443"
      - "--certificatesresolvers.letsencrypt.acme.httpchallenge=true"
      - "--certificatesresolvers.letsencrypt.acme.httpchallenge.entrypoint=web"
      - "[email protected]"
      - "--certificatesresolvers.letsencrypt.acme.storage=/letsencrypt/acme.json"
    ports:
      - "80:80"
      - "443:443"
    volumes:
      - "/var/run/docker.sock:/var/run/docker.sock:ro"
      - "./letsencrypt:/letsencrypt"
    networks:
      - app-network

  fastapi:
    build:
      context: .
      dockerfile: Dockerfile
    container_name: fastapi-app
    restart: unless-stopped
    labels:
      - "traefik.enable=true"
      - "traefik.http.routers.fastapi.rule=Host(\`yourdomain.com\`)"
      - "traefik.http.routers.fastapi.entrypoints=websecure"
      - "traefik.http.routers.fastapi.tls.certresolver=letsencrypt"
      - "traefik.http.services.fastapi.loadbalancer.server.port=8000"
      # HTTP to HTTPS redirect
      - "traefik.http.routers.fastapi-http.rule=Host(\`yourdomain.com\`)"
      - "traefik.http.routers.fastapi-http.entrypoints=web"
      - "traefik.http.routers.fastapi-http.middlewares=https-redirect"
      - "traefik.http.middlewares.https-redirect.redirectscheme.scheme=https"
    environment:
      - CORS_ORIGINS=https://yourdomain.com
    env_file:
      - .env
    networks:
      - app-network

networks:
  app-network:
    driver: bridge`}
Traefik automatically obtains and renews SSL certificates from Let's Encrypt. No manual certbot setup required.
Step 6: SSL Certificate Setup
If you chose Traefik, SSL is automatic. For Nginx, use Certbot:
# Add certbot to docker-compose.yml
  certbot:
    image: certbot/certbot
    container_name: certbot
    volumes:
      - ./certbot/conf:/etc/letsencrypt
      - ./certbot/www:/var/www/certbot
    entrypoint: "/bin/sh -c 'trap exit TERM; while :; do certbot renew; sleep 12h & wait $!; done;'"

# Initial certificate generation (run once)
docker compose run --rm certbot certonly --webroot -w /var/www/certbot \\
    --email [email protected] \\
    -d yourdomain.com -d www.yourdomain.com \\
    --agree-tos --no-eff-email
Certbot runs every 12 hours to check for renewals. Certificates are automatically renewed 30 days before expiration.
Step 7: Environment Variables Management
Secure environment variable handling is critical. Here are best practices for FastAPI deployments:
Use Pydantic Settings
Create app/config.py for type-safe configuration:
from pydantic_settings import BaseSettings
from functools import lru_cache

class Settings(BaseSettings):
    # Application
    app_name: str = "My FastAPI App"
    debug: bool = False
    log_level: str = "info"

    # Security
    secret_key: str
    cors_origins: list[str] = ["http://localhost:3000"]

    # Database
    database_url: str | None = None
    postgres_user: str = "fastapi"
    postgres_password: str = ""
    postgres_db: str = "fastapi_db"

    # Redis
    redis_url: str = "redis://localhost:6379/0"

    class Config:
        env_file = ".env"
        env_file_encoding = "utf-8"

@lru_cache
def get_settings() -> Settings:
    return Settings()

settings = get_settings()
Validate on Startup
Add validation in app/main.py to fail fast if required variables are missing:
from app.config import settings

@app.on_event("startup")
async def validate_settings():
    """Validate required settings on startup."""
    if not settings.secret_key or settings.secret_key == "changeme":
        raise ValueError("SECRET_KEY must be set to a secure value")
    if settings.debug and settings.log_level == "info":
        print("Warning: Running in debug mode with info logging")
Secrets on VPS
Never commit .env files to Git. On your VPS, create them manually or use a secrets manager:
# Generate a secure secret key
openssl rand -hex 32

# Create .env file with restricted permissions
touch .env
chmod 600 .env
nano .env
Step 8: Uvicorn Production Settings
The default Uvicorn settings are for development. For production, optimize worker count, timeouts, and logging.
Update the CMD in your Dockerfile:
# Production Uvicorn configuration
CMD ["uvicorn", "app.main:app", \\
    "--host", "0.0.0.0", \\
    "--port", "8000", \\
    "--workers", "4", \\
    "--loop", "uvloop", \\
    "--http", "httptools", \\
    "--timeout-keep-alive", "120", \\
    "--access-log", \\
    "--log-level", "info"]
Key production settings:
- --workers — Number of worker processes. Rule of thumb: 2-4x CPU cores. For a 2-core VPS, use 4 workers.
- --loop uvloop — High-performance async event loop (2-4x faster than default).
- --http httptools — Fast HTTP parser written in C.
- --timeout-keep-alive — Keep connections alive for 120 seconds to reduce TCP overhead.
- --access-log — Enable access logging for monitoring and debugging.
For more control, create a gunicorn.conf.py and use Gunicorn with Uvicorn workers:
# gunicorn.conf.py
import multiprocessing

# Worker configuration
workers = multiprocessing.cpu_count() * 2 + 1
worker_class = "uvicorn.workers.UvicornWorker"
worker_connections = 1000
timeout = 120
keepalive = 5

# Server socket
bind = "0.0.0.0:8000"
backlog = 2048

# Logging
accesslog = "-"
errorlog = "-"
loglevel = "info"
access_log_format = '%(h)s %(l)s %(u)s %(t)s "%(r)s" %(s)s %(b)s "%(f)s" "%(a)s" %(D)s'

# Process naming
proc_name = "fastapi-app"

# Server mechanics
daemon = False
pidfile = None
umask = 0
user = None
group = None
tmp_upload_dir = None
Update your Dockerfile to use Gunicorn:
# Add gunicorn to requirements.txt
# gunicorn==21.2.0

CMD ["gunicorn", "app.main:app", "-c", "gunicorn.conf.py"]
The Easy Way: Deploy FastAPI with Server Compass
All of the above steps — Dockerfiles, docker-compose, reverse proxy, SSL, environment variables — can take hours to set up correctly. And that's if everything works on the first try.
Server Compass eliminates this complexity. It's a desktop app that deploys Docker apps to your VPS with a visual interface. No SSH commands, no YAML editing, no manual certificate setup.

How It Works
- Connect your VPS — Add your server with SSH credentials. Server Compass automatically installs Docker if needed.
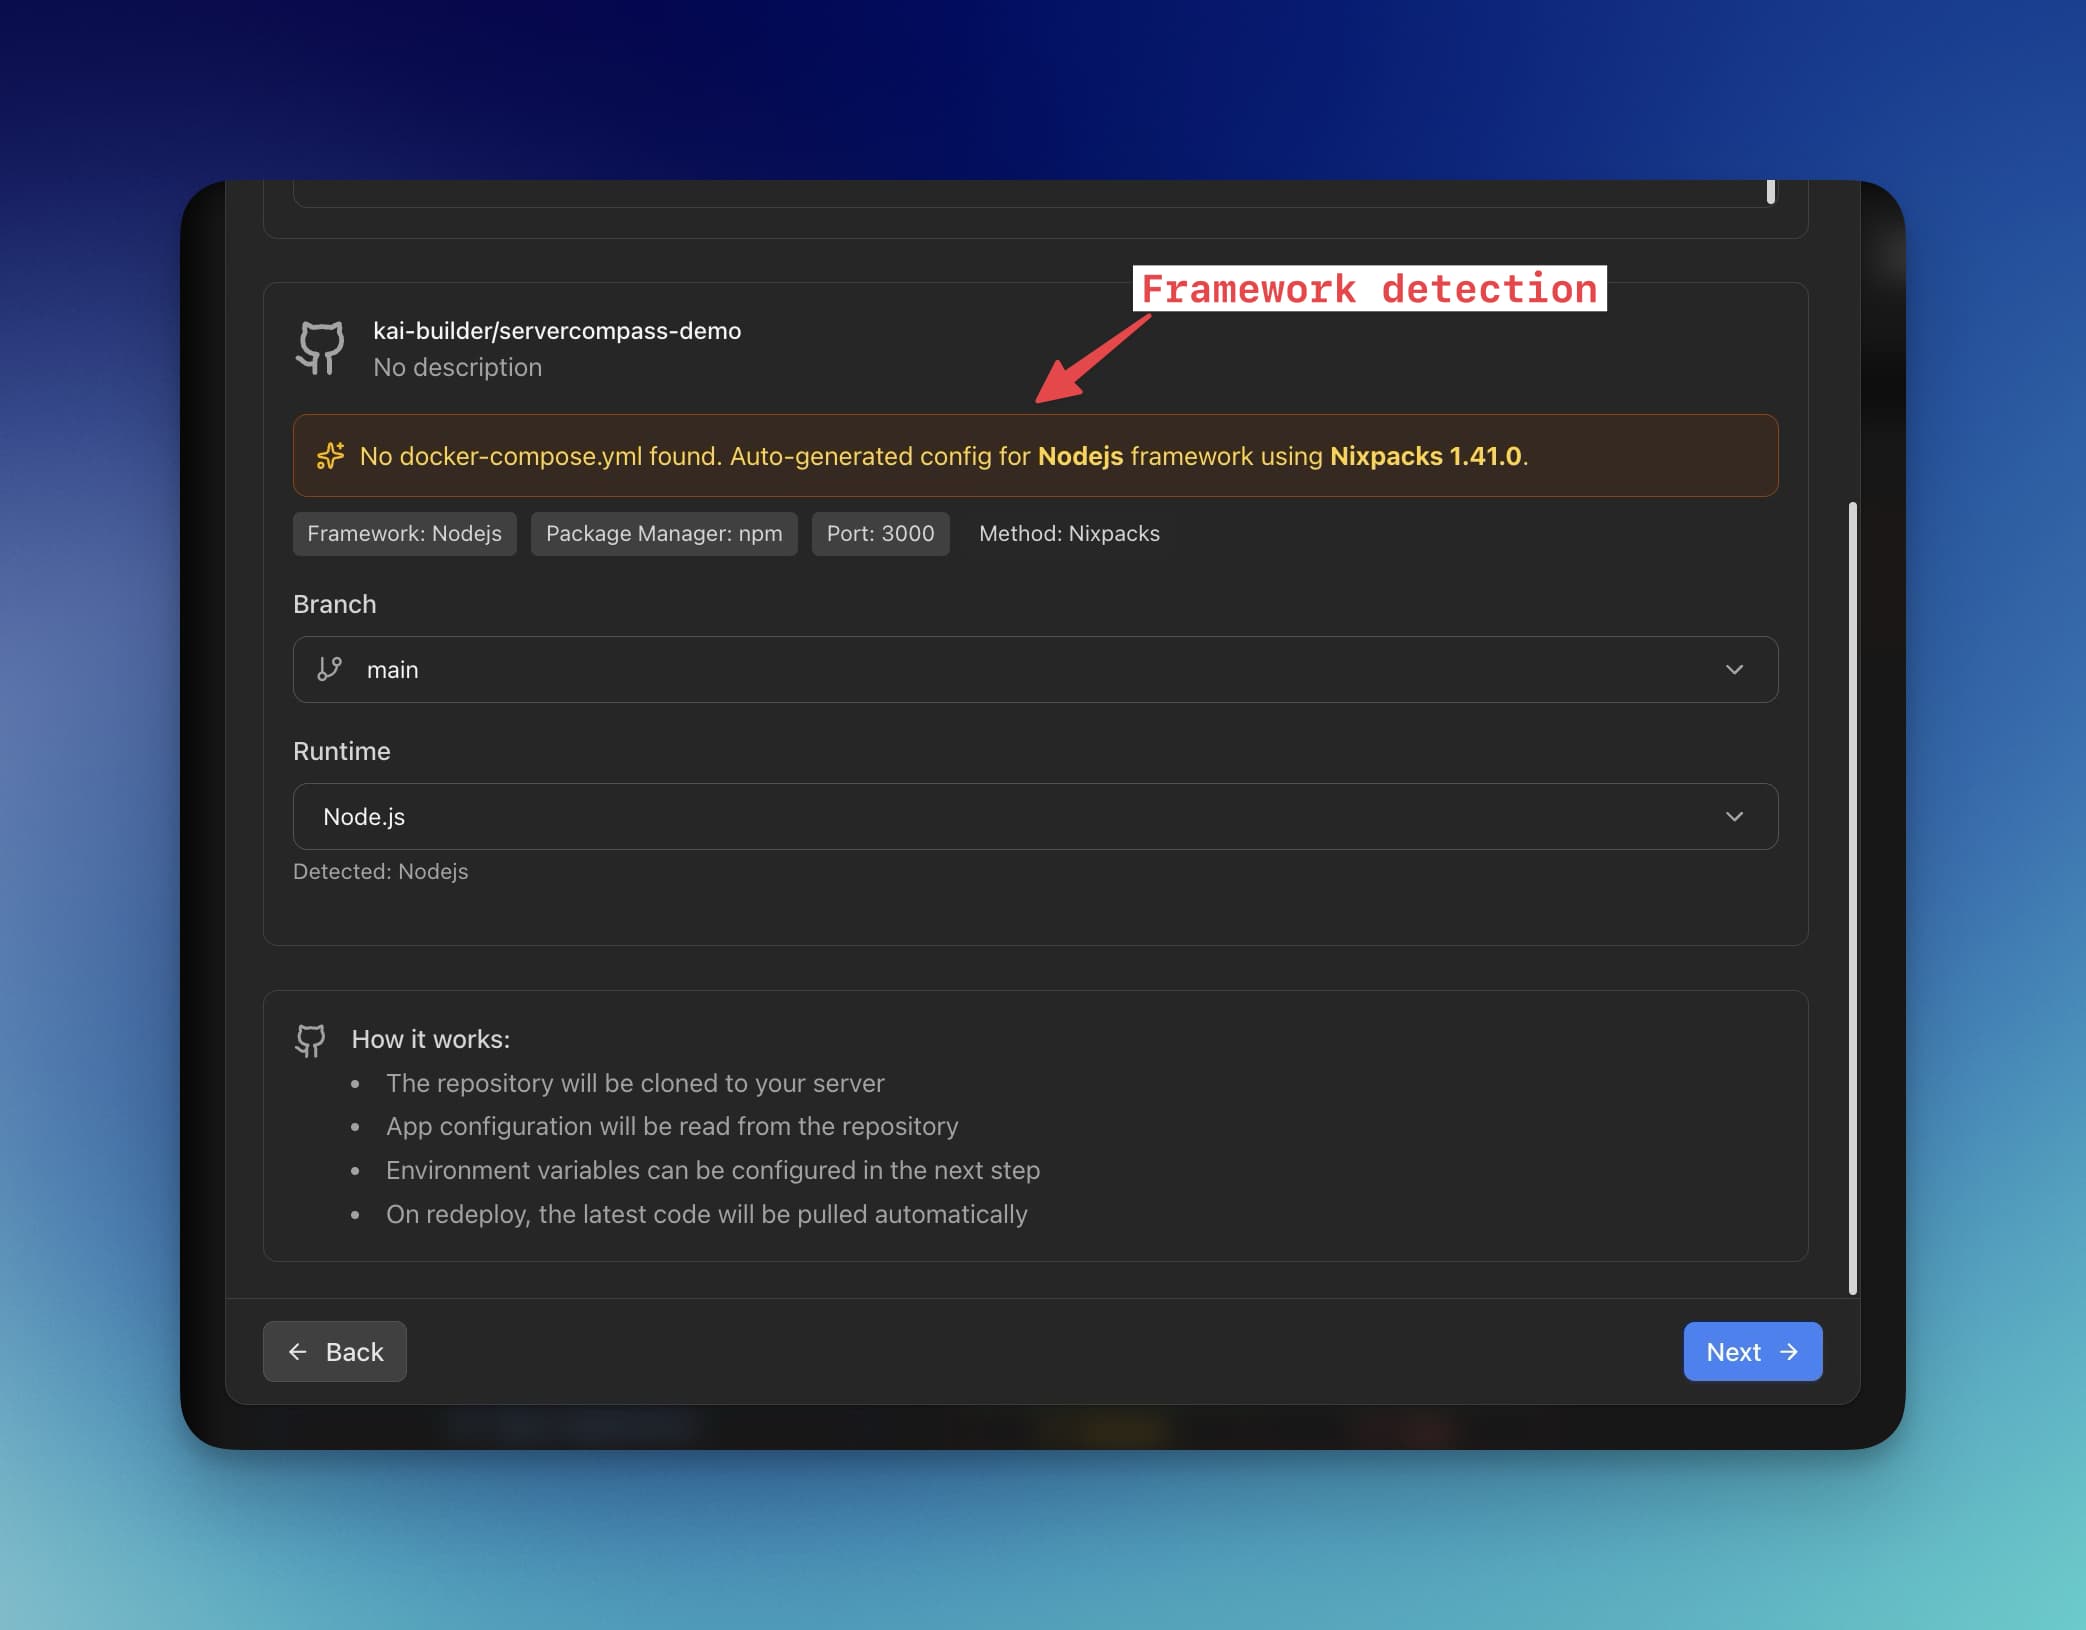
- Select your project — Point to your GitHub repository or local folder. Server Compass detects FastAPI and generates an optimized Dockerfile automatically.
- Configure deployment — Set environment variables, port mappings, and domain. The visual interface validates your config before deployment.
- Deploy — One click builds your image, pushes it to your VPS, and starts the container. Watch real-time logs as it happens.
- SSL included — Traefik is automatically configured with Let's Encrypt. Your FastAPI app is live with HTTPS in minutes.
Need the Dockerfile for reference? Use our Dockerfile Generator to create optimized configurations for FastAPI, Django, Flask, and other Python frameworks.
Looking for pre-built templates? Browse our Python templates including FastAPI with PostgreSQL, Redis, and Celery worker configurations.
Why Server Compass?
- Framework detection — Automatically identifies FastAPI, Django, Flask, and generates appropriate Dockerfiles.
- Build anywhere — Build on your VPS, locally, or with GitHub Actions for low-memory servers.
- Zero-downtime deploys — Blue-green deployments ensure your API never goes offline during updates.
- Environment vault — Store secrets encrypted locally. They're injected at deploy time without ever hitting disk on your VPS.
- One-time payment — $29 forever. No subscriptions, no per-server fees, no deploy limits.
Frequently Asked Questions
What VPS size do I need for FastAPI?
A 1GB RAM VPS handles most FastAPI applications comfortably. For builds, 2GB is recommended to avoid memory issues during pip install. Alternatively, build locally or with GitHub Actions and push the pre-built image to your VPS.
How many Uvicorn workers should I use?
The general formula is (2 x CPU cores) + 1. For a 2-core VPS, use 5 workers. For async-heavy workloads with lots of I/O (database queries, external APIs), you can increase this. Monitor memory usage — each worker consumes 50-200MB depending on your app.
Should I use Gunicorn or Uvicorn directly?
For most deployments, Uvicorn alone is fine. Use Gunicorn with Uvicorn workers if you need:
- Graceful restarts (Gunicorn handles worker lifecycle)
- More control over worker management
- Integration with monitoring tools that expect Gunicorn
How do I connect FastAPI to PostgreSQL in Docker?
Use the Docker service name as the hostname. If your PostgreSQL service is named postgres in docker-compose, the connection string is:
DATABASE_URL=postgresql://user:password@postgres:5432/dbname
Docker's internal DNS resolves postgres to the container's IP.
Does this setup support WebSockets?
Yes. Both Nginx and Traefik configurations in this guide include WebSocket support. Ensure your --timeout-keep-alive is set high enough for long-lived connections.
How do I scale FastAPI horizontally?
For horizontal scaling, run multiple FastAPI containers behind a load balancer:
# docker-compose.yml
services:
  fastapi:
    deploy:
      replicas: 3
    # ... rest of config
Use Traefik or Nginx as a load balancer to distribute requests. For stateful features (sessions, rate limiting), use Redis to share state between containers.
How do I monitor FastAPI in production?
Add Prometheus metrics with prometheus-fastapi-instrumentator:
from prometheus_fastapi_instrumentator import Instrumentator

Instrumentator().instrument(app).expose(app)
Pair with Grafana for dashboards. For logging, configure structured JSON logs and ship to Loki, Elasticsearch, or your preferred log aggregator.
Are there cold starts like serverless?
No. Your FastAPI container runs continuously on the VPS. There are no cold starts. Requests are handled immediately by the already-running Uvicorn workers.
Conclusion
Deploying FastAPI on a VPS gives you performance, control, and cost savings that managed platforms can't match. With Docker, you get reproducible deployments. With a proper reverse proxy and SSL, you get production-grade security.
The manual setup takes time to get right, but the payoff is a deployment pipeline you fully understand and control. For those who want the same result without the manual work, Server Compass provides a visual interface that handles Dockerfiles, compose files, SSL, and deployments automatically.
Ready to deploy your FastAPI app? Start with a Python template or generate a custom Dockerfile for your project.
Related in the StoicSoft network
If you're self-hosting on a VPS or working through a deployment guide like the one above, DeployToVPS is the StoicSoft network's handbook for VPS deployment recipes — docker-compose, nginx, traefik, and common app self-hosts.
If you're choosing a VPS provider or benchmarking real-world performance like the post above explores, StoicVPS is the StoicSoft network's independent tracker for VPS pricing, performance, and migration safety.
From across the StoicSoft network
Hand-curated reads on the same topic from sister sites in the StoicSoft family.
 1DevTool10 min read
Docker Desktop Alternatives for Developers in 2026
Developers want a Docker workflow that stays close to code, logs, and AI agents. This comparison breaks down Docker Desktop alternatives by performance, observability, and daily usability.
Read on 1devtool.com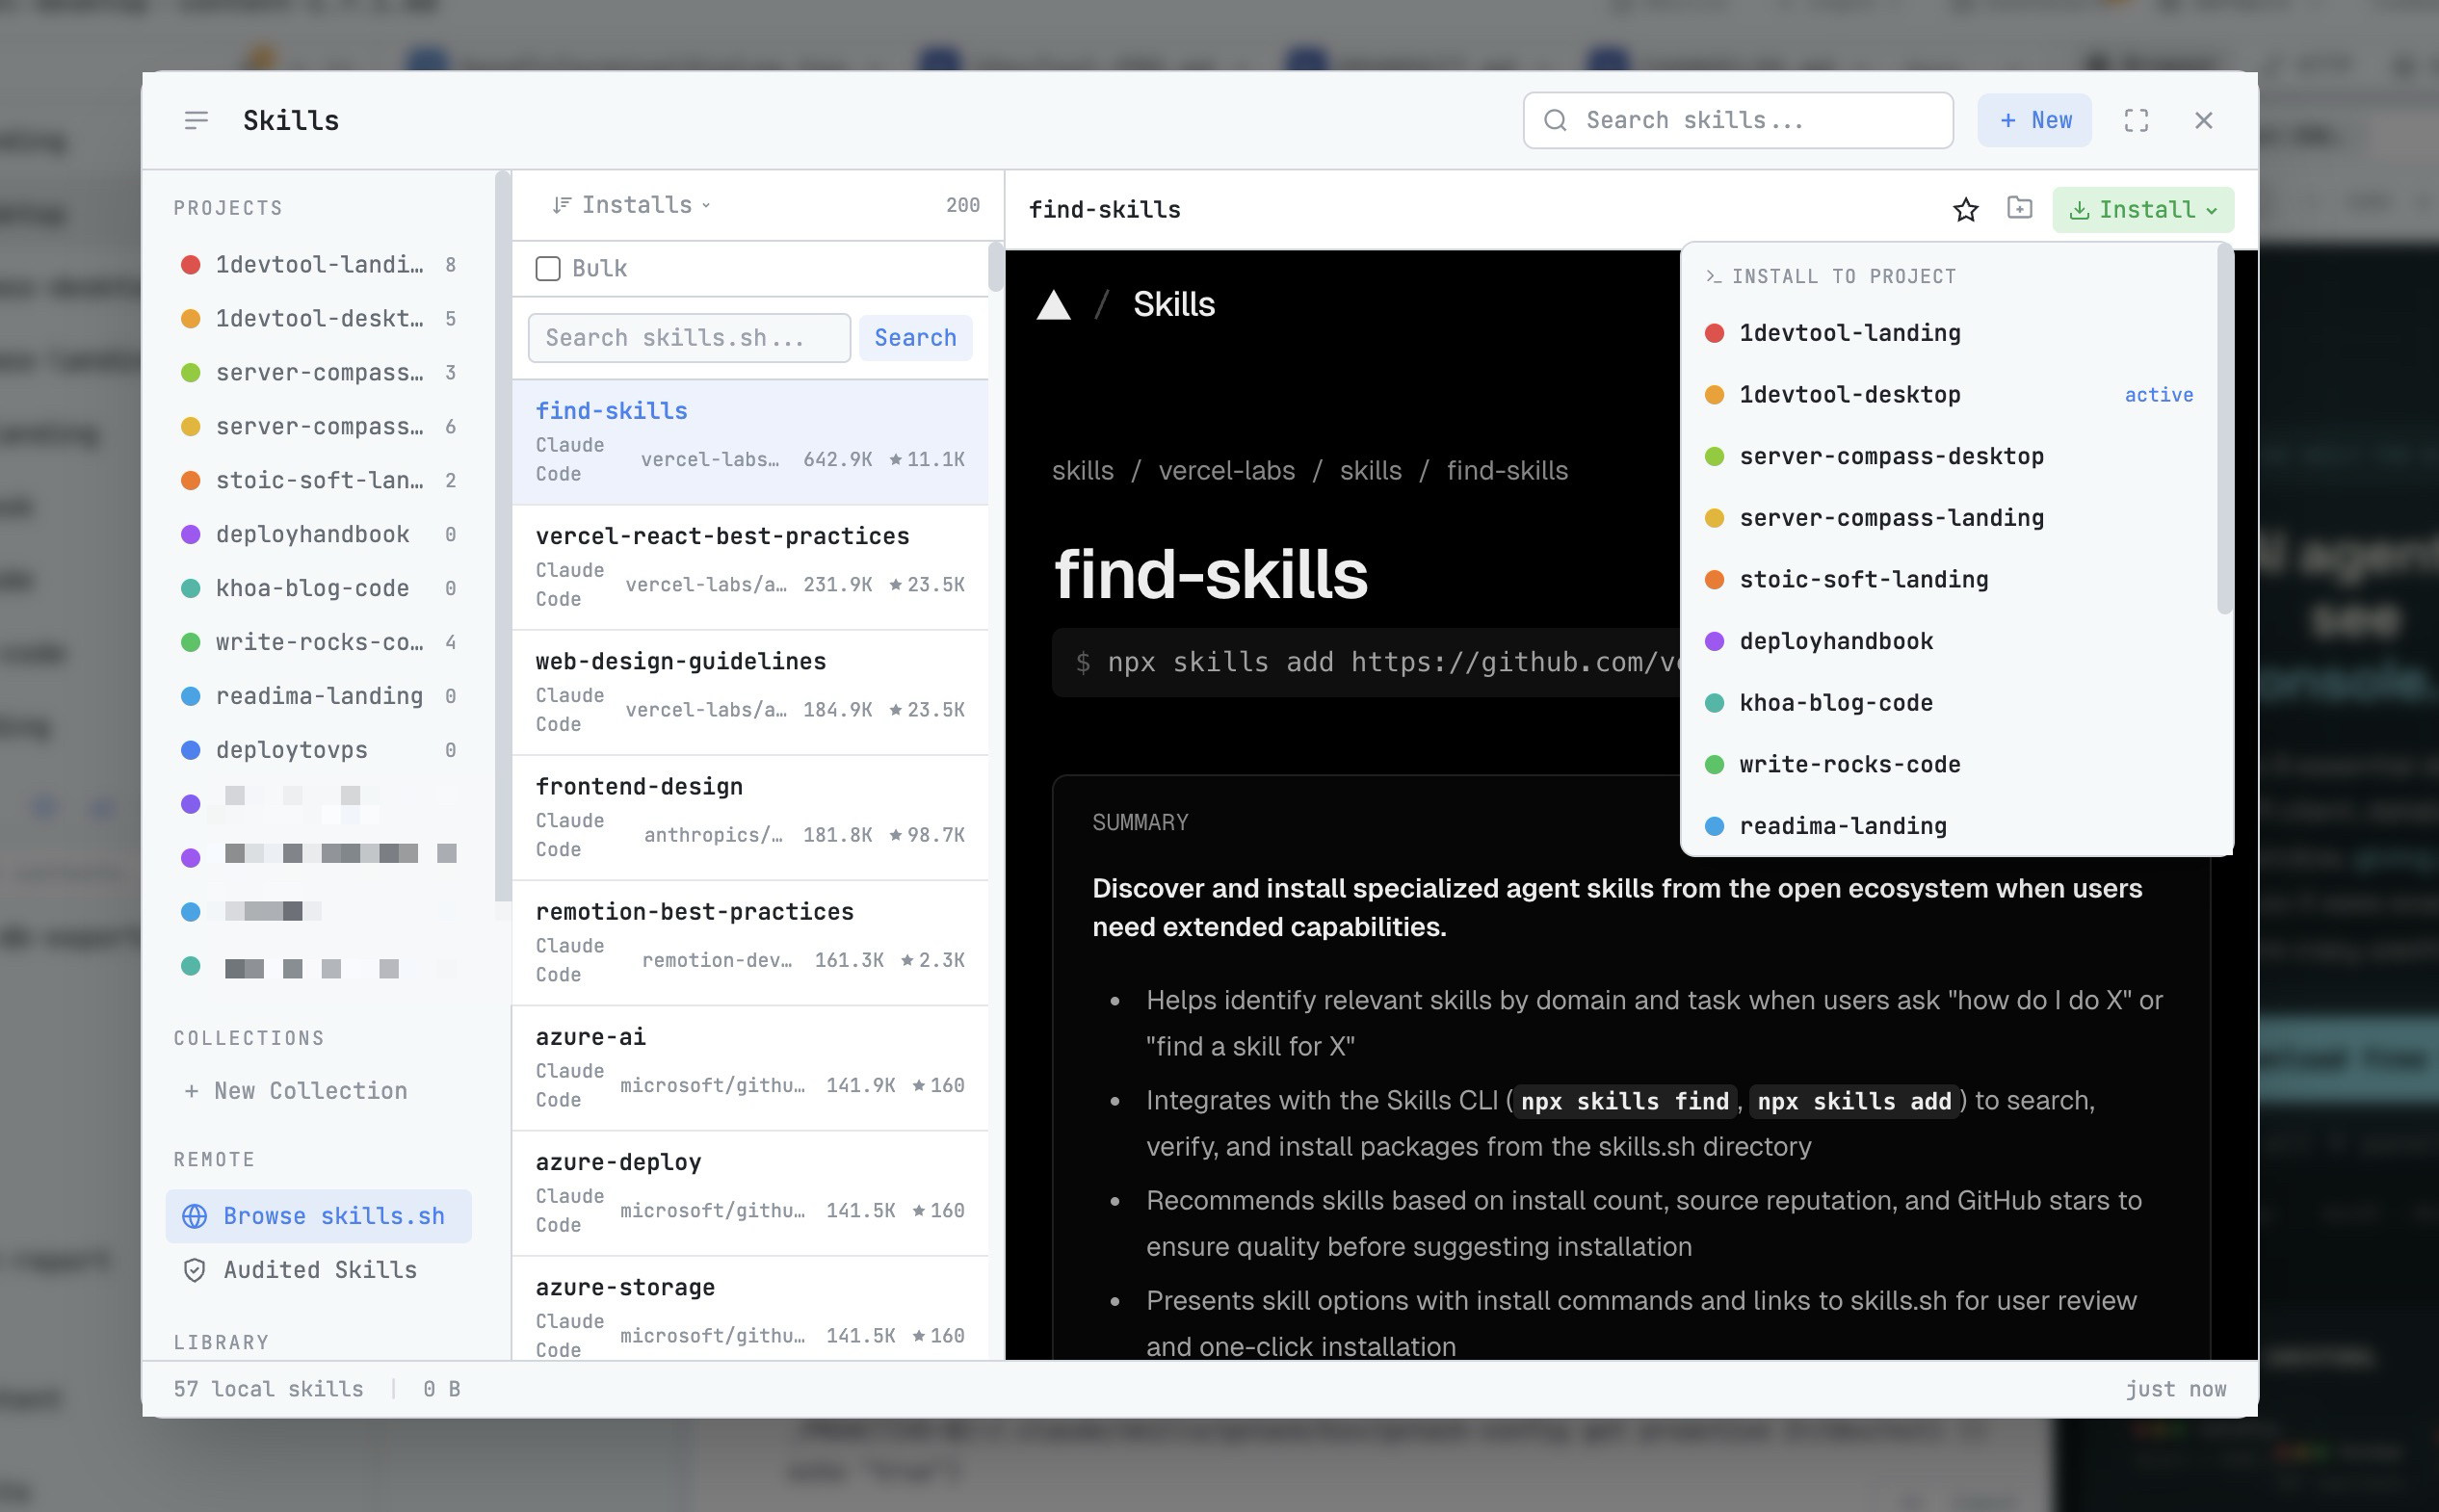 1DevTool8 min read
AI Skills Manager & Docker Deep Dive: Extend Your Agents, Monitor Your Containers
Browse, create, and install AI agent skills with built-in security scanning. Plus a redesigned Docker manager with live CPU, memory, and network monitoring for every container.
Read on 1devtool.com