March 6, 2026
Deploy WordPress on VPS with Docker (Self-Hosted Guide)
Learn how to deploy WordPress on your VPS using Docker and Docker Compose. This comprehensive guide covers MySQL setup, persistent volumes, SSL certificates, backups, and performance optimization for a production-ready self-hosted WordPress site.

WordPress powers over 40% of all websites on the internet. From personal blogs to enterprise sites, it remains the most popular content management system in the world. But if you've ever looked at your managed WordPress hosting bill and wondered if there's a better way — there is.
Self-hosting WordPress on a VPS gives you complete control over your site, dramatically lower costs, and performance that often exceeds expensive managed solutions. With Docker, the entire deployment becomes reproducible, portable, and easy to manage.
This guide walks you through every step to deploy WordPress on your VPS with Docker. By the end, you'll have a production-ready WordPress site with MySQL, persistent storage, SSL certificates, automated backups, and performance optimizations — all running on a $5–$10/month VPS.
Why Self-Host WordPress on a VPS?
Before diving into the technical setup, let's examine why self-hosting WordPress makes sense for developers, agencies, and site owners.
1. Dramatic Cost Savings
Managed WordPress hosting typically costs $20–$100/month for a single site. Premium hosts like WP Engine, Kinsta, or Flywheel charge even more for high-traffic sites. Compare that to a VPS:
- Hetzner: $4–$6/month for 2–4 GB RAM, 40–80 GB NVMe
- DigitalOcean: $6/month for 1 GB RAM, 25 GB SSD
- Vultr: $6/month for 1 GB RAM, 25 GB SSD
- Linode: $5/month for 1 GB RAM, 25 GB SSD
A single $6 VPS can host multiple WordPress sites, databases, and even other applications. That's 80–90% savings compared to managed hosting.
2. Full Control Over Your Stack
Managed hosts restrict what you can do. You can't install custom PHP extensions, modify server configurations, or run background processes. Self-hosting removes all limitations:
- Install any WordPress plugin without restrictions
- Use custom PHP versions and extensions (imagick, redis, opcache)
- Configure MySQL/MariaDB for your specific workload
- Run cron jobs, background workers, or other services
- Implement custom caching strategies (Redis, Varnish, Nginx FastCGI)
3. Better Performance
Shared managed hosting means your site competes with others for resources. A VPS gives you dedicated CPU, RAM, and NVMe storage. Combined with proper caching and optimization, self-hosted WordPress often outperforms expensive managed solutions.
4. Data Ownership and Privacy
Your content, user data, and database stay on servers you control. No third-party access, no data mining, no surprise terms of service changes. For GDPR compliance or sensitive content, this matters.
Prerequisites
Before starting, make sure you have:
- A VPS with at least 1 GB RAM (2 GB recommended) running Ubuntu 22.04 or Debian 12. Providers like Hetzner, DigitalOcean, Vultr, or Linode all work well.
- A domain name pointed to your VPS IP address (A record)
- SSH access to your server (root or sudo user)
- Basic terminal knowledge (or use Server Compass to skip the command line entirely)
Step 1: Set Up Your VPS
Start with a fresh VPS installation. After provisioning your server, connect via SSH:
ssh root@your-server-ip
Update the system packages:
apt update && apt upgrade -y
For security, create a non-root user and configure SSH key authentication. You should also set up a firewall (UFW) to allow only ports 22 (SSH), 80 (HTTP), and 443 (HTTPS):
# Create a new user
adduser deploy
usermod -aG sudo deploy

# Configure UFW firewall
ufw allow OpenSSH
ufw allow 80/tcp
ufw allow 443/tcp
ufw enable
Step 2: Install Docker and Docker Compose
Docker simplifies WordPress deployment by packaging the application, PHP, and web server into a single container. Install Docker using the official repository:
# Install dependencies
apt install -y ca-certificates curl gnupg

# Add Docker's official GPG key
install -m 0755 -d /etc/apt/keyrings
curl -fsSL https://download.docker.com/linux/ubuntu/gpg | \\
  gpg --dearmor -o /etc/apt/keyrings/docker.gpg
chmod a+r /etc/apt/keyrings/docker.gpg

# Add the repository
echo \\
  "deb [arch=$(dpkg --print-architecture) signed-by=/etc/apt/keyrings/docker.gpg] \\
  https://download.docker.com/linux/ubuntu \\
  $(. /etc/os-release && echo "$VERSION_CODENAME") stable" | \\
  tee /etc/apt/sources.list.d/docker.list > /dev/null

# Install Docker
apt update
apt install -y docker-ce docker-ce-cli containerd.io docker-compose-plugin

# Verify installation
docker --version
docker compose version
Add your user to the docker group to run commands without sudo:
usermod -aG docker deploy
Step 3: Create WordPress Docker Compose Stack
Create a directory for your WordPress project and the Docker Compose configuration:
mkdir -p /opt/wordpress
cd /opt/wordpress
Create the docker-compose.yml file:
version: '3.8'

services:
  wordpress:
    image: wordpress:6.4-php8.2-apache
    container_name: wordpress
    restart: unless-stopped
    depends_on:
      - mysql
    ports:
      - "8080:80"
    environment:
      WORDPRESS_DB_HOST: mysql:3306
      WORDPRESS_DB_NAME: \$
      WORDPRESS_DB_USER: \$
      WORDPRESS_DB_PASSWORD: \$
      WORDPRESS_TABLE_PREFIX: wp_
    volumes:
      - wordpress_data:/var/www/html
      - ./uploads.ini:/usr/local/etc/php/conf.d/uploads.ini
    networks:
      - wordpress_network

  mysql:
    image: mysql:8.0
    container_name: wordpress_mysql
    restart: unless-stopped
    environment:
      MYSQL_DATABASE: \$
      MYSQL_USER: \$
      MYSQL_PASSWORD: \$
      MYSQL_ROOT_PASSWORD: \$
    volumes:
      - mysql_data:/var/lib/mysql
      - ./mysql.cnf:/etc/mysql/conf.d/custom.cnf
    networks:
      - wordpress_network
    command: --default-authentication-plugin=mysql_native_password

volumes:
  wordpress_data:
  mysql_data:

networks:
  wordpress_network:
    driver: bridge
This configuration defines two services: WordPress (with Apache and PHP 8.2) and MySQL 8.0. The depends_on ensures MySQL starts before WordPress. Both services use named volumes for persistent storage and connect through an isolated Docker network.
Step 4: Configure MySQL/MariaDB
Create a .env file in the same directory to store your database credentials securely:
# /opt/wordpress/.env
MYSQL_DATABASE=wordpress
MYSQL_USER=wpuser
MYSQL_PASSWORD=your_secure_password_here
MYSQL_ROOT_PASSWORD=your_root_password_here
Important: Use strong, randomly generated passwords. You can generate them with:
openssl rand -base64 24
Create a custom MySQL configuration file for better performance:
# /opt/wordpress/mysql.cnf
[mysqld]
# InnoDB settings
innodb_buffer_pool_size = 256M
innodb_log_file_size = 64M
innodb_flush_log_at_trx_commit = 2

# Query cache (deprecated in MySQL 8, but useful for MariaDB)
# query_cache_type = 1
# query_cache_size = 32M

# Connection settings
max_connections = 100
wait_timeout = 600

# Logging (disable for production)
slow_query_log = 0
If you prefer MariaDB over MySQL, simply change the image in your Docker Compose file:
mysql:
  image: mariadb:10.11
  # ... rest of configuration
MariaDB is a drop-in replacement for MySQL with better performance in many scenarios. Both work identically with WordPress.
Step 5: Set Up Persistent Volumes
Docker volumes ensure your WordPress files and database survive container restarts, updates, and server reboots. The configuration above already defines named volumes:
wordpress_data— Stores WordPress core files, themes, plugins, and uploadsmysql_data— Stores the entire MySQL database
To increase PHP upload limits for media files, create the uploads.ini file:
# /opt/wordpress/uploads.ini
file_uploads = On
memory_limit = 256M
upload_max_filesize = 64M
post_max_size = 64M
max_execution_time = 300
You can verify volume locations with:
docker volume inspect wordpress_data
By default, volumes are stored in /var/lib/docker/volumes/. For production, you might want to back up these directories regularly.
Step 6: Configure Domain and SSL
For production WordPress, you need SSL/TLS (HTTPS). We'll use Traefik as a reverse proxy with automatic Let's Encrypt certificates. Update your docker-compose.yml:
{`version: '3.8'

services:
  traefik:
    image: traefik:v2.10
    container_name: traefik
    restart: unless-stopped
    command:
      - "--api.dashboard=true"
      - "--providers.docker=true"
      - "--providers.docker.exposedbydefault=false"
      - "--entrypoints.web.address=:80"
      - "--entrypoints.websecure.address=:443"
      - "--certificatesresolvers.letsencrypt.acme.httpchallenge=true"
      - "--certificatesresolvers.letsencrypt.acme.httpchallenge.entrypoint=web"
      - "--certificatesresolvers.letsencrypt.acme.email=your-email@example.com"
      - "--certificatesresolvers.letsencrypt.acme.storage=/letsencrypt/acme.json"
      - "--entrypoints.web.http.redirections.entrypoint.to=websecure"
      - "--entrypoints.web.http.redirections.entrypoint.scheme=https"
    ports:
      - "80:80"
      - "443:443"
    volumes:
      - /var/run/docker.sock:/var/run/docker.sock:ro
      - letsencrypt:/letsencrypt
    networks:
      - wordpress_network

  wordpress:
    image: wordpress:6.4-php8.2-apache
    container_name: wordpress
    restart: unless-stopped
    depends_on:
      - mysql
    environment:
      WORDPRESS_DB_HOST: mysql:3306
      WORDPRESS_DB_NAME: \$
      WORDPRESS_DB_USER: \$
      WORDPRESS_DB_PASSWORD: \$
      WORDPRESS_TABLE_PREFIX: wp_
    volumes:
      - wordpress_data:/var/www/html
      - ./uploads.ini:/usr/local/etc/php/conf.d/uploads.ini
    networks:
      - wordpress_network
    labels:
      - "traefik.enable=true"
      - "traefik.http.routers.wordpress.rule=Host(\`yourdomain.com\`)"
      - "traefik.http.routers.wordpress.entrypoints=websecure"
      - "traefik.http.routers.wordpress.tls.certresolver=letsencrypt"
      - "traefik.http.services.wordpress.loadbalancer.server.port=80"

  mysql:
    image: mysql:8.0
    container_name: wordpress_mysql
    restart: unless-stopped
    environment:
      MYSQL_DATABASE: \$
      MYSQL_USER: \$
      MYSQL_PASSWORD: \$
      MYSQL_ROOT_PASSWORD: \$
    volumes:
      - mysql_data:/var/lib/mysql
      - ./mysql.cnf:/etc/mysql/conf.d/custom.cnf
    networks:
      - wordpress_network
    command: --default-authentication-plugin=mysql_native_password

volumes:
  wordpress_data:
  mysql_data:
  letsencrypt:

networks:
  wordpress_network:
    driver: bridge`}
Replace yourdomain.com with your actual domain and update the email address for Let's Encrypt notifications. Traefik will automatically obtain and renew SSL certificates.
Now start the stack:
cd /opt/wordpress
docker compose up -d
Verify all containers are running:
docker compose ps
You should see three containers (traefik, wordpress, wordpress_mysql) all showing "running" status.
Step 7: WordPress Initial Setup
Navigate to https://yourdomain.com in your browser. You'll see the WordPress installation wizard:
- Select your language
- Enter your site title, admin username, password, and email
- Click "Install WordPress"
After installation, log in to the WordPress admin at https://yourdomain.com/wp-admin.
Post-installation security steps:
- Delete the default "Hello World" post and sample page
- Update permalinks to a SEO-friendly structure (Settings → Permalinks → Post name)
- Install a security plugin like Wordfence or Solid Security
- Disable XML-RPC if you don't need it (reduces attack surface)
- Enable two-factor authentication for admin accounts
Step 8: Automated Backups with Docker
A WordPress site without backups is a disaster waiting to happen. Create a backup script that exports both the database and WordPress files:
#!/bin/bash
# /opt/wordpress/backup.sh

# Configuration
BACKUP_DIR="/opt/backups/wordpress"
DATE=$(date +%Y-%m-%d_%H-%M-%S)
RETENTION_DAYS=7

# Create backup directory
mkdir -p $BACKUP_DIR

# Backup MySQL database
docker exec wordpress_mysql mysqldump -u root -p\$ \\
  --all-databases --single-transaction > $BACKUP_DIR/db_$DATE.sql

# Backup WordPress files
docker run --rm -v wordpress_data:/data -v $BACKUP_DIR:/backup \\
  alpine tar czf /backup/files_$DATE.tar.gz -C /data .

# Compress database dump
gzip $BACKUP_DIR/db_$DATE.sql

# Remove backups older than retention period
find $BACKUP_DIR -name "*.sql.gz" -mtime +$RETENTION_DAYS -delete
find $BACKUP_DIR -name "*.tar.gz" -mtime +$RETENTION_DAYS -delete

echo "Backup completed: $DATE"
Make the script executable and add it to cron for daily backups:
chmod +x /opt/wordpress/backup.sh

# Add to crontab (runs daily at 3 AM)
crontab -e
# Add this line:
0 3 * * * /opt/wordpress/backup.sh >> /var/log/wordpress-backup.log 2>&1
For off-site backups, you can sync the backup directory to S3, Backblaze B2, or any S3-compatible storage using rclone or the AWS CLI.
Step 9: Performance Optimization
A self-hosted WordPress site can be incredibly fast with the right optimizations.
Enable Redis Object Caching
Add Redis to your Docker Compose stack for persistent object caching:
  redis:
    image: redis:7-alpine
    container_name: wordpress_redis
    restart: unless-stopped
    networks:
      - wordpress_network
    volumes:
      - redis_data:/data
Add redis_data: to your volumes section, then install the Redis Object Cache plugin in WordPress and configure it to connect to wordpress_redis:6379.
Enable PHP OPcache
OPcache dramatically improves PHP performance by caching compiled scripts. Add to your uploads.ini:
opcache.enable=1
opcache.memory_consumption=128
opcache.interned_strings_buffer=8
opcache.max_accelerated_files=10000
opcache.revalidate_freq=60
opcache.fast_shutdown=1
Robots.txt for SEO
Don't forget to configure your robots.txt file — it controls which pages search engines and AI crawlers can access. WordPress generates a basic one, but for fine-grained control use our free robots.txt generator to block admin pages, manage crawl rates, and protect sensitive paths.
CDN Integration
Use Cloudflare (free tier) as a CDN and DDoS protection layer. Point your domain's nameservers to Cloudflare, and they'll cache static assets globally. Plugins like WP Super Cache or W3 Total Cache can further optimize caching.
Image Optimization
Install Imagify, ShortPixel, or Smush to automatically compress uploaded images. Consider serving images in WebP format for modern browsers.
Cost Comparison: Managed WordPress vs VPS
Let's compare the real costs of running WordPress:
Hosting Type
Monthly Cost
Sites Included
Storage
Bandwidth
WP Engine (Startup)
$20
1 site
10 GB
50 GB
Kinsta (Starter)
$30
1 site
10 GB
25k visits
Flywheel (Tiny)
$15
1 site
5 GB
20 GB
SiteGround (StartUp)
$15
1 site
10 GB
~10k visits
Hetzner VPS (CX21)
$5
Unlimited
40 GB NVMe
20 TB
DigitalOcean Droplet
$6
Unlimited
25 GB SSD
1 TB
The difference becomes even more dramatic when hosting multiple sites. A single $6 VPS can run 5–10 low-traffic WordPress sites easily. Try doing that on managed hosting without spending $100+/month.
Annual savings with self-hosting:
- vs WP Engine: $180/year saved
- vs Kinsta: $288/year saved
- vs Flywheel: $108/year saved
Multiply by the number of sites you manage, and the savings become substantial.
One-Click Deploy with Server Compass
All of the above steps work perfectly, but they require SSH access, terminal commands, and manual configuration. If you prefer a visual interface, Server Compass can deploy WordPress to your VPS in about 60 seconds.
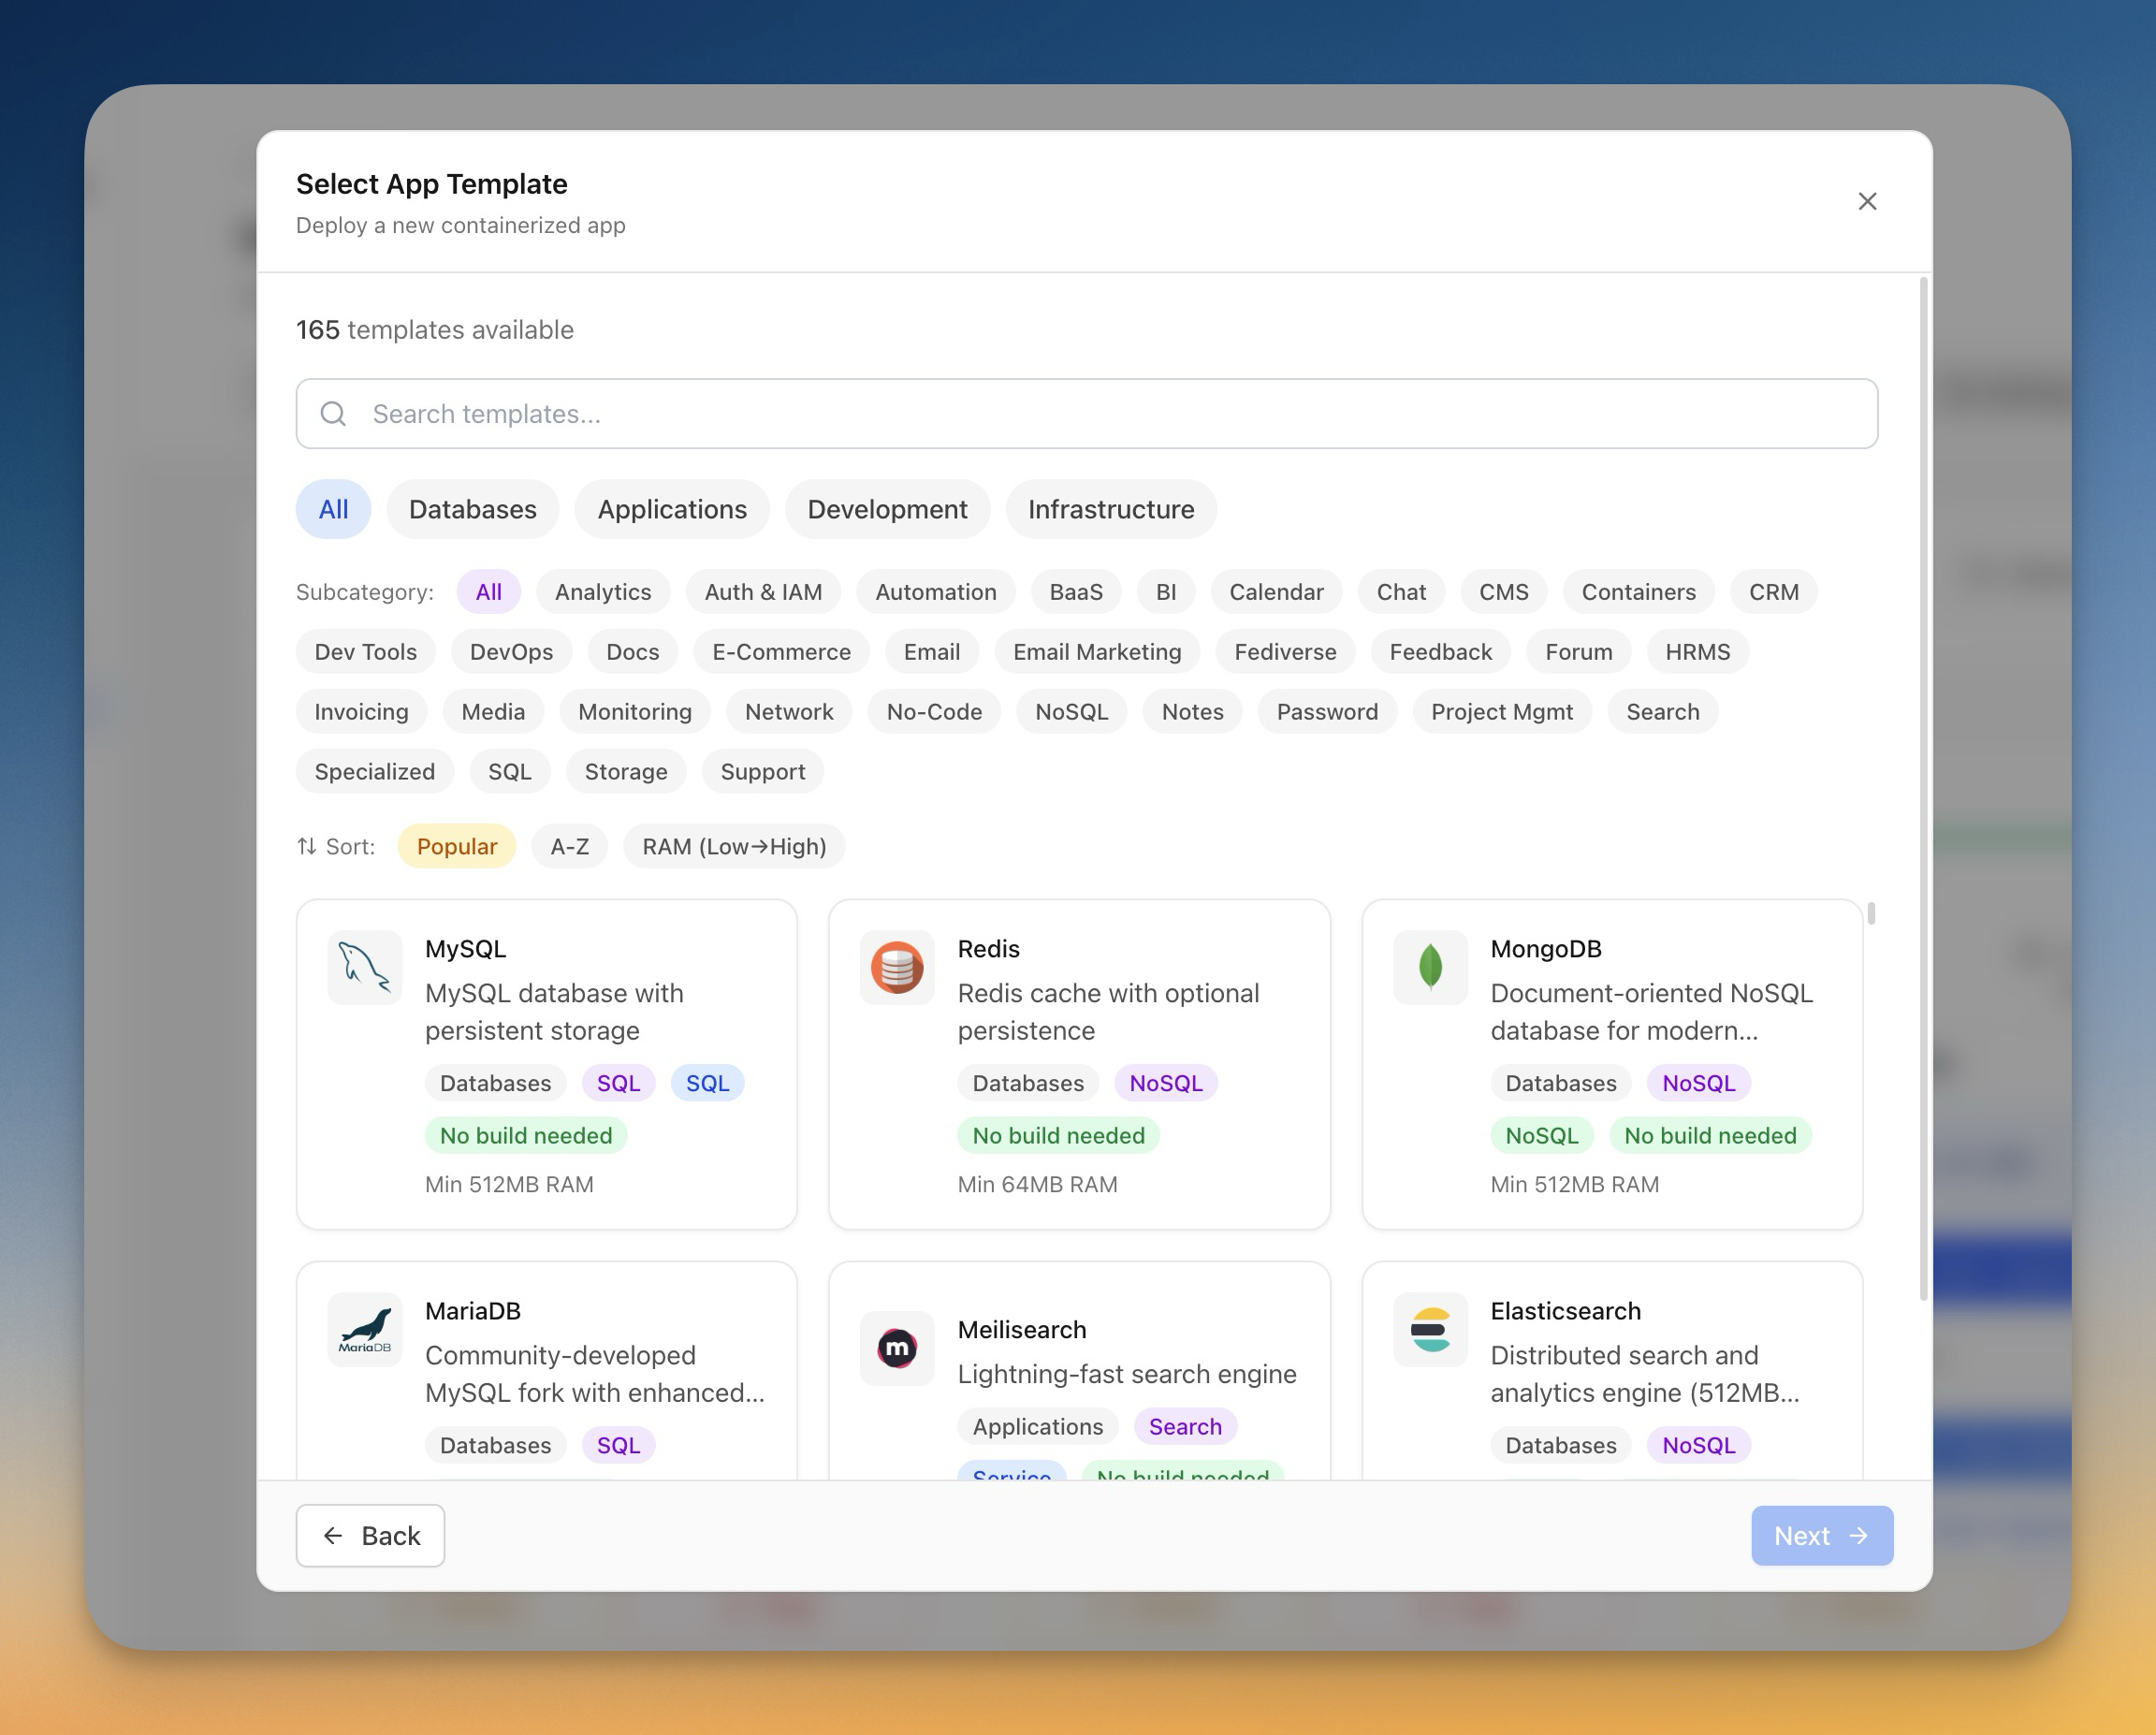
Here's how it works:
- Connect your VPS — Add your server with SSH credentials in Server Compass
- Open the template gallery — Click New App → From Template and search for WordPress
- Configure and deploy — Set your database credentials, domain, and click Deploy
Server Compass handles Docker installation, MySQL setup, Traefik configuration, SSL certificates, and persistent volumes automatically. You get the same production-ready setup described in this guide without writing a single terminal command.
The template gallery includes 100+ pre-configured stacks including MySQL, MariaDB, Traefik, and Redis — everything you need for a complete WordPress stack.
Additional features that help with WordPress management:
- Container status monitoring — See real-time CPU, memory, and health status
- Container logs — Debug issues without SSH
- Automated backups — Schedule backups to S3-compatible storage
- Environment vault — Securely store database passwords
- Firewall management — Configure UFW rules visually
Frequently Asked Questions
What VPS size do I need for WordPress?
For a single low-to-medium traffic site (under 50k monthly visitors), 1 GB RAM is sufficient. For multiple sites or higher traffic, choose 2–4 GB RAM. The Hetzner CX21 (2 vCPU, 4 GB RAM, $5.50/month) handles most WordPress workloads comfortably.
Should I use MySQL or MariaDB?
Both work identically with WordPress. MariaDB often performs slightly better and is fully open-source. MySQL 8.0 has some enterprise features. For most WordPress sites, the difference is negligible. Use whichever you're more comfortable with.
How do I update WordPress in Docker?
WordPress core updates work through the admin dashboard as usual. To update the Docker image (for PHP/Apache updates), pull the new image and recreate the container:
docker compose pull wordpress
docker compose up -d --force-recreate wordpress
Your WordPress files and database are stored in volumes, so they persist across container updates.
Can I run WordPress Multisite with this setup?
Yes. Enable multisite in wp-config.php after installation. For subdomain multisite, you'll need wildcard SSL certificates (Traefik supports this via DNS challenge with supported providers).
How do I send emails from WordPress?
Docker containers don't include a mail server. Use an SMTP plugin (WP Mail SMTP, FluentSMTP) with a transactional email service like Mailgun, SendGrid, Amazon SES, or Brevo. These services offer free tiers for low-volume sending.
Is self-hosted WordPress secure?
Self-hosted WordPress is as secure as you make it. Follow best practices: keep WordPress, plugins, and themes updated; use strong passwords; install a security plugin; configure your firewall properly; and enable fail2ban for SSH protection. Server Compass includes a security audit feature that checks for common misconfigurations.
How do I migrate an existing WordPress site?
Use a migration plugin like All-in-One WP Migration, Duplicator, or UpdraftPlus. Export your site from the old host, deploy a fresh WordPress on your VPS, and import the backup. Update your domain's DNS to point to the new server after verifying everything works.
How do I set up a staging environment?
Create a second WordPress stack with a different container name and subdomain (e.g., staging.yourdomain.com). Use plugins like WP Staging to sync production to staging when needed.
Conclusion
Deploying WordPress on a VPS with Docker gives you the best of both worlds: the flexibility and cost savings of self-hosting with the simplicity of containerized deployment. Your entire stack is defined in a single docker-compose.yml file that's easy to version control, replicate, and migrate.
Whether you follow the manual steps in this guide or use Server Compass for one-click deployment, you'll end up with a production-ready WordPress site that costs 80% less than managed hosting while giving you complete control over your infrastructure.
Ready to deploy WordPress on your VPS? Try Server Compass — $29 one-time, no subscription, no usage fees. Or bookmark this guide and follow the manual steps whenever you're ready.
Related in the StoicSoft network
If you're choosing a VPS provider or benchmarking real-world performance like the post above explores, StoicVPS is the StoicSoft network's independent tracker for VPS pricing, performance, and migration safety.
If you're self-hosting on a VPS or working through a deployment guide like the one above, DeployToVPS is the StoicSoft network's handbook for VPS deployment recipes — docker-compose, nginx, traefik, and common app self-hosts.
From across the StoicSoft network
Hand-curated reads on the same topic from sister sites in the StoicSoft family.
 1DevTool11 min read
Self-Hosted AI Coding Assistant Workflow: Practical Setup Guide
A self-hosted AI coding workflow needs more than model hosting. You need environment control, connector governance, and reproducible operations. This guide covers the practical stack.
Read on 1devtool.com 1DevTool10 min read
Docker Desktop Alternatives for Developers in 2026
Developers want a Docker workflow that stays close to code, logs, and AI agents. This comparison breaks down Docker Desktop alternatives by performance, observability, and daily usability.
Read on 1devtool.com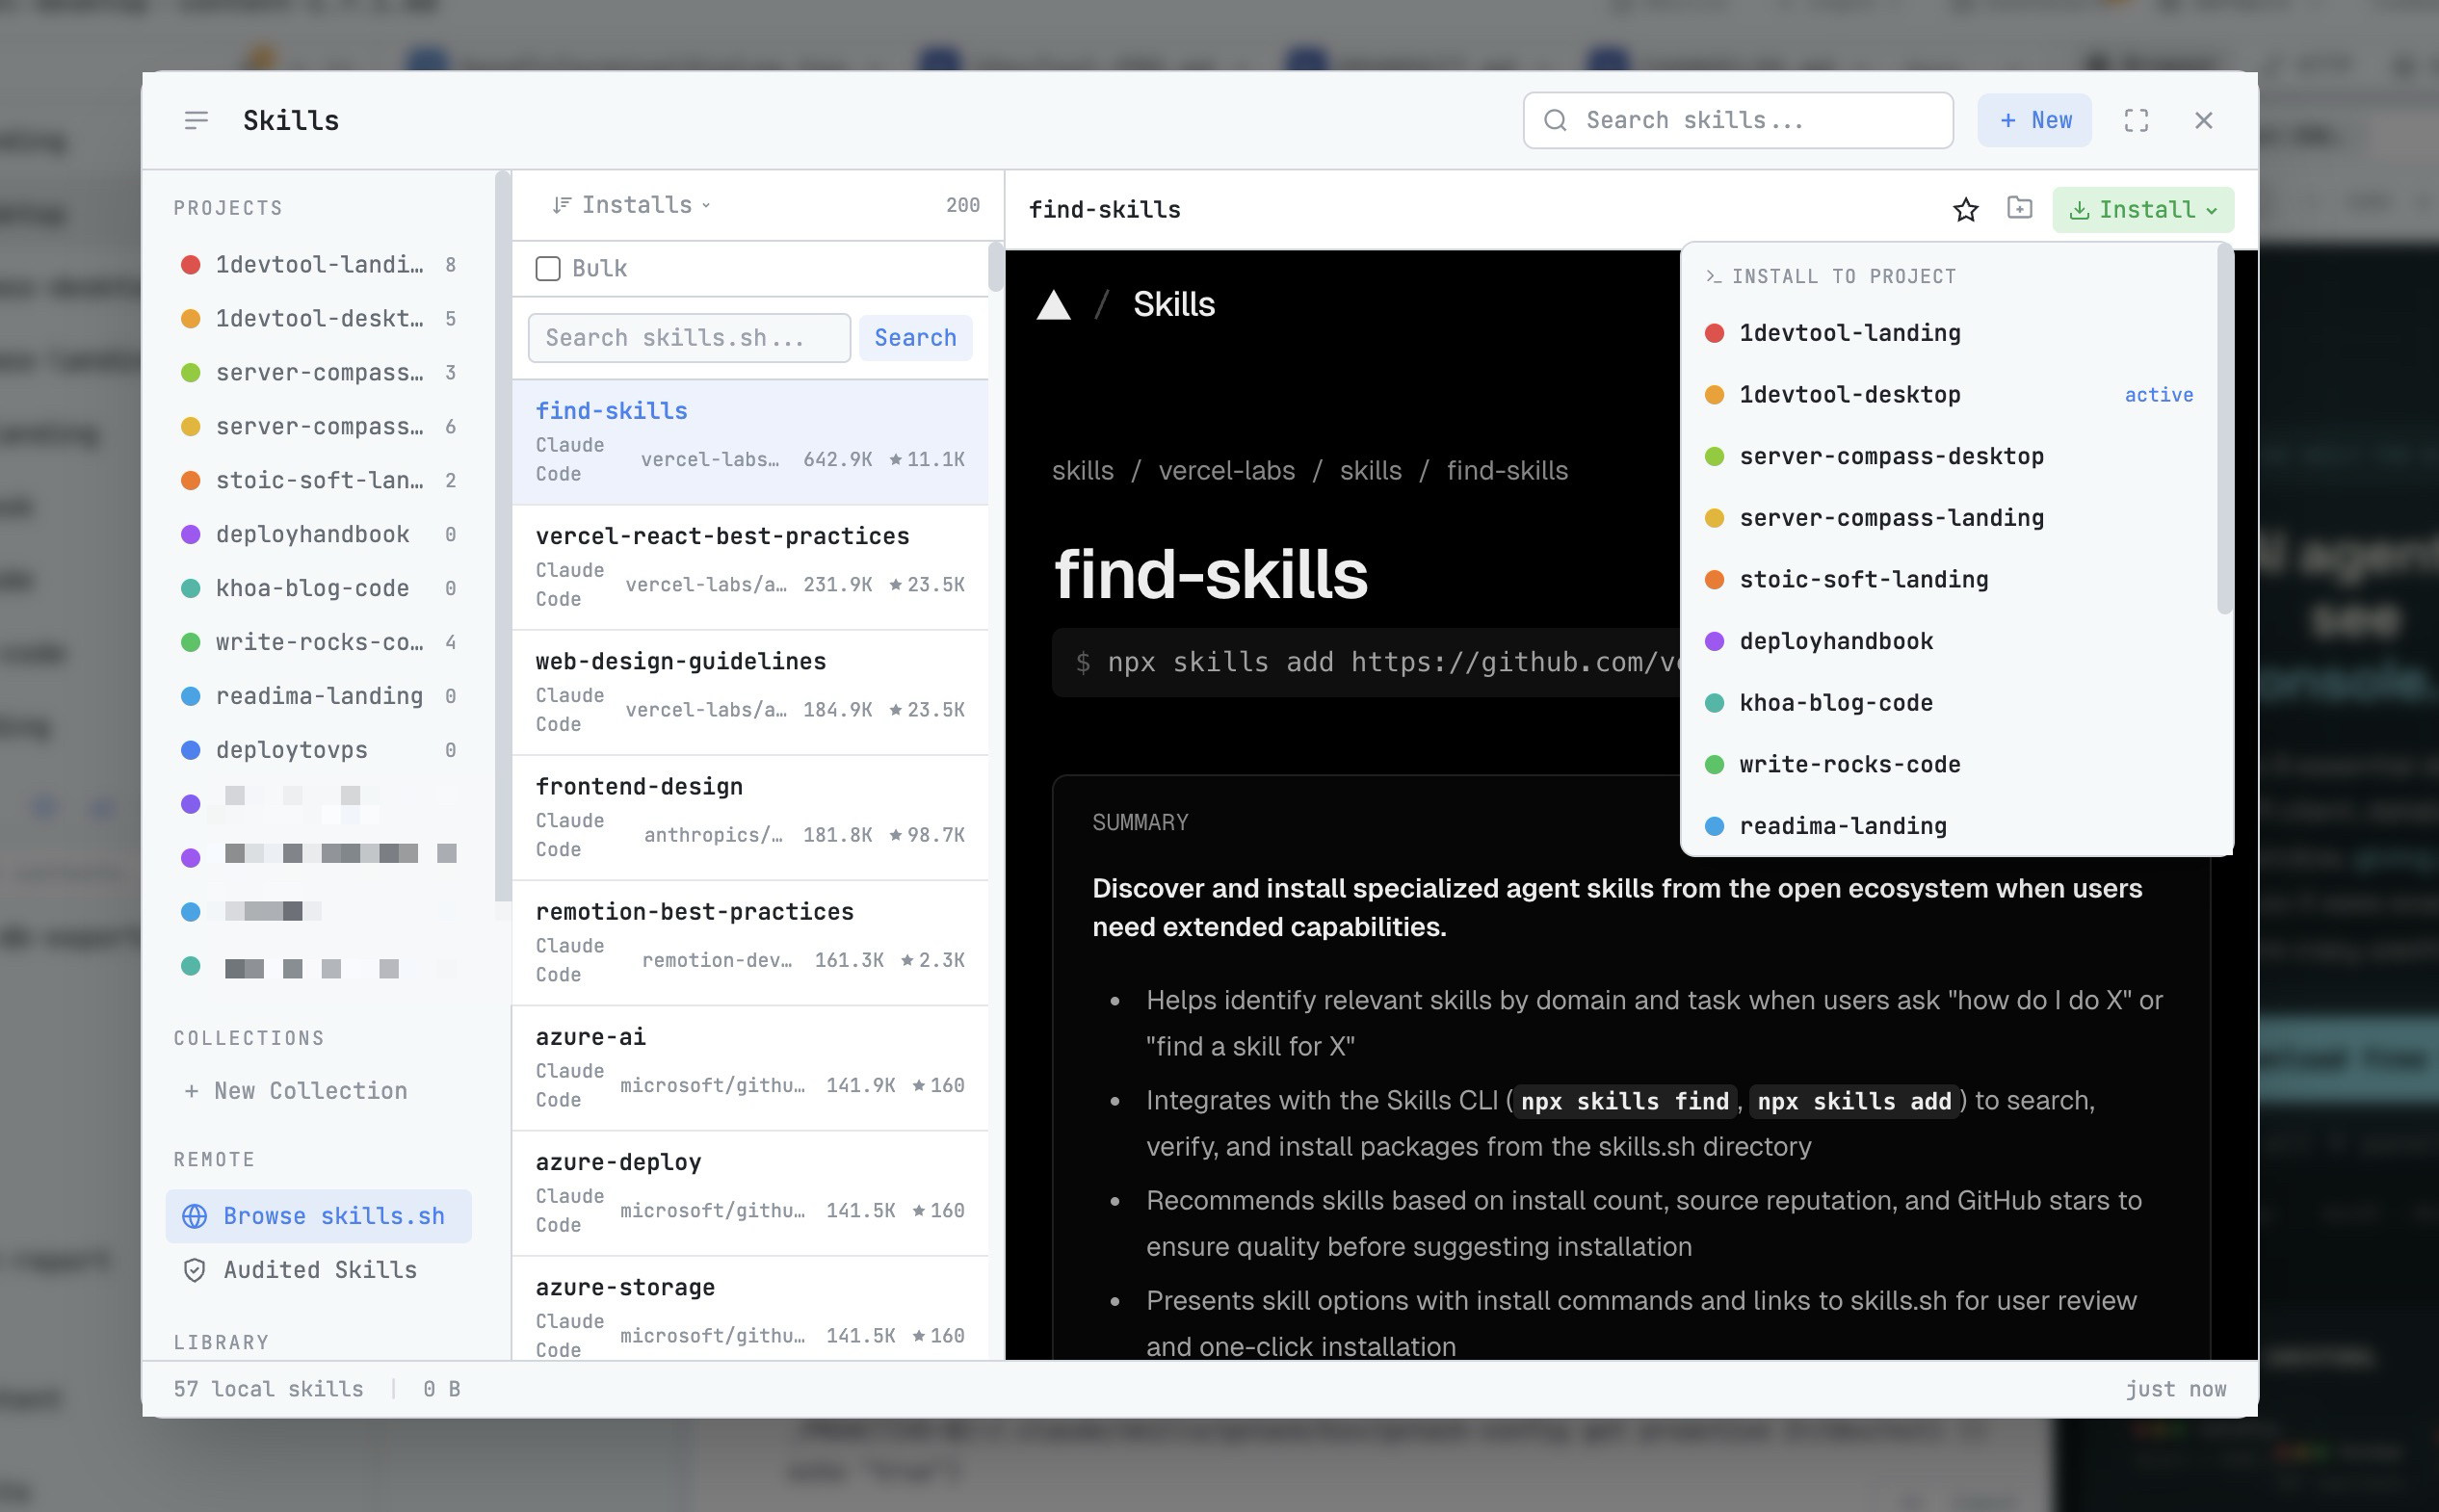 1DevTool8 min read
AI Skills Manager & Docker Deep Dive: Extend Your Agents, Monitor Your Containers
Browse, create, and install AI agent skills with built-in security scanning. Plus a redesigned Docker manager with live CPU, memory, and network monitoring for every container.
Read on 1devtool.com