March 6, 2026
Deploy Laravel on VPS with Docker (Production Guide)
Complete guide to deploying Laravel on your VPS using Docker. Covers Dockerfile, docker-compose with MySQL and Redis, Nginx configuration, SSL, queue workers, scheduler, and automated backups for a production-ready setup.

Laravel is one of the most popular PHP frameworks, powering everything from small blogs to enterprise applications. But deploying it to production? That's where many developers struggle.
Managed platforms like Laravel Forge, Vapor, or Ploi cost $12–$39/month. Add database hosting, Redis, and storage, and you're looking at $50–$150/month for a modest application. Meanwhile, a $5 VPS from Hetzner or DigitalOcean can run your entire Laravel stack with plenty of headroom.
This guide shows you how to deploy Laravel on your VPS using Docker, complete with MySQL, Redis, Nginx, SSL, queue workers, the scheduler, and automated backups. By the end, you'll have a production-ready setup that costs 80% less than managed alternatives.
Prerequisites
Before we start, make sure you have:
- A VPS — Any Linux server with at least 1GB RAM. Recommended providers: Hetzner ($4/mo), DigitalOcean ($6/mo), Vultr ($5/mo), or Linode ($5/mo).
- A domain name — Pointed to your VPS IP address via an A record.
- SSH access — Root or sudo user access to your server.
- Docker and Docker Compose — We'll cover installation if not already present.
- A Laravel project — Either an existing project or a fresh
laravel new myapp.
Step 1: Prepare Laravel for Production
Before containerizing your Laravel application, ensure it's ready for production. Open your .env file and update these settings:
APP_ENV=production
APP_DEBUG=false
APP_URL=https://yourdomain.com

LOG_CHANNEL=stderr

DB_CONNECTION=mysql
DB_HOST=mysql
DB_PORT=3306
DB_DATABASE=laravel
DB_USERNAME=laravel
DB_PASSWORD=your_secure_password

CACHE_DRIVER=redis
QUEUE_CONNECTION=redis
SESSION_DRIVER=redis

REDIS_HOST=redis
REDIS_PASSWORD=null
REDIS_PORT=6379
Key changes for Docker:
- DB_HOST=mysql — Docker networking uses container names as hostnames.
- REDIS_HOST=redis — Same principle for Redis.
- LOG_CHANNEL=stderr — Logs go to Docker's logging system instead of files.
- APP_DEBUG=false — Never expose debug information in production.
Also update config/database.php to ensure Redis uses the correct connection:
'redis' => [
    'client' => env('REDIS_CLIENT', 'phpredis'),
    'default' => [
        'host' => env('REDIS_HOST', '127.0.0.1'),
        'password' => env('REDIS_PASSWORD'),
        'port' => env('REDIS_PORT', 6379),
        'database' => 0,
    ],
    'cache' => [
        'host' => env('REDIS_HOST', '127.0.0.1'),
        'password' => env('REDIS_PASSWORD'),
        'port' => env('REDIS_PORT', 6379),
        'database' => 1,
    ],
],
Step 2: Create the Dockerfile
Create a Dockerfile in your Laravel project root. This multi-stage build optimizes for production by separating dependency installation from the final image:
# Stage 1: Build PHP dependencies
FROM composer:2 AS composer
WORKDIR /app
COPY composer.json composer.lock ./
RUN composer install --no-dev --no-scripts --no-autoloader --prefer-dist

COPY . .
RUN composer dump-autoload --optimize --classmap-authoritative

# Stage 2: Build frontend assets
FROM node:20-alpine AS node
WORKDIR /app
COPY package*.json ./
RUN npm ci
COPY . .
RUN npm run build

# Stage 3: Production image
FROM php:8.3-fpm-alpine

# Install system dependencies
RUN apk add --no-cache \\
    nginx \\
    supervisor \\
    libpng-dev \\
    libjpeg-turbo-dev \\
    freetype-dev \\
    libzip-dev \\
    oniguruma-dev \\
    icu-dev \\
    && docker-php-ext-configure gd --with-freetype --with-jpeg \\
    && docker-php-ext-install -j$(nproc) \\
        pdo_mysql \\
        mbstring \\
        exif \\
        pcntl \\
        bcmath \\
        gd \\
        zip \\
        intl \\
        opcache

# Install Redis extension
RUN apk add --no-cache --virtual .build-deps $PHPIZE_DEPS \\
    && pecl install redis \\
    && docker-php-ext-enable redis \\
    && apk del .build-deps

# Configure PHP for production
COPY docker/php.ini /usr/local/etc/php/conf.d/custom.ini

# Configure Nginx
COPY docker/nginx.conf /etc/nginx/nginx.conf

# Configure Supervisor
COPY docker/supervisord.conf /etc/supervisor/conf.d/supervisord.conf

# Set working directory
WORKDIR /var/www/html

# Copy application code
COPY --from=composer /app/vendor ./vendor
COPY --from=node /app/public/build ./public/build
COPY . .

# Set permissions
RUN chown -R www-data:www-data /var/www/html \\
    && chmod -R 755 /var/www/html/storage \\
    && chmod -R 755 /var/www/html/bootstrap/cache

# Create required directories
RUN mkdir -p /var/log/supervisor \\
    && mkdir -p /run/nginx

EXPOSE 80

CMD ["/usr/bin/supervisord", "-c", "/etc/supervisor/conf.d/supervisord.conf"]
This Dockerfile:
- Uses a multi-stage build to keep the final image small
- Installs all required PHP extensions for Laravel
- Includes Redis extension for caching and queues
- Uses Supervisor to manage multiple processes (PHP-FPM, Nginx, queue workers)
- Sets proper permissions for storage and cache directories
Step 3: Docker Compose Configuration
Create a docker-compose.yml file that orchestrates Laravel, MySQL, and Redis together. This is the complete production-ready configuration:
{`version: '3.8'

services:
  app:
    build:
      context: .
      dockerfile: Dockerfile
    container_name: laravel-app
    restart: unless-stopped
    volumes:
      - ./storage:/var/www/html/storage
      - ./.env:/var/www/html/.env
    networks:
      - laravel
    depends_on:
      mysql:
        condition: service_healthy
      redis:
        condition: service_started
    labels:
      - "traefik.enable=true"
      - "traefik.http.routers.laravel.rule=Host(\`yourdomain.com\`)"
      - "traefik.http.routers.laravel.entrypoints=websecure"
      - "traefik.http.routers.laravel.tls.certresolver=letsencrypt"
      - "traefik.http.services.laravel.loadbalancer.server.port=80"

  mysql:
    image: mysql:8.0
    container_name: laravel-mysql
    restart: unless-stopped
    environment:
      MYSQL_ROOT_PASSWORD: \${DB_ROOT_PASSWORD:-rootpassword}
      MYSQL_DATABASE: \${DB_DATABASE:-laravel}
      MYSQL_USER: \${DB_USERNAME:-laravel}
      MYSQL_PASSWORD: \${DB_PASSWORD:-secret}
    volumes:
      - mysql_data:/var/lib/mysql
      - ./docker/mysql/init.sql:/docker-entrypoint-initdb.d/init.sql:ro
    networks:
      - laravel
    healthcheck:
      test: ["CMD", "mysqladmin", "ping", "-h", "localhost"]
      interval: 10s
      timeout: 5s
      retries: 5

  redis:
    image: redis:7-alpine
    container_name: laravel-redis
    restart: unless-stopped
    command: redis-server --appendonly yes
    volumes:
      - redis_data:/data
    networks:
      - laravel

  queue:
    build:
      context: .
      dockerfile: Dockerfile
    container_name: laravel-queue
    restart: unless-stopped
    command: php artisan queue:work --sleep=3 --tries=3 --max-time=3600
    volumes:
      - ./storage:/var/www/html/storage
      - ./.env:/var/www/html/.env
    networks:
      - laravel
    depends_on:
      mysql:
        condition: service_healthy
      redis:
        condition: service_started

  scheduler:
    build:
      context: .
      dockerfile: Dockerfile
    container_name: laravel-scheduler
    restart: unless-stopped
    command: sh -c "while true; do php artisan schedule:run --verbose --no-interaction & sleep 60; done"
    volumes:
      - ./storage:/var/www/html/storage
      - ./.env:/var/www/html/.env
    networks:
      - laravel
    depends_on:
      mysql:
        condition: service_healthy
      redis:
        condition: service_started

networks:
  laravel:
    driver: bridge

volumes:
  mysql_data:
  redis_data:`}
This configuration includes five services:
- app — Your Laravel application with PHP-FPM and Nginx
- mysql — MySQL 8.0 database with health checks and persistent storage. See our MySQL template for more options.
- redis — Redis for caching, sessions, and queues. See our Redis template for advanced configurations.
- queue — Dedicated container for Laravel queue workers
- scheduler — Dedicated container for Laravel's task scheduler
You can also use our pre-built Laravel template which includes all of this pre-configured and ready to deploy with one click.
Step 4: Create Supporting Configuration Files
Create a docker directory in your project root for configuration files.
PHP Configuration (docker/php.ini)
[PHP]
; Production settings
display_errors = Off
display_startup_errors = Off
error_reporting = E_ALL & ~E_DEPRECATED & ~E_STRICT
log_errors = On
error_log = /dev/stderr

; Performance
memory_limit = 256M
max_execution_time = 60
max_input_time = 60
post_max_size = 100M
upload_max_filesize = 100M

; OPcache
opcache.enable = 1
opcache.memory_consumption = 128
opcache.interned_strings_buffer = 8
opcache.max_accelerated_files = 10000
opcache.validate_timestamps = 0
opcache.revalidate_freq = 0
opcache.save_comments = 1

; Session
session.cookie_httponly = 1
session.cookie_secure = 1
session.use_strict_mode = 1
Nginx Configuration (docker/nginx.conf)
worker_processes auto;
error_log /dev/stderr warn;
pid /run/nginx.pid;

events {
    worker_connections 1024;
    multi_accept on;
    use epoll;
}

http {
    include /etc/nginx/mime.types;
    default_type application/octet-stream;

    log_format main '$remote_addr - $remote_user [$time_local] "$request" '
                    '$status $body_bytes_sent "$http_referer" '
                    '"$http_user_agent" "$http_x_forwarded_for"';

    access_log /dev/stdout main;

    sendfile on;
    tcp_nopush on;
    tcp_nodelay on;
    keepalive_timeout 65;
    types_hash_max_size 2048;

    # Gzip compression
    gzip on;
    gzip_vary on;
    gzip_proxied any;
    gzip_comp_level 6;
    gzip_types text/plain text/css text/xml application/json application/javascript
               application/xml application/xml+rss text/javascript application/x-font-ttf
               font/opentype image/svg+xml;

    server {
        listen 80 default_server;
        server_name _;

        root /var/www/html/public;
        index index.php;

        charset utf-8;

        # Security headers
        add_header X-Frame-Options "SAMEORIGIN" always;
        add_header X-Content-Type-Options "nosniff" always;
        add_header X-XSS-Protection "1; mode=block" always;
        add_header Referrer-Policy "strict-origin-when-cross-origin" always;

        location / {
            try_files $uri $uri/ /index.php?$query_string;
        }

        location = /favicon.ico { access_log off; log_not_found off; }
        location = /robots.txt  { access_log off; log_not_found off; }

        error_page 404 /index.php;

        location ~ \\.php$ {
            fastcgi_pass 127.0.0.1:9000;
            fastcgi_param SCRIPT_FILENAME $realpath_root$fastcgi_script_name;
            include fastcgi_params;
            fastcgi_hide_header X-Powered-By;
        }

        # Deny access to hidden files
        location ~ /\\. {
            deny all;
        }

        # Cache static assets
        location ~* \\.(jpg|jpeg|png|gif|ico|css|js|woff|woff2|ttf|svg)$ {
            expires 30d;
            add_header Cache-Control "public, immutable";
        }
    }
}
Notice the robots.txt location block — this tells Nginx to serve your robots file efficiently. Need help creating one? Use our free robots.txt generator to control how search engines and AI crawlers access your Laravel app.
Supervisor Configuration (docker/supervisord.conf)
[supervisord]
nodaemon=true
logfile=/var/log/supervisor/supervisord.log
pidfile=/var/run/supervisord.pid
user=root

[program:php-fpm]
command=/usr/local/sbin/php-fpm -F
autostart=true
autorestart=true
stdout_logfile=/dev/stdout
stdout_logfile_maxbytes=0
stderr_logfile=/dev/stderr
stderr_logfile_maxbytes=0

[program:nginx]
command=/usr/sbin/nginx -g "daemon off;"
autostart=true
autorestart=true
stdout_logfile=/dev/stdout
stdout_logfile_maxbytes=0
stderr_logfile=/dev/stderr
stderr_logfile_maxbytes=0
Step 5: Connect to Your VPS
SSH into your server and install Docker if it's not already present:
# Connect to your VPS
ssh root@your-server-ip

# Install Docker (if not installed)
curl -fsSL https://get.docker.com | sh

# Start Docker and enable on boot
systemctl enable docker
systemctl start docker

# Verify installation
docker --version
docker compose version
Create a directory for your Laravel application:
mkdir -p /var/www/laravel
cd /var/www/laravel
Step 6: Deploy with Docker Compose
Transfer your Laravel project to the server. You can use Git, SCP, or rsync:
# Option 1: Clone from Git
git clone https://github.com/yourusername/your-laravel-app.git .

# Option 2: SCP from local machine
scp -r ./your-laravel-app/* root@your-server-ip:/var/www/laravel/

# Option 3: rsync (recommended for updates)
rsync -avz --exclude='vendor' --exclude='node_modules' \\
  ./your-laravel-app/ root@your-server-ip:/var/www/laravel/
Create your production .env file on the server:
cp .env.example .env
nano .env  # Edit with your production values
Build and start the containers:
# Build images
docker compose build

# Start containers in the background
docker compose up -d

# Check status
docker compose ps

# View logs
docker compose logs -f
Run Laravel setup commands:
# Generate application key
docker compose exec app php artisan key:generate

# Run migrations
docker compose exec app php artisan migrate --force

# Cache configuration for performance
docker compose exec app php artisan config:cache
docker compose exec app php artisan route:cache
docker compose exec app php artisan view:cache

# Create storage symlink
docker compose exec app php artisan storage:link
Step 7: Configure Nginx Reverse Proxy (Alternative to Traefik)
If you prefer using a standalone Nginx reverse proxy instead of Traefik, install Nginx on your host and configure it:
# Install Nginx
apt update && apt install -y nginx

# Create site configuration
nano /etc/nginx/sites-available/laravel
Add this configuration:
server {
    listen 80;
    server_name yourdomain.com www.yourdomain.com;

    location / {
        proxy_pass http://127.0.0.1:8080;
        proxy_http_version 1.1;
        proxy_set_header Upgrade $http_upgrade;
        proxy_set_header Connection 'upgrade';
        proxy_set_header Host $host;
        proxy_set_header X-Real-IP $remote_addr;
        proxy_set_header X-Forwarded-For $proxy_add_x_forwarded_for;
        proxy_set_header X-Forwarded-Proto $scheme;
        proxy_cache_bypass $http_upgrade;
        proxy_read_timeout 300;
        proxy_connect_timeout 300;

        # Important for Laravel trusted proxies
        proxy_set_header X-Forwarded-Host $host;
        proxy_set_header X-Forwarded-Port $server_port;
    }
}
Enable the site and test the configuration:
# Enable site
ln -s /etc/nginx/sites-available/laravel /etc/nginx/sites-enabled/

# Remove default site
rm /etc/nginx/sites-enabled/default

# Test configuration
nginx -t

# Reload Nginx
systemctl reload nginx
Update your docker-compose.yml to expose port 8080 instead of using Traefik labels:
app:
  # ... other settings ...
  ports:
    - "127.0.0.1:8080:80"
  # Remove or comment out Traefik labels
Step 8: SSL Setup with Let's Encrypt
Secure your application with a free SSL certificate from Let's Encrypt:
# Install Certbot
apt install -y certbot python3-certbot-nginx

# Obtain SSL certificate
certbot --nginx -d yourdomain.com -d www.yourdomain.com

# Certbot will automatically:
# - Obtain the certificate
# - Update your Nginx configuration
# - Set up automatic renewal
Verify automatic renewal is configured:
# Test renewal
certbot renew --dry-run

# Check the renewal timer
systemctl status certbot.timer
Update Laravel's trusted proxies in app/Http/Middleware/TrustProxies.php:
<?php

namespace App\\Http\\Middleware;

use Illuminate\\Http\\Middleware\\TrustProxies as Middleware;
use Illuminate\\Http\\Request;

class TrustProxies extends Middleware
{
    protected $proxies = '*';

    protected $headers =
        Request::HEADER_X_FORWARDED_FOR |
        Request::HEADER_X_FORWARDED_HOST |
        Request::HEADER_X_FORWARDED_PORT |
        Request::HEADER_X_FORWARDED_PROTO |
        Request::HEADER_X_FORWARDED_AWS_ELB;
}
Step 9: Laravel Queue Workers
The docker-compose.yml already includes a dedicated queue worker container. To scale queue processing, you can run multiple queue workers:
# Scale to 3 queue workers
docker compose up -d --scale queue=3
For different queue priorities, create additional queue services in docker-compose.yml:
queue-high:
  build:
    context: .
    dockerfile: Dockerfile
  container_name: laravel-queue-high
  restart: unless-stopped
  command: php artisan queue:work --queue=high,default --sleep=3 --tries=3
  volumes:
    - ./storage:/var/www/html/storage
    - ./.env:/var/www/html/.env
  networks:
    - laravel
  depends_on:
    - mysql
    - redis

queue-low:
  build:
    context: .
    dockerfile: Dockerfile
  container_name: laravel-queue-low
  restart: unless-stopped
  command: php artisan queue:work --queue=low --sleep=3 --tries=3
  volumes:
    - ./storage:/var/www/html/storage
    - ./.env:/var/www/html/.env
  networks:
    - laravel
  depends_on:
    - mysql
    - redis
Monitor queue jobs using Laravel Horizon (optional but recommended):
# Install Horizon
docker compose exec app composer require laravel/horizon

# Publish configuration
docker compose exec app php artisan horizon:install

# Add Horizon dashboard to docker-compose queue service
command: php artisan horizon
Step 10: Cron Jobs for Scheduler
The scheduler service in our docker-compose.yml runs php artisan schedule:run every minute. Configure your scheduled tasks in app/Console/Kernel.php:
<?php

namespace App\\Console;

use Illuminate\\Console\\Scheduling\\Schedule;
use Illuminate\\Foundation\\Console\\Kernel as ConsoleKernel;

class Kernel extends ConsoleKernel
{
    protected function schedule(Schedule $schedule): void
    {
        // Example: Clean up old tokens daily
        $schedule->command('sanctum:prune-expired --hours=24')
            ->daily();

        // Example: Send daily digest emails
        $schedule->command('emails:send-digest')
            ->dailyAt('08:00')
            ->timezone('America/New_York');

        // Example: Clear old cache weekly
        $schedule->command('cache:prune-stale-tags')
            ->weekly();

        // Example: Database backup daily
        $schedule->command('backup:run')
            ->dailyAt('02:00')
            ->onOneServer();

        // Example: Telescope pruning
        $schedule->command('telescope:prune --hours=48')
            ->daily();
    }

    protected function commands(): void
    {
        $this->load(__DIR__.'/Commands');
        require base_path('routes/console.php');
    }
}
Verify the scheduler is running:
# View scheduler logs
docker compose logs -f scheduler

# Run schedule manually to test
docker compose exec app php artisan schedule:run
Step 11: Automated Backups
Set up automated backups for your database and uploaded files. Install the Spatie backup package:
# Install backup package
docker compose exec app composer require spatie/laravel-backup

# Publish configuration
docker compose exec app php artisan vendor:publish \\
  --provider="Spatie\\Backup\\BackupServiceProvider"
Configure config/backup.php for your needs:
'backup' => [
    'name' => env('APP_NAME', 'laravel-backup'),
    'source' => [
        'files' => [
            'include' => [
                base_path(),
            ],
            'exclude' => [
                base_path('vendor'),
                base_path('node_modules'),
                storage_path('logs'),
            ],
        ],
        'databases' => ['mysql'],
    ],
    'destination' => [
        'disks' => ['s3'],  // or 'local'
    ],
],

'notifications' => [
    'mail' => [
        'to' => '[email protected]',
    ],
],
Add the backup command to your scheduler:
// In app/Console/Kernel.php
$schedule->command('backup:run')->dailyAt('02:00');
$schedule->command('backup:clean')->dailyAt('03:00');
For S3-compatible storage (AWS S3, Backblaze B2, Cloudflare R2), add the S3 driver:
# Install S3 driver
docker compose exec app composer require league/flysystem-aws-s3-v3 "^3.0"
Configure your S3 credentials in .env:
AWS_ACCESS_KEY_ID=your-key
AWS_SECRET_ACCESS_KEY=your-secret
AWS_DEFAULT_REGION=us-east-1
AWS_BUCKET=your-bucket-name
AWS_ENDPOINT=https://s3.us-east-1.amazonaws.com  # or Backblaze/R2 endpoint
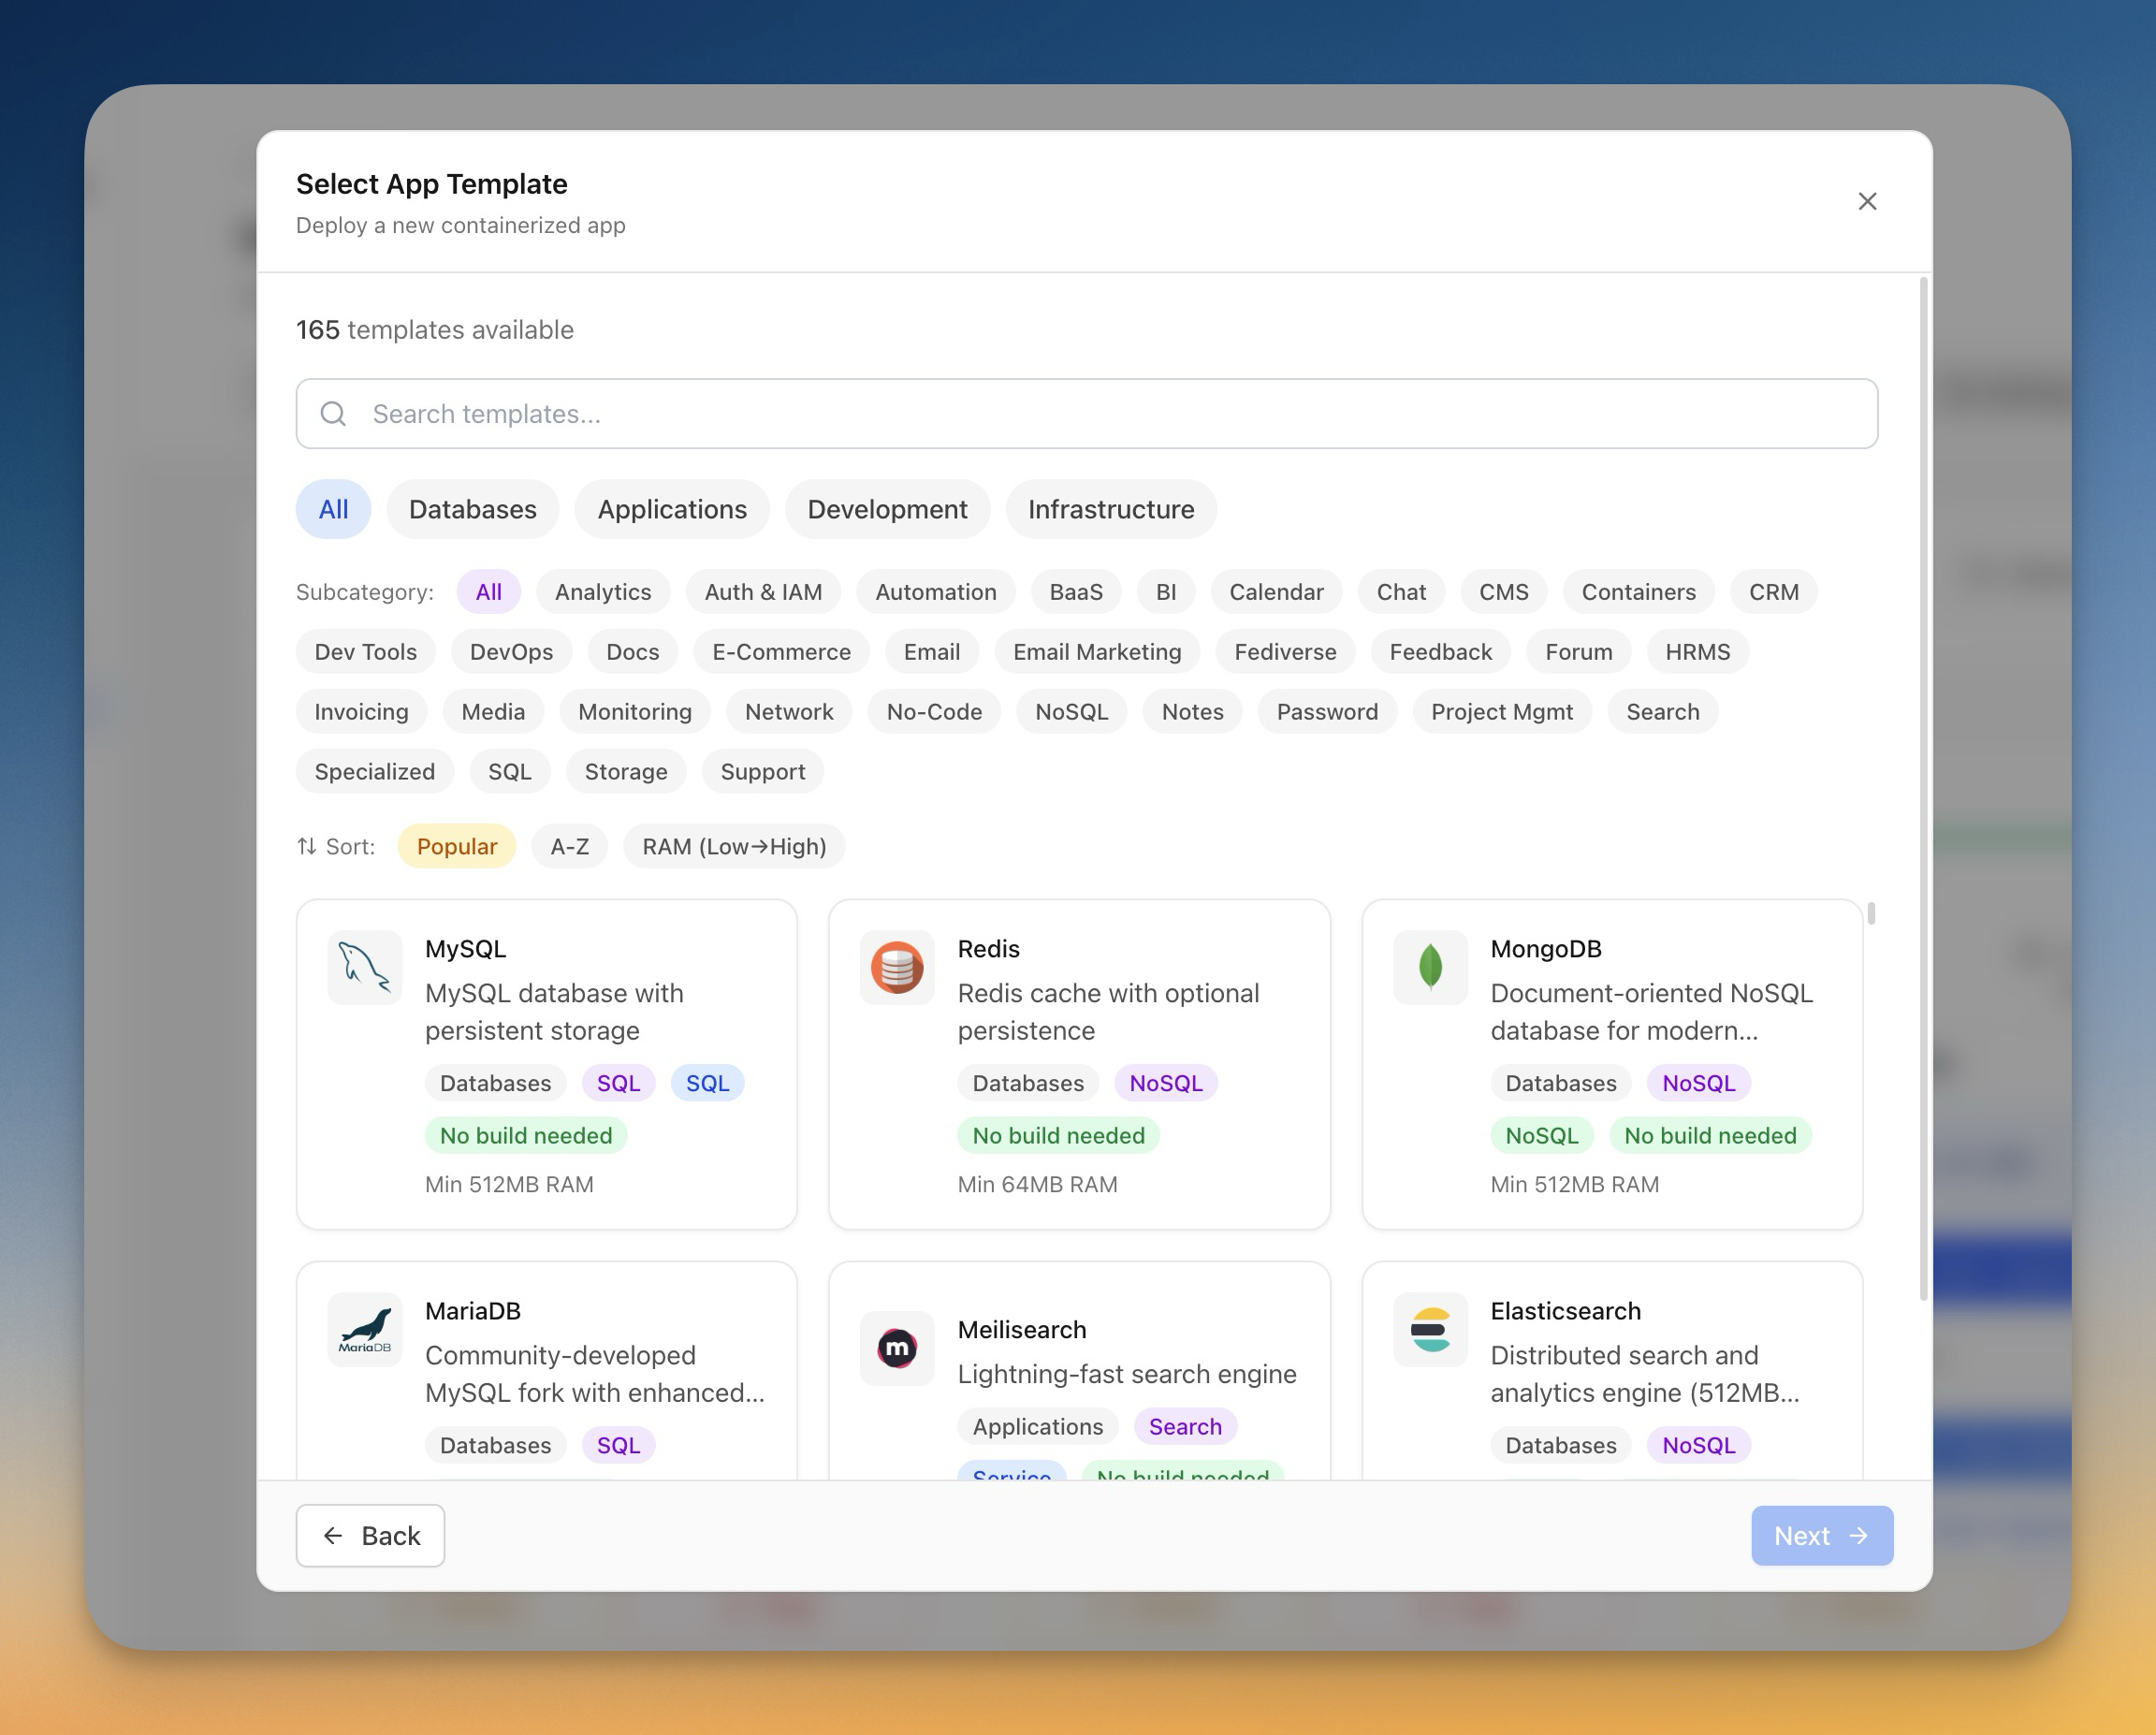
The Easy Way: Deploy Laravel with Server Compass
All of the above takes 2–4 hours for a first-time setup. With Server Compass, you can deploy Laravel in under 5 minutes.
Here's how:
- Connect your VPS — Add your server once with SSH credentials. Server Compass auto-installs Docker if needed.
- Select the Laravel template — Our Laravel template includes the complete stack: PHP-FPM, Nginx, MySQL, Redis, queue workers, and scheduler.
- Configure environment variables — Use the visual .env Vault to set your database credentials, app URL, and other settings.
- Deploy — One click and your Laravel app is live with SSL, automatic restarts, and health monitoring.
What you get with Server Compass:
- 100+ one-click templates including Laravel, MySQL, and Redis
- Visual Docker Compose editor with validation
- Real-time container logs and resource monitoring
- Automated backups to S3-compatible storage
- Free SSL certificates via Let's Encrypt
- GitHub Actions CI/CD for automatic deployments
- Built-in database admin with SQL editor
Server Compass is $29 one-time. No subscription. That's less than one month of Laravel Forge, and you own it forever.
Frequently Asked Questions
What are the minimum VPS specs for Laravel with Docker?
For a small-to-medium Laravel application with MySQL and Redis, you need at least:
- RAM: 1GB minimum, 2GB recommended
- CPU: 1 vCPU minimum, 2 vCPUs for better performance
- Storage: 20GB SSD minimum
A $5–$6/month VPS from Hetzner, DigitalOcean, or Vultr handles most Laravel applications comfortably.
Why use Docker instead of traditional LEMP?
Docker provides several advantages over a traditional LEMP (Linux, Nginx, MySQL, PHP) stack:
- Consistency: Same environment in development and production
- Isolation: Each service runs in its own container
- Portability: Move your stack to any Docker host
- Scalability: Scale individual services independently
- Easy updates: Update PHP or MySQL versions with a single line change
How do I update my Laravel application?
For code updates:
# Pull latest code
git pull origin main

# Rebuild and restart containers
docker compose build app
docker compose up -d app

# Run migrations
docker compose exec app php artisan migrate --force

# Clear caches
docker compose exec app php artisan optimize:clear
docker compose exec app php artisan config:cache
docker compose exec app php artisan route:cache
docker compose exec app php artisan view:cache
How do I achieve zero-downtime deployments?
Use a blue-green deployment strategy with Traefik or a reverse proxy. Server Compass provides built-in zero-downtime deployments via GitHub Actions that handle this automatically.
How do I view Laravel logs?
With LOG_CHANNEL=stderr, logs go to Docker:
# View all logs
docker compose logs -f app

# View last 100 lines
docker compose logs --tail=100 app

# View queue worker logs
docker compose logs -f queue
How do I handle file uploads and storage?
The docker-compose.yml mounts ./storage as a volume, so uploaded files persist outside the container. For production, consider using S3 or S3-compatible storage:
# .env
FILESYSTEM_DISK=s3
AWS_ACCESS_KEY_ID=your-key
AWS_SECRET_ACCESS_KEY=your-secret
AWS_DEFAULT_REGION=us-east-1
AWS_BUCKET=your-bucket
Can I run multiple Laravel apps on one VPS?
Yes. Use different container names and either:
- Different ports with Nginx reverse proxy routing by domain
- Traefik with different hostnames in labels
Conclusion
Deploying Laravel on a VPS with Docker gives you full control over your infrastructure at a fraction of the cost of managed platforms. The setup we've covered includes:
- Production-optimized Dockerfile with multi-stage builds
- Docker Compose orchestrating Laravel, MySQL, Redis, queues, and scheduler
- Nginx configuration with security headers and caching
- SSL via Let's Encrypt
- Automated backups to S3-compatible storage
For a faster deployment experience, try Server Compass. Deploy Laravel with MySQL, Redis, and all the production essentials in under 5 minutes. No SSH required, no manual configuration, and built-in monitoring for peace of mind.
Download Server Compass — $29 one-time, unlimited servers, no subscription.
Related in the StoicSoft network
If you're choosing a VPS provider or benchmarking real-world performance like the post above explores, StoicVPS is the StoicSoft network's independent tracker for VPS pricing, performance, and migration safety.
If you're self-hosting on a VPS or working through a deployment guide like the one above, DeployToVPS is the StoicSoft network's handbook for VPS deployment recipes — docker-compose, nginx, traefik, and common app self-hosts.
From across the StoicSoft network
Hand-curated reads on the same topic from sister sites in the StoicSoft family.
 1DevTool11 min read
Self-Hosted AI Coding Assistant Workflow: Practical Setup Guide
A self-hosted AI coding workflow needs more than model hosting. You need environment control, connector governance, and reproducible operations. This guide covers the practical stack.
Read on 1devtool.com 1DevTool10 min read
Docker Desktop Alternatives for Developers in 2026
Developers want a Docker workflow that stays close to code, logs, and AI agents. This comparison breaks down Docker Desktop alternatives by performance, observability, and daily usability.
Read on 1devtool.com