March 6, 2026
Deploy Next.js to VPS: Complete Guide (2026)
Learn how to deploy Next.js applications to your own VPS with PM2, Docker, Nginx, and SSL. A comprehensive guide covering standalone mode, reverse proxy configuration, and environment variables — plus the easy way with Server Compass.
Deploying Next.js to your own VPS gives you complete control over your infrastructure, predictable costs, and the freedom to scale on your terms. While Vercel offers a frictionless deployment experience, it comes with usage-based pricing that can quickly spiral out of control as your application grows.
This guide walks you through every step of deploying a Next.js application to a VPS, from preparing your app for production to configuring SSL certificates. Whether you choose PM2 for simplicity or Docker for containerization, you'll have a production-ready deployment by the end.
Why Self-Host Next.js Instead of Vercel?
Vercel is the company behind Next.js, and their platform is optimized for it. So why would you deploy elsewhere? Here are the most common reasons developers make the switch:
- Cost predictability — Vercel's free tier is generous for hobby projects, but production apps quickly hit bandwidth limits, function invocation caps, and image optimization quotas. A $5–$10 VPS gives you unlimited bandwidth and no per-request fees.
- No vendor lock-in — Vercel-specific features like Edge Functions, Middleware edge runtime, and ISR caching work differently (or not at all) on other platforms. Self-hosting keeps your app portable.
- Data sovereignty — Your server, your region, your rules. No data processing agreements with third parties, no questions about where your users' data is stored.
- Full server access — Need to run background jobs, connect to a local database, or install system dependencies? A VPS gives you root access to do whatever you need.
- Custom caching strategies — Implement your own CDN, use Varnish, or configure Redis caching exactly how you want it.
For a deeper comparison, see our Server Compass vs Vercel comparison and the Vercel alternative page.
Prerequisites
Before you begin, make sure you have:
- A VPS — Any provider works: Hetzner, DigitalOcean, Linode, Vultr, or AWS Lightsail. We recommend at least 1 GB RAM and 1 vCPU for small Next.js apps. Ubuntu 22.04 or 24.04 is ideal.
- A domain name — Pointed to your server's IP address with an A record.
- SSH access — Root or sudo access to your server.
- A Next.js application — Either a new project or an existing one you want to deploy.
- Git repository — Your code should be in GitHub, GitLab, or another Git hosting service for easy deployment.
Step 1: Prepare Your Next.js App for Production
Next.js has a special standalone output mode that creates a minimal production bundle. This is essential for VPS deployment because it copies only the necessary files and dependencies.
Open your next.config.js (or next.config.ts) and add the output configuration:
// next.config.js
/** @type {import('next').NextConfig} */
const nextConfig = {
  output: 'standalone',
}

module.exports = nextConfig
For TypeScript projects using next.config.ts:
// next.config.ts
import type { NextConfig } from 'next'

const nextConfig: NextConfig = {
  output: 'standalone',
}

export default nextConfig
The standalone output mode:
- Creates a self-contained
.next/standalonefolder - Copies only production dependencies (not devDependencies)
- Generates a
server.jsfile that runs withoutnext start - Reduces deployment size by 80–90% compared to copying
node_modules
After adding this configuration, run a production build locally to verify it works:
npm run build
Check that .next/standalone exists and contains server.js.
Step 2: Connect to Your VPS
SSH into your server using the credentials from your VPS provider:
ssh root@your-server-ip
If you're using a non-root user with sudo privileges:
ssh username@your-server-ip
For better security, set up SSH key authentication instead of password login. See our SSH config generator for help creating SSH configuration files.
Step 3: Install Node.js and Dependencies
We recommend using nvm (Node Version Manager) to install Node.js. This lets you easily switch between Node versions and keeps your system Node separate from your application.
# Update system packages
sudo apt update && sudo apt upgrade -y

# Install curl if not present
sudo apt install -y curl

# Install nvm
curl -o- https://raw.githubusercontent.com/nvm-sh/nvm/v0.40.1/install.sh | bash

# Load nvm (or restart your terminal)
source ~/.bashrc

# Install the latest LTS version of Node.js
nvm install --lts

# Verify installation
node --version
npm --version
Install PM2 globally for process management:
npm install -g pm2
PM2 keeps your Next.js app running, restarts it on crashes, and provides logging and monitoring. It's the standard for running Node.js applications in production.
Step 4: Clone and Build Your Next.js App
Create a directory for your applications and clone your repository:
# Create apps directory
mkdir -p ~/apps
cd ~/apps

# Clone your repository
git clone https://github.com/yourusername/your-nextjs-app.git
cd your-nextjs-app

# Install dependencies
npm ci

# Build the application
npm run build
The npm ci command is preferred over npm install for production because it installs exact versions from package-lock.json and is faster.
After the build completes, you need to copy the static files to the standalone folder:
# Copy static files to standalone
cp -r .next/static .next/standalone/.next/
cp -r public .next/standalone/
This is necessary because the standalone output doesn't include the static folder or public directory by default.
Step 5: Run with PM2 (Standalone Mode)
Create a PM2 ecosystem configuration file for better process management:
// ecosystem.config.js
module.exports = {
  apps: [
    {
      name: 'nextjs-app',
      script: '.next/standalone/server.js',
      cwd: '/root/apps/your-nextjs-app',
      instances: 'max',
      exec_mode: 'cluster',
      env: {
        NODE_ENV: 'production',
        PORT: 3000,
        HOSTNAME: '0.0.0.0',
      },
      env_production: {
        NODE_ENV: 'production',
        PORT: 3000,
        HOSTNAME: '0.0.0.0',
      },
      // Restart if memory exceeds 500MB
      max_memory_restart: '500M',
      // Log configuration
      error_file: '/root/apps/your-nextjs-app/logs/error.log',
      out_file: '/root/apps/your-nextjs-app/logs/out.log',
      log_date_format: 'YYYY-MM-DD HH:mm:ss Z',
      // Graceful restart
      kill_timeout: 5000,
      wait_ready: true,
      listen_timeout: 10000,
    },
  ],
}
Create the logs directory and start the application:
# Create logs directory
mkdir -p ~/apps/your-nextjs-app/logs

# Start with PM2
cd ~/apps/your-nextjs-app
pm2 start ecosystem.config.js --env production

# Save the PM2 process list
pm2 save

# Configure PM2 to start on boot
pm2 startup
The pm2 startup command will output a command you need to run with sudo. Copy and execute it to enable automatic startup.
Useful PM2 commands:
pm2 status              # View all processes
pm2 logs nextjs-app     # View logs
pm2 restart nextjs-app  # Restart the app
pm2 stop nextjs-app     # Stop the app
pm2 delete nextjs-app   # Remove from PM2
Use our PM2 config generator to create custom ecosystem configurations.
Step 6: Docker Alternative (with Dockerfile Example)
Docker provides better isolation, reproducibility, and makes deployment more consistent across environments. Here's a production-ready Dockerfile for Next.js:
# Dockerfile
FROM node:20-alpine AS base

# Install dependencies only when needed
FROM base AS deps
RUN apk add --no-cache libc6-compat
WORKDIR /app

# Install dependencies based on the preferred package manager
COPY package.json package-lock.json* ./
RUN npm ci

# Rebuild the source code only when needed
FROM base AS builder
WORKDIR /app
COPY --from=deps /app/node_modules ./node_modules
COPY . .

# Disable telemetry during build
ENV NEXT_TELEMETRY_DISABLED=1

RUN npm run build

# Production image, copy all the files and run next
FROM base AS runner
WORKDIR /app

ENV NODE_ENV=production
ENV NEXT_TELEMETRY_DISABLED=1

RUN addgroup --system --gid 1001 nodejs
RUN adduser --system --uid 1001 nextjs

COPY --from=builder /app/public ./public

# Set the correct permission for prerender cache
RUN mkdir .next
RUN chown nextjs:nodejs .next

# Automatically leverage output traces to reduce image size
COPY --from=builder --chown=nextjs:nodejs /app/.next/standalone ./
COPY --from=builder --chown=nextjs:nodejs /app/.next/static ./.next/static

USER nextjs

EXPOSE 3000

ENV PORT=3000
ENV HOSTNAME="0.0.0.0"

CMD ["node", "server.js"]
Create a .dockerignore file to exclude unnecessary files:
# .dockerignore
Dockerfile
.dockerignore
node_modules
npm-debug.log
.next
.git
.gitignore
README.md
.env*.local
Build and run the Docker container:
# Build the image
docker build -t nextjs-app .

# Run the container
docker run -d \\
  --name nextjs-app \\
  --restart unless-stopped \\
  -p 3000:3000 \\
  -e DATABASE_URL="your-database-url" \\
  nextjs-app
For more complex setups with Docker Compose, including databases and other services:
# docker-compose.yml
version: '3.8'

services:
  nextjs:
    build:
      context: .
      dockerfile: Dockerfile
    container_name: nextjs-app
    restart: unless-stopped
    ports:
      - "3000:3000"
    environment:
      - NODE_ENV=production
      - DATABASE_URL=postgresql://user:password@db:5432/mydb
    depends_on:
      - db
    networks:
      - app-network

  db:
    image: postgres:16-alpine
    container_name: postgres-db
    restart: unless-stopped
    environment:
      - POSTGRES_USER=user
      - POSTGRES_PASSWORD=password
      - POSTGRES_DB=mydb
    volumes:
      - postgres-data:/var/lib/postgresql/data
    networks:
      - app-network

volumes:
  postgres-data:

networks:
  app-network:
    driver: bridge
Use our Dockerfile generator to create custom Dockerfiles for your specific needs.
Step 7: Configure Nginx Reverse Proxy
Nginx acts as a reverse proxy, handling SSL termination, compression, and static file serving. This offloads work from Node.js and improves performance.
Install Nginx:
sudo apt install -y nginx
Create a configuration file for your Next.js app:
# /etc/nginx/sites-available/nextjs-app
upstream nextjs_upstream {
    server 127.0.0.1:3000;
    keepalive 64;
}

server {
    listen 80;
    server_name yourdomain.com www.yourdomain.com;

    # Security headers
    add_header X-Frame-Options "SAMEORIGIN" always;
    add_header X-Content-Type-Options "nosniff" always;
    add_header X-XSS-Protection "1; mode=block" always;
    add_header Referrer-Policy "strict-origin-when-cross-origin" always;

    # Gzip compression
    gzip on;
    gzip_vary on;
    gzip_proxied any;
    gzip_comp_level 6;
    gzip_types text/plain text/css text/xml application/json application/javascript application/rss+xml application/atom+xml image/svg+xml;

    # Proxy settings
    location / {
        proxy_pass http://nextjs_upstream;
        proxy_http_version 1.1;
        proxy_set_header Upgrade $http_upgrade;
        proxy_set_header Connection 'upgrade';
        proxy_set_header Host $host;
        proxy_set_header X-Real-IP $remote_addr;
        proxy_set_header X-Forwarded-For $proxy_add_x_forwarded_for;
        proxy_set_header X-Forwarded-Proto $scheme;
        proxy_cache_bypass $http_upgrade;
        proxy_read_timeout 60s;
        proxy_send_timeout 60s;
    }

    # Cache static assets
    location /_next/static {
        proxy_pass http://nextjs_upstream;
        proxy_cache_valid 60m;
        add_header Cache-Control "public, max-age=31536000, immutable";
    }

    # Cache public folder assets
    location /public {
        proxy_pass http://nextjs_upstream;
        proxy_cache_valid 60m;
        add_header Cache-Control "public, max-age=31536000, immutable";
    }
}
Enable the site and restart Nginx:
# Create symbolic link
sudo ln -s /etc/nginx/sites-available/nextjs-app /etc/nginx/sites-enabled/

# Remove default site (optional)
sudo rm /etc/nginx/sites-enabled/default

# Test configuration
sudo nginx -t

# Restart Nginx
sudo systemctl restart nginx
Use our Nginx config generator for custom configurations, and our robots.txt generator to control how search engines and AI crawlers access your Next.js app.
Step 8: SSL Certificate Setup
Let's Encrypt provides free SSL certificates. We'll use Certbot to automate the process:
# Install Certbot
sudo apt install -y certbot python3-certbot-nginx

# Obtain and install certificate
sudo certbot --nginx -d yourdomain.com -d www.yourdomain.com

# Follow the prompts to complete setup
Certbot will:
- Obtain a certificate from Let's Encrypt
- Modify your Nginx configuration to use HTTPS
- Set up automatic HTTP to HTTPS redirection
- Configure a cron job for automatic renewal
Verify automatic renewal is set up:
sudo certbot renew --dry-run
Your Nginx configuration will be updated to include SSL settings. The final configuration will look something like this:
server {
    listen 443 ssl http2;
    server_name yourdomain.com www.yourdomain.com;

    ssl_certificate /etc/letsencrypt/live/yourdomain.com/fullchain.pem;
    ssl_certificate_key /etc/letsencrypt/live/yourdomain.com/privkey.pem;
    ssl_session_timeout 1d;
    ssl_session_cache shared:SSL:50m;
    ssl_session_tickets off;

    # Modern SSL configuration
    ssl_protocols TLSv1.2 TLSv1.3;
    ssl_ciphers ECDHE-ECDSA-AES128-GCM-SHA256:ECDHE-RSA-AES128-GCM-SHA256:ECDHE-ECDSA-AES256-GCM-SHA384:ECDHE-RSA-AES256-GCM-SHA384;
    ssl_prefer_server_ciphers off;

    # HSTS
    add_header Strict-Transport-Security "max-age=63072000" always;

    # ... rest of configuration
}
Step 9: Environment Variables Management
Managing environment variables securely is critical for production deployments. There are several approaches:
Option 1: .env Files
Create a .env.production file on your server (not in Git):
# ~/apps/your-nextjs-app/.env.production
DATABASE_URL=postgresql://user:password@localhost:5432/mydb
NEXTAUTH_SECRET=your-secret-key
NEXTAUTH_URL=https://yourdomain.com
STRIPE_SECRET_KEY=sk_live_...
NEXT_PUBLIC_API_URL=https://api.yourdomain.com
For PM2, reference the env file in your ecosystem config or load it manually:
# Load env vars before starting
export $(cat .env.production | xargs) && pm2 start ecosystem.config.js
Option 2: PM2 Environment Variables
Add environment variables directly to your ecosystem.config.js:
module.exports = {
  apps: [{
    name: 'nextjs-app',
    script: '.next/standalone/server.js',
    env_production: {
      NODE_ENV: 'production',
      DATABASE_URL: 'postgresql://user:password@localhost:5432/mydb',
      NEXTAUTH_SECRET: 'your-secret-key',
    },
  }],
}
Option 3: Docker Environment Variables
Use an env file with Docker:
docker run -d --env-file .env.production -p 3000:3000 nextjs-app
Or with Docker Compose:
services:
  nextjs:
    env_file:
      - .env.production
Use our env file builder to generate properly formatted environment files.
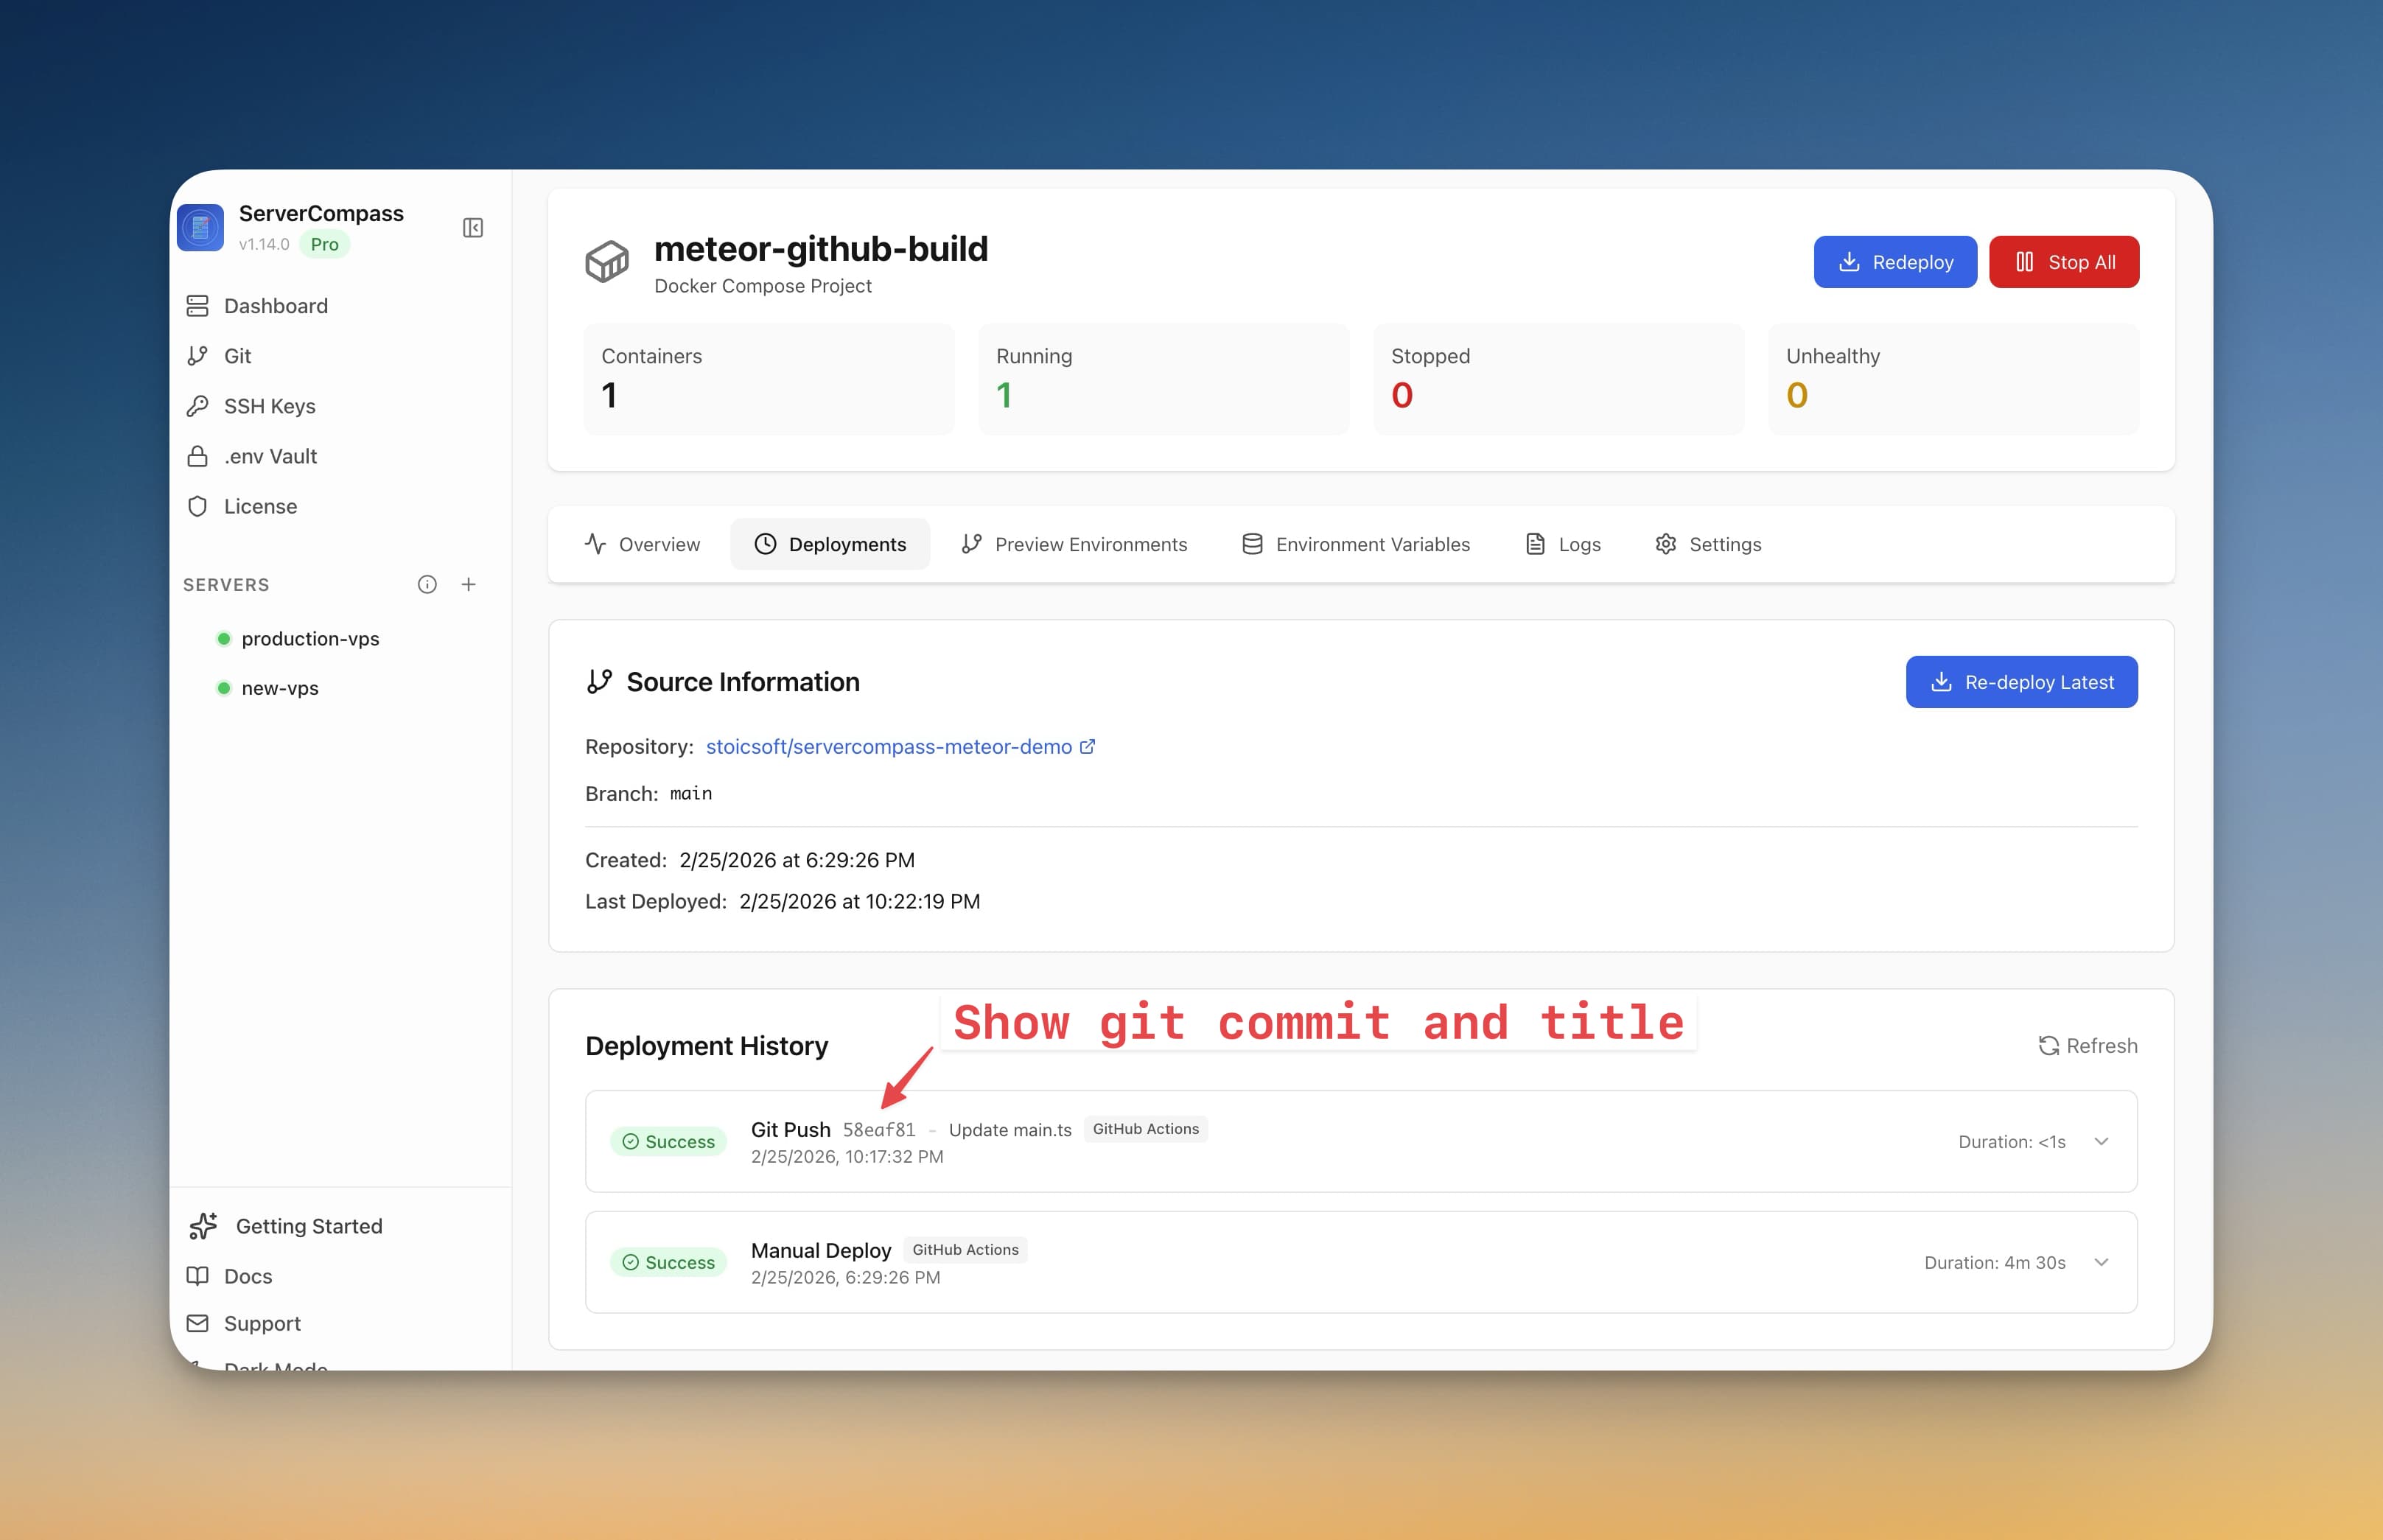
The Easy Way: Deploy with Server Compass
Everything we've covered so far — PM2 configuration, Docker builds, Nginx setup, SSL certificates, environment variables — is handled automatically by Server Compass.
Server Compass is a desktop application that turns complex VPS deployment into a visual workflow:
- One-click Next.js deployment — Server Compass detects Next.js projects automatically, generates optimized Dockerfiles, and deploys with zero configuration.
- GitHub integration — Connect your repository and deploy on every push with GitHub Actions-powered CI/CD.
- Automatic SSL — SSL certificates are provisioned and renewed automatically using Let's Encrypt.
- Environment variable vault — Store secrets securely with AES-256-GCM encryption, synced to your server at deploy time.
- Zero-downtime deployments — Blue-green deployment strategy ensures your app never goes offline during updates.
- Real-time monitoring — View container logs, CPU/memory usage, and deployment history from a single dashboard.
Instead of writing configuration files and running terminal commands, you get a visual interface that handles everything. It's the Vercel experience on your own infrastructure.
Download Server Compass — $29 one-time, no subscription, no usage fees.
Vercel vs VPS Cost Comparison
Here's a realistic cost comparison for a Next.js application with moderate traffic (100,000 page views/month):
Metric
Vercel Pro
Vercel Team
Self-Hosted VPS
Base cost
$20/month
$20/user/month
$5–$10/month
Bandwidth (100GB)
Included
Included
Unlimited*
Serverless functions
1M included, then $0.6/M
10M included
Unlimited
Image optimization
1,000 included, then $5/1,000
5,000 included
Unlimited (self-hosted)
Build minutes
6,000/month
24,000/month
Unlimited
Concurrent builds
1
3
Limited by CPU
Analytics
$10/month add-on
$10/month add-on
Free (self-hosted)
Typical monthly cost
$30–$100+
$60–$200+
$5–$20
Annual cost
$360–$1,200+
$720–$2,400+
$60–$240
*Most VPS providers include 1–20TB of bandwidth, which is effectively unlimited for most applications.
The cost difference becomes even more significant at scale. At 1 million page views per month, Vercel costs can exceed $500/month, while a $20 VPS handles the traffic easily.
Add Server Compass at $29 one-time, and the entire first year of self-hosting costs less than two months of Vercel Pro.
Deployment Checklist
Before going live, verify these items:
output: 'standalone'is set in next.config.js- Static files are copied to standalone folder
- PM2 or Docker is configured and running
- Nginx reverse proxy is configured
- SSL certificate is installed and auto-renewing
- Environment variables are set (not in Git)
- Firewall allows only ports 80, 443, and SSH
- PM2 is configured to start on boot
- Logs are being written and rotated
- Health check endpoint is working
Updating Your Application
To deploy updates, follow this process:
cd ~/apps/your-nextjs-app

# Pull latest changes
git pull origin main

# Install dependencies (if changed)
npm ci

# Build the application
npm run build

# Copy static files
cp -r .next/static .next/standalone/.next/
cp -r public .next/standalone/

# Restart PM2
pm2 restart nextjs-app
For Docker deployments:
cd ~/apps/your-nextjs-app

# Pull latest changes
git pull origin main

# Rebuild and restart
docker compose down
docker compose build --no-cache
docker compose up -d
Consider setting up GitHub Actions for automated deployments. Our guide on GitHub Actions for zero-downtime deployments covers this in detail.
Troubleshooting Common Issues
Application Not Starting
Check PM2 logs for errors:
pm2 logs nextjs-app --lines 100
Common causes:
- Missing environment variables
- Port already in use (check with
lsof -i :3000) - Incorrect path in ecosystem.config.js
- Missing static files in standalone folder
502 Bad Gateway
This usually means Nginx can't connect to your Node.js application:
- Verify the app is running:
pm2 status - Check the upstream port matches in Nginx config
- Look at Nginx error logs:
sudo tail -f /var/log/nginx/error.log
SSL Certificate Issues
If certificate renewal fails:
# Check certificate status
sudo certbot certificates

# Force renewal
sudo certbot renew --force-renewal

# Check for port conflicts
sudo lsof -i :80
Memory Issues
Next.js can consume significant memory during builds. If your server runs out of memory:
- Add swap space (at least 2GB for small VPS)
- Build locally and deploy the built files
- Use Docker with build stages to limit memory during build
Frequently Asked Questions
Can I use Next.js static export instead?
Yes, if your app doesn't use server-side features. Set output: 'export' in next.config.js, and deploy the generated out folder to any static hosting or serve it directly with Nginx. However, you lose API routes, server components, and dynamic rendering.
Which VPS provider should I use?
All major providers work well. Hetzner offers the best value in Europe, DigitalOcean and Linode are popular in the US, and Vultr has good global coverage. For a Next.js app, start with 1GB RAM / 1 vCPU ($5–$6/month) and scale up as needed.
Does ISR (Incremental Static Regeneration) work on a VPS?
Yes, ISR works in standalone mode. The revalidation cache is stored in .next/cache. For multi-instance deployments, you'll need a shared cache (Redis) or accept that different instances may have different cached versions.
What about Next.js Image Optimization?
The built-in image optimization works in standalone mode. Images are optimized on-demand and cached in .next/cache/images. For better performance, consider using a CDN like Cloudflare in front of your server.
Can I run multiple Next.js apps on one VPS?
Absolutely. Run each app on a different port (3000, 3001, 3002, etc.) and configure Nginx to route traffic based on domain name or path. Server Compass makes this easy with its multi-app support.
Do I need a separate database server?
For small to medium applications, running PostgreSQL or MySQL on the same VPS is fine. For larger applications or when you need high availability, consider a managed database service or a dedicated database server.
Next Steps
You now have a production Next.js deployment on your own VPS. Here are some ways to improve it further:
- Set up GitHub Actions for automated deployments
- Add a CDN like Cloudflare for global caching and DDoS protection
- Configure monitoring with tools like Prometheus + Grafana or use Server Compass's built-in monitoring
- Set up automated backups for your database and configuration
- Self-host PostgreSQL for your database needs
Ready to simplify your VPS deployments? Try Server Compass — deploy Next.js, Node.js, Docker apps, and 100+ templates with a visual interface. $29 one-time, no subscription.
Related in the StoicSoft network
If you're choosing a VPS provider or benchmarking real-world performance like the post above explores, StoicVPS is the StoicSoft network's independent tracker for VPS pricing, performance, and migration safety.
From across the StoicSoft network
Hand-curated reads on the same topic from sister sites in the StoicSoft family.
 1DevTool10 min read
Docker Desktop Alternatives for Developers in 2026
Developers want a Docker workflow that stays close to code, logs, and AI agents. This comparison breaks down Docker Desktop alternatives by performance, observability, and daily usability.
Read on 1devtool.com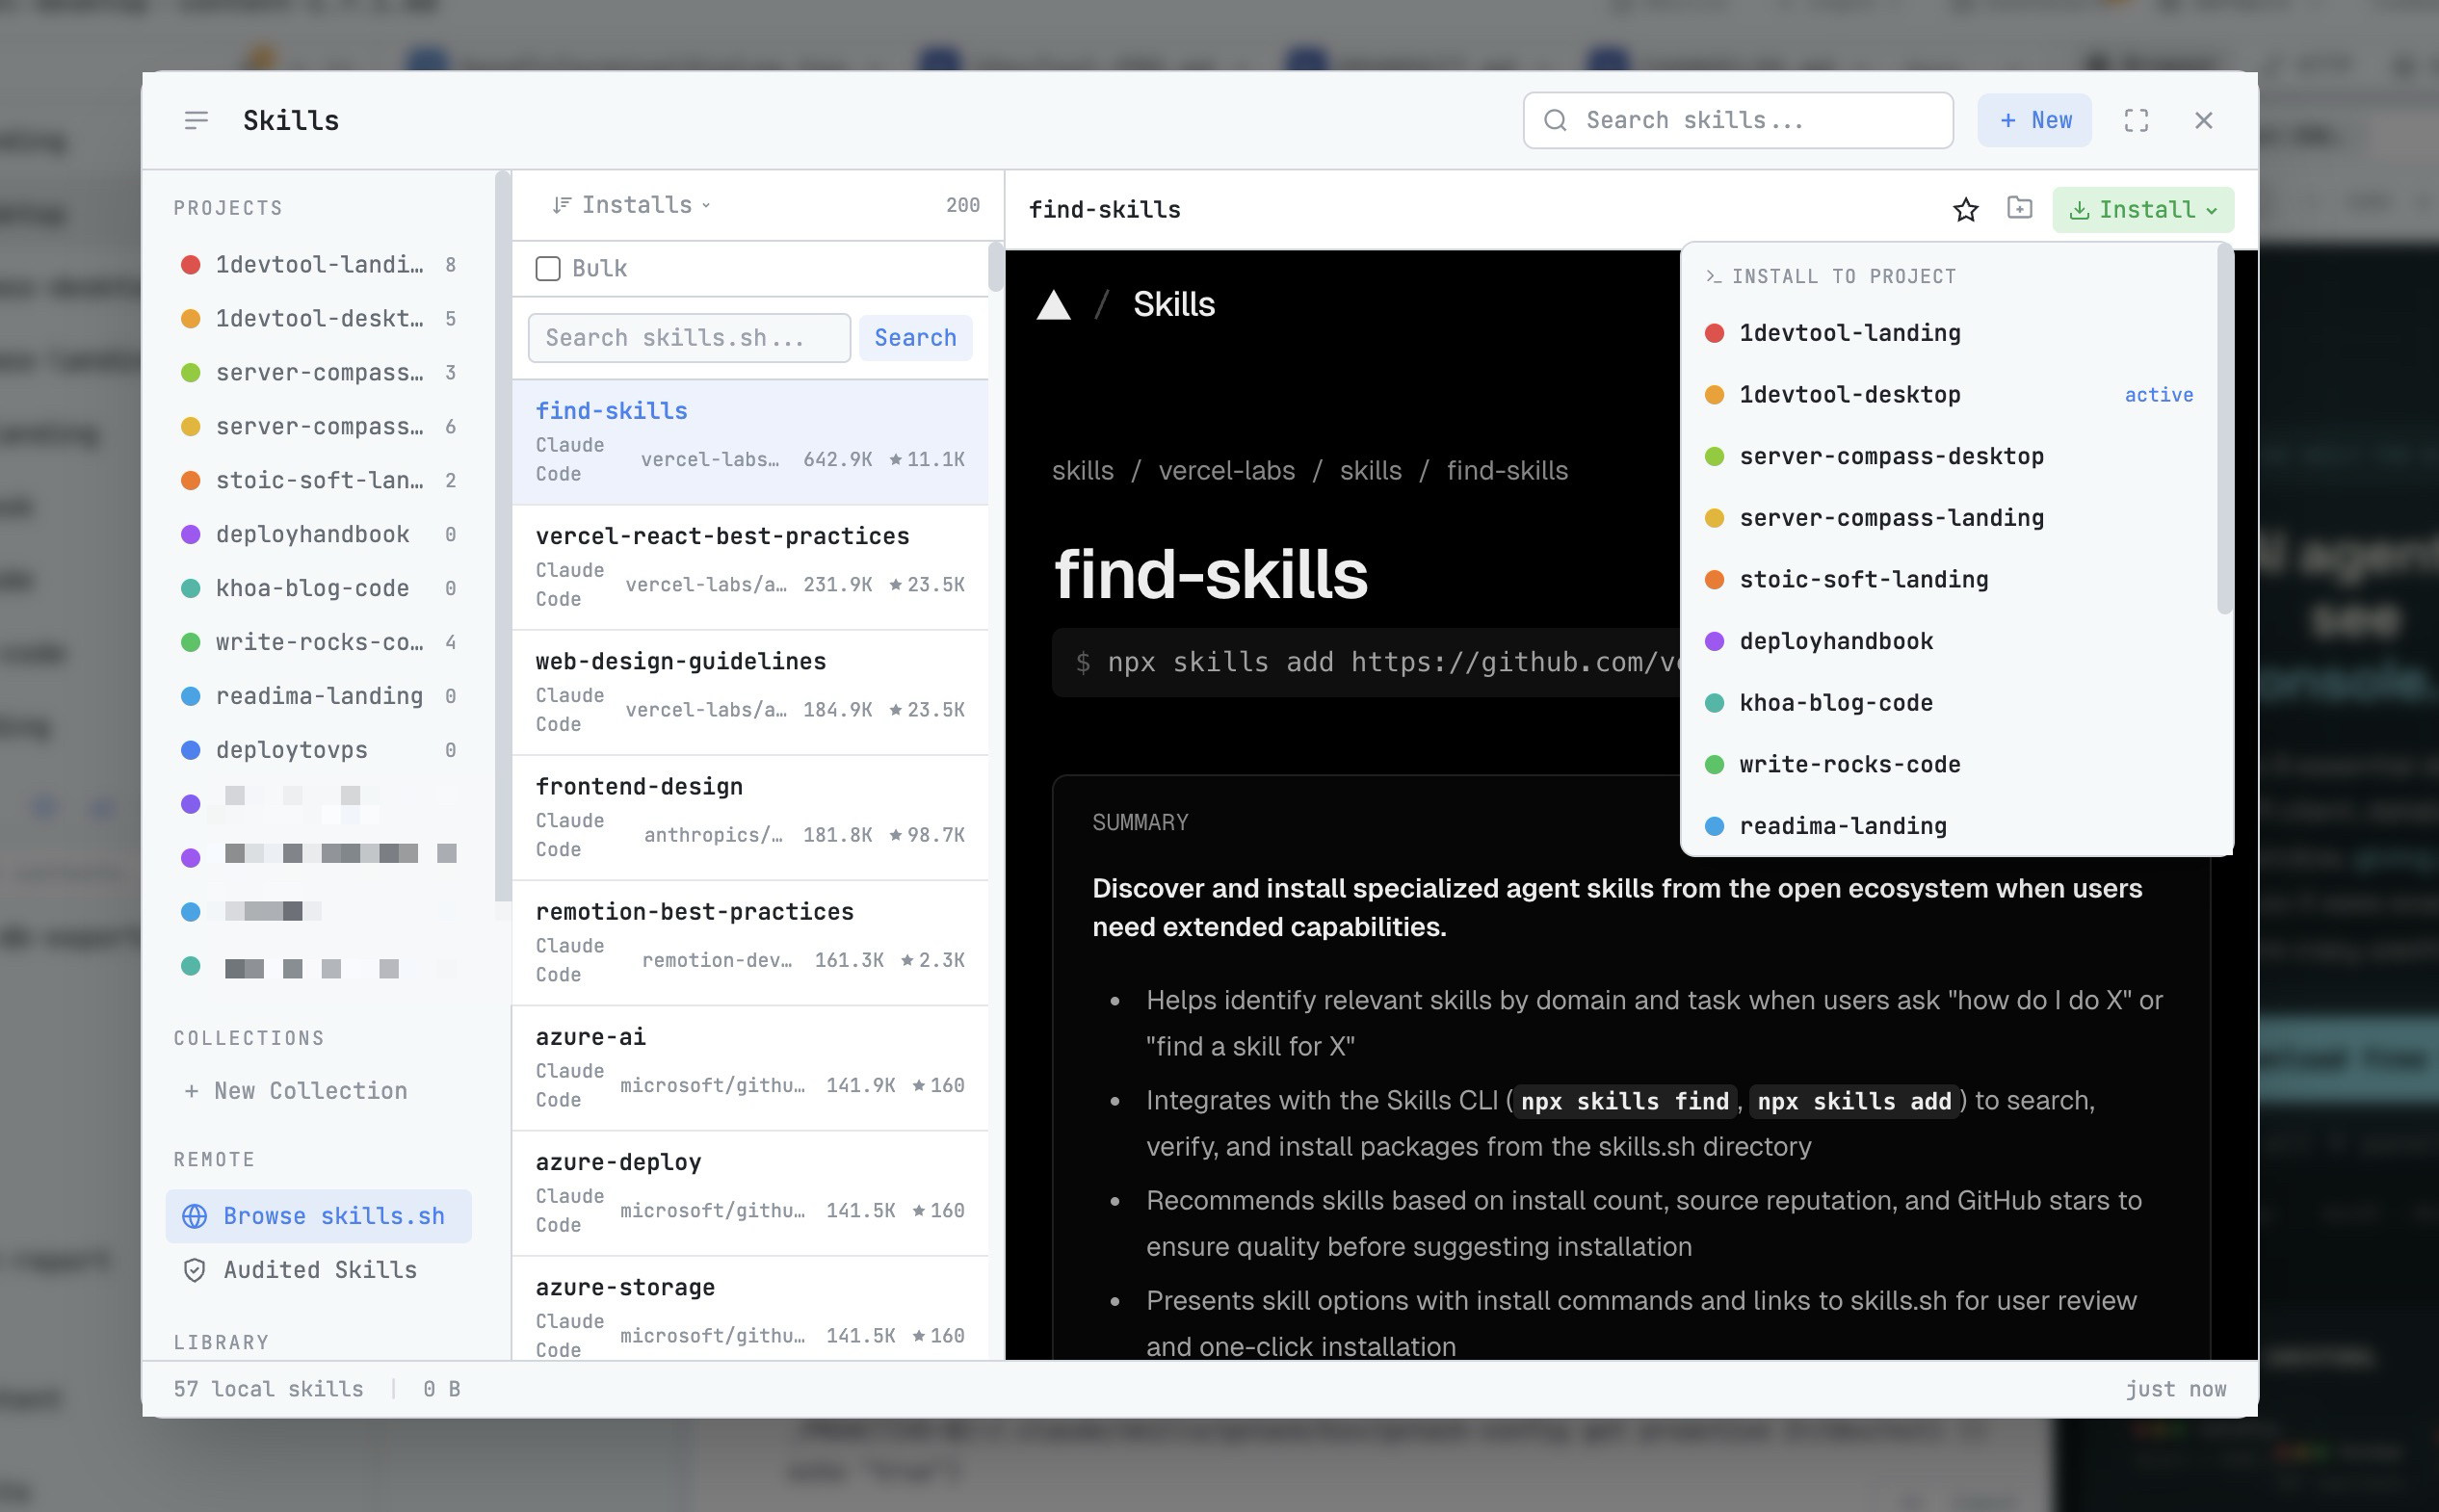 1DevTool8 min read
AI Skills Manager & Docker Deep Dive: Extend Your Agents, Monitor Your Containers
Browse, create, and install AI agent skills with built-in security scanning. Plus a redesigned Docker manager with live CPU, memory, and network monitoring for every container.
Read on 1devtool.com