Disks & Storage
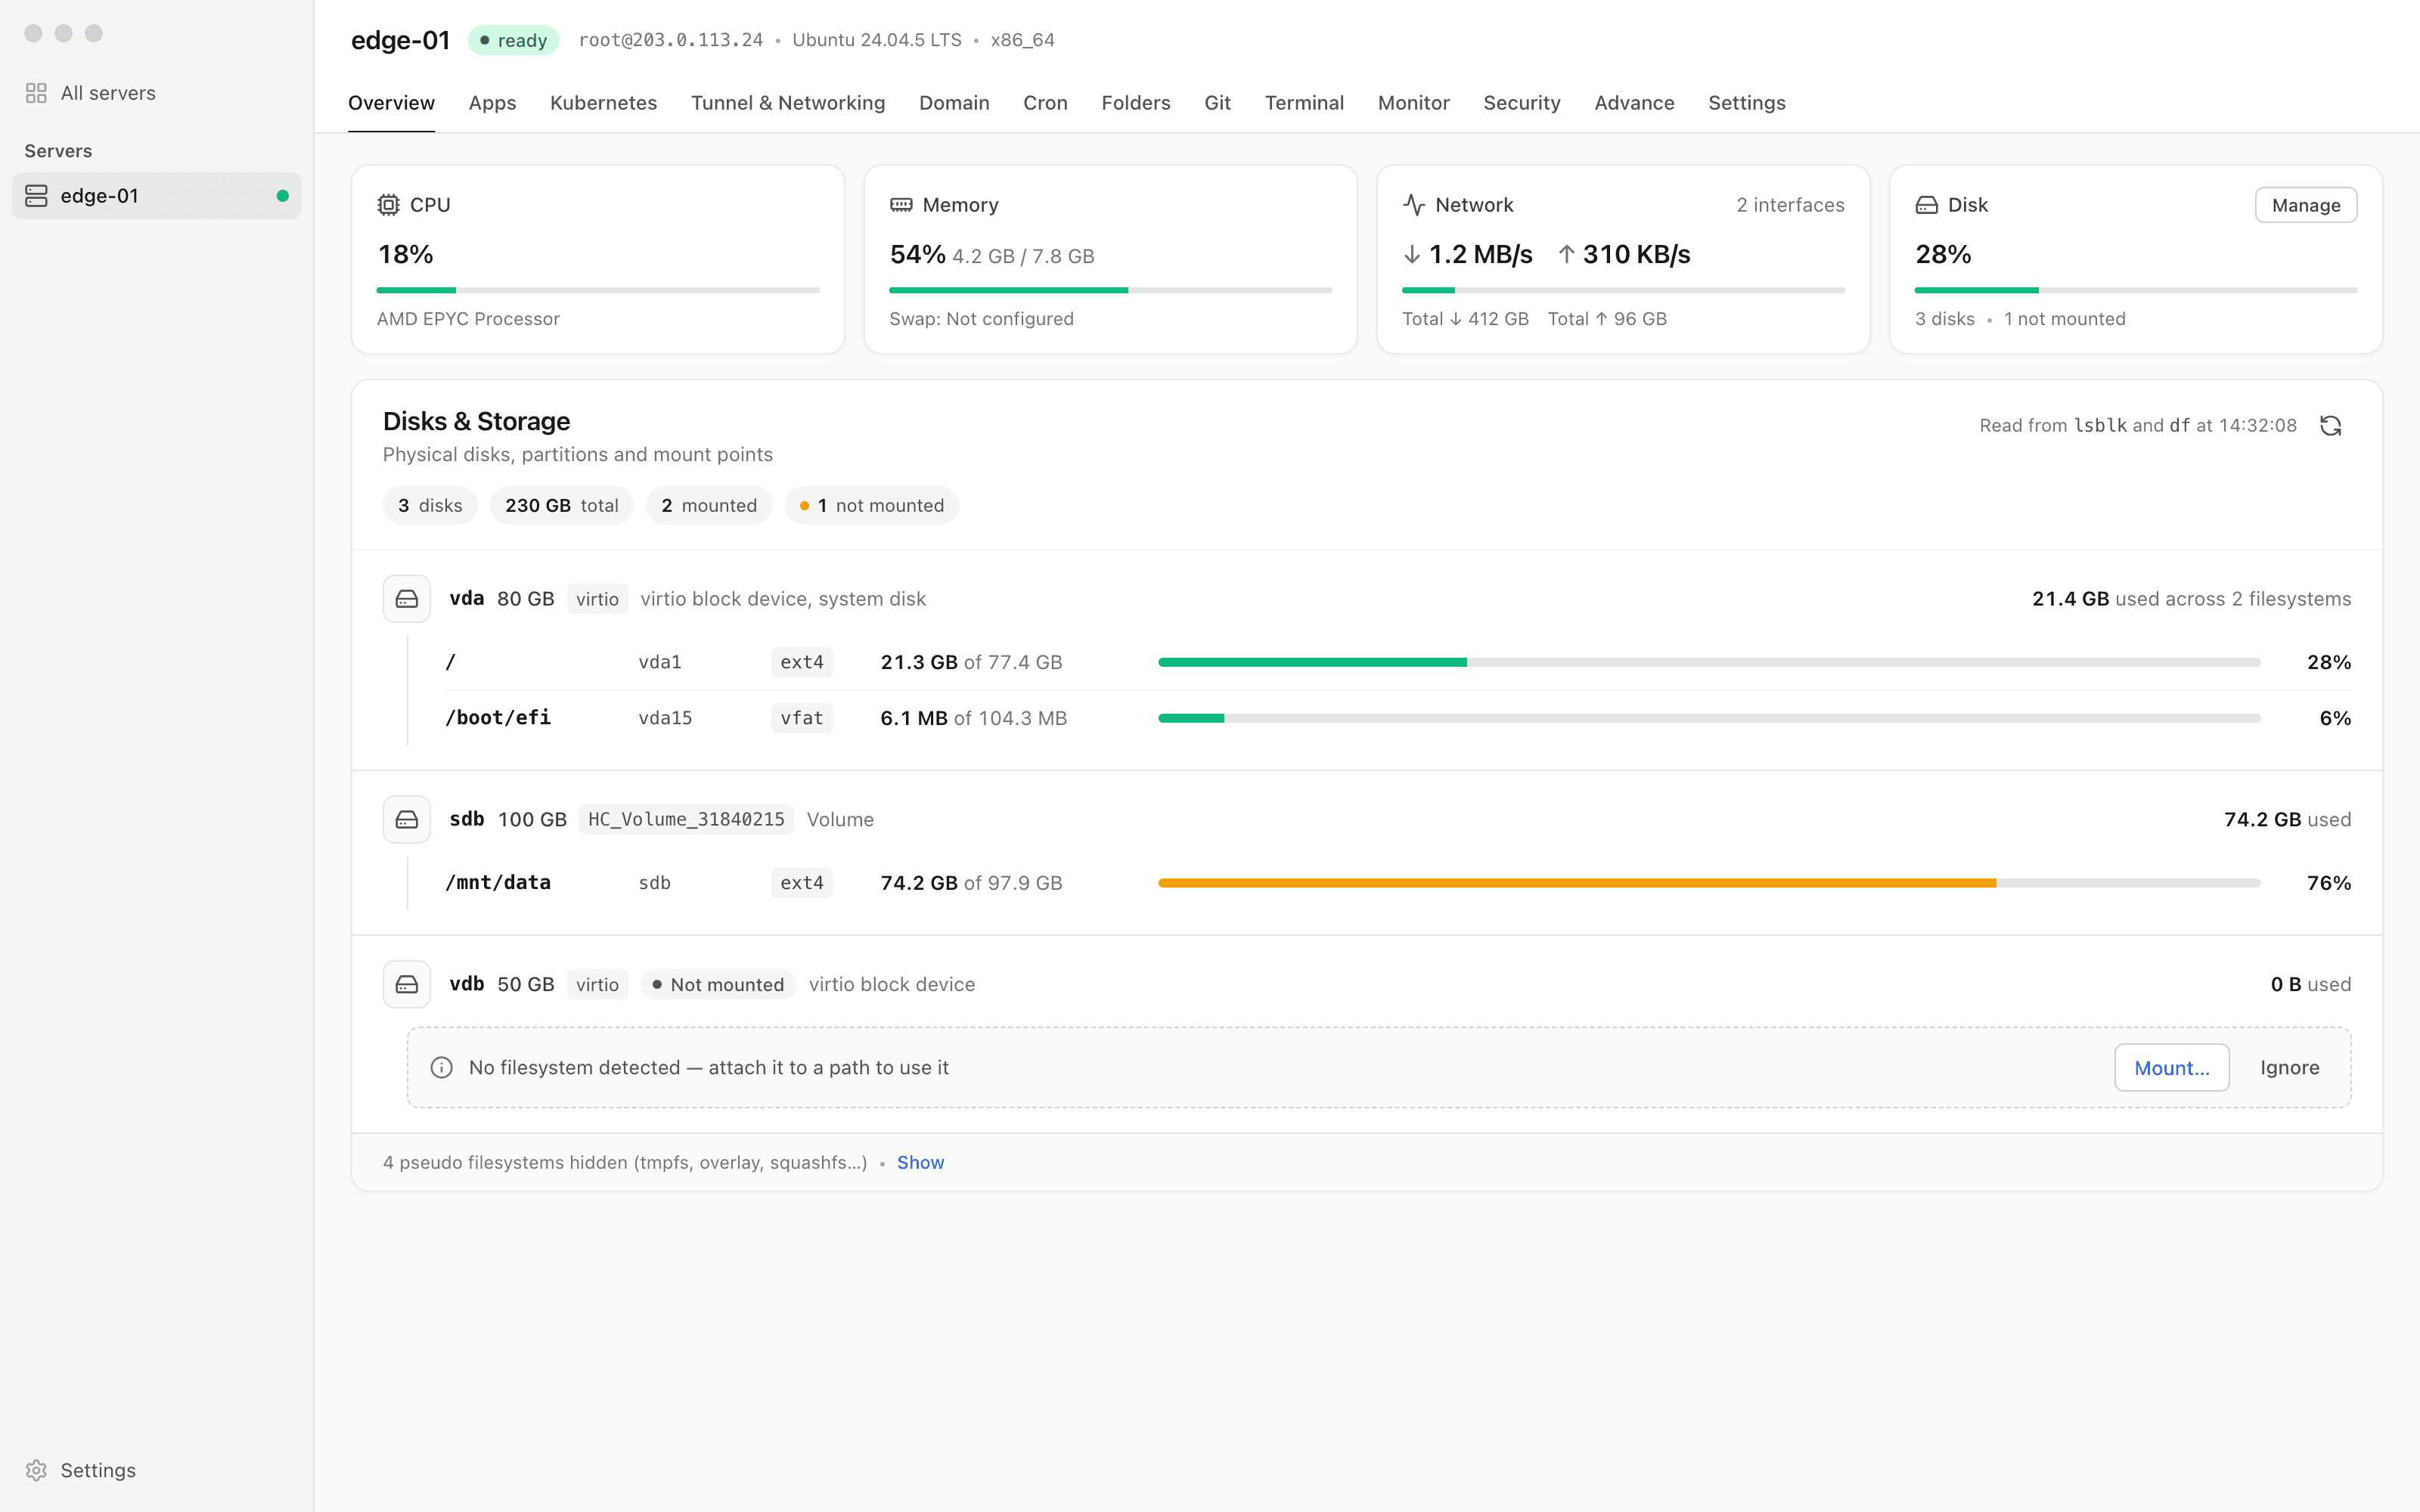
See every disk on your server, with partitions and mount points grouped under each physical disk and attached volumes that were never mounted called out. Mount one from the app, with an optional /etc/fstab entry by UUID and nofail so the server still boots without it.
How Disks & Storage Works
Using Disks & Storage is straightforward. Follow these simple steps to get started.
Open the server Overview
Disks & Storage groups partitions and mount points under each physical disk, read from lsblk and df, with totals for disks, size, mounted and not mounted.
Find the volume that is not mounted
An attached disk with no mount shows Not mounted, with Mount… to use it and Ignore to hide it from the count.
Mount it
Pick the Partition and Mount path (default /mnt/<name>, created if missing). Add to /etc/fstab (UUID, nofail) is on by default.
Format only a blank disk
A disk with no filesystem can be formatted as ext4 (recommended) or xfs after you type its name. Existing filesystems are never reformatted.
Disks & Storage vs. The Command Line
Miss the old days? Here's how to do everything Disks & Storage does... the hard way.
Find the new disk
Match the device name to the volume you attached, and check what is already mounted.
lsblk -o NAME,SIZE,TYPE,FSTYPE,MOUNTPOINT
df -hFormat it, only if it is blank
No blkid output means no filesystem. Anything else means there is data on it.
blkid /dev/vdb
mkfs.ext4 -L data /dev/vdb
mkfs on the wrong device erases it without asking.
Mount it
Create the folder and mount the device there.
mkdir -p /mnt/data
mount /dev/vdb /mnt/dataMake it survive a reboot
Reference the volume by UUID and mark it nofail.
cp /etc/fstab /etc/fstab.bak
echo "UUID=$(blkid -s UUID -o value /dev/vdb) /mnt/data ext4 defaults,nofail 0 2" >> /etc/fstab
systemctl daemon-reload
Leave out nofail and a detached volume can stop the server at boot in emergency mode.
There's a Better Way
Disks & Storage in Server Compass does all of this with a single click. No terminal. No memorizing commands. No 3 AM debugging sessions.
- No SSH required
- Guided workflows
- Undo support
- Multi-server management
Disks & Storage Features
Everything you need for server management in one integrated tool, replacing complex CLI commands and manual configuration.
Get StartedBenefits of Disks & Storage
Server management shouldn't require a DevOps team. Disks & Storage makes professional-grade server management accessible to everyone.
At-a-Glance Monitoring
Disks & Storage shows CPU, RAM, disk, and network metrics in a single dashboard view.
Quick Actions
Disks & Storage provides one-click package updates, Docker setup, and system configuration.
Multi-Server Support
Disks & Storage manages unlimited VPS servers from one application with saved connections.
Resource Trending
Disks & Storage tracks resource usage over time so you can plan capacity and identify bottlenecks.
Disks & Storage FAQ
Common questions about Disks & Storage in Server Compass
How do I access Disks & Storage in Server Compass?
Disks & Storage is available in the Server Management section of Server Compass. Simply connect to your server, navigate to Server Management, and you'll find Disks & Storage ready to use. No additional setup or plugins required.
Does Disks & Storage require any server-side installation?
No. Server Compass operates as a desktop application that connects to your server via SSH. Disks & Storage works through this connection without installing any agents or packages on your server (except the optional monitoring agent for resource tracking).
Is Disks & Storage included in all Server Compass plans?
Yes. Every Server Compass feature, including Disks & Storage, is included with the one-time $29 payment. There are no tier restrictions, add-ons, or per-server fees. You get all 155+ features for all your servers.
Can I use Disks & Storage with any VPS provider?
Disks & Storage works with any VPS or dedicated server that supports SSH access and Docker. This includes DigitalOcean, Hetzner, Vultr, Linode, AWS EC2, Google Cloud, Azure, and any other provider. It also works with local servers and homelab setups.
What makes Disks & Storage different from command-line alternatives?
Disks & Storage provides a visual, intuitive interface that replaces complex CLI commands and configuration files. You get real-time feedback, safety confirmations, and a consistent experience across all your servers without memorizing syntax or writing scripts.
More Server Management Features
Explore other server management capabilities in Server Compass
Server Overview Dashboard
At-a-glance view of CPU, RAM, and disk usage. See OS info, auth method, location, and provider details.
Resource Monitoring
Real-time CPU, memory, and disk usage graphs. Track resource trends and identify bottlenecks.
System Packages
List and manage installed APT packages, update individual ones, or run a system-wide upgrade. Install Recommended covers the baseline a server needs — including sudo and jq — and an Available Packages section installs optional software like Caddy with its repository set up for you.
Port Management
View all open ports and the services using them. Identify conflicts and manage port allocations.
Try Disks & Storage Today
Download Server Compass and get access to Disks & Storage along with 154 other features. One-time $29 payment. No subscriptions. No per-server fees.