April 5, 2026
Deploy Apps on Hetzner: The Complete Beginner Guide
A step-by-step beginner guide to deploying apps on Hetzner Cloud. Learn how to create an account, provision a VPS, connect via SSH, install Docker, and deploy your first application on one of the most affordable cloud providers.
Hetzner Cloud is one of the best-kept secrets in the VPS world. While most beginners default to AWS or DigitalOcean, Hetzner offers significantly more computing power per dollar — and their European data centers are rock-solid. If you want to deploy an app on Hetzner but have never touched a VPS before, this guide walks you through every step from zero to a running application.
By the end of this Hetzner VPS tutorial, you'll know how to create an account, provision a server, connect via SSH, install Docker, and deploy your first app. We'll also cover an easier alternative that skips the terminal entirely.
Why Choose Hetzner for App Deployment
Before we dive into the setup, here's why Hetzner stands out for developers deploying apps on a budget:
- Unbeatable pricing — A 2-vCPU, 4GB RAM server costs around $4.50/month. The same specs on AWS EC2 or DigitalOcean cost 2-4x more.
- Included traffic — Most plans include 20TB of outbound traffic. No surprise bandwidth bills.
- NVMe storage — Fast SSD storage on all plans, not just premium tiers.
- Data centers in Europe and the US — Falkenstein, Nuremberg, Helsinki, Ashburn (Virginia), and Hillsboro (Oregon).
- Simple, honest pricing — No hidden fees, no confusing tier structures, no per-request charges.
For comparison, a Hetzner CX22 (2 vCPUs, 4GB RAM, 40GB NVMe) costs about $4.50/month. A comparable DigitalOcean droplet costs $24/month. That's a massive difference, especially if you're running multiple apps or side projects.
Hetzner Cloud Pricing at a Glance
Plan
vCPUs
RAM
Storage
Price/Month
CX11
1
2 GB
20 GB NVMe
~$3.50
CX22
2
4 GB
40 GB NVMe
~$4.50
CX32
4
8 GB
80 GB NVMe
~$8.50
CX42
8
16 GB
160 GB NVMe
~$16
All plans include 20TB of traffic. Even the smallest CX11 plan is enough to run a couple of Docker-based applications.
Step 1: Create a Hetzner Cloud Account
Head to hetzner.com/cloud and create an account. You'll need to:
- Sign up with your email address
- Verify your email
- Add a payment method (credit card or PayPal)
- Complete identity verification (may require a selfie with your ID for new accounts)
Once verified, you'll land in the Hetzner Cloud Console. This is your dashboard for managing servers, networks, firewalls, and more.
Step 2: Provision Your First VPS
In the Hetzner Cloud Console, click Create Server. You'll need to make a few choices:
Choose a Location
Pick the data center closest to your users. If your audience is in Europe, choose Falkenstein (FSN), Nuremberg (NBG), or Helsinki (HEL). For US-based users, choose Ashburn (ASH) or Hillsboro (HIL).
Choose an Operating System
Select Ubuntu 24.04. It's the most widely supported Linux distribution, has the largest community, and virtually every tutorial you find online will use Ubuntu commands. Debian is a solid alternative if you prefer it.
Choose a Server Plan
For most apps, the CX22 (2 vCPUs, 4GB RAM, ~$4.50/month) is the sweet spot. It can comfortably run multiple Docker containers, a reverse proxy, and a database.
If you're just experimenting, the CX11 (1 vCPU, 2GB RAM, ~$3.50/month) works fine for a single lightweight app.
Add an SSH Key (Recommended)
Hetzner lets you add an SSH key during server creation. This is more secure than password authentication. If you don't have an SSH key yet, generate one on your local machine:
ssh-keygen -t ed25519 -C "[email protected]"
Then copy your public key:
cat ~/.ssh/id_ed25519.pub
Paste this into the SSH key field in the Hetzner server creation form. If you prefer password login instead, Hetzner will email you the root password after the server is created.
Create the Server
Give your server a name (e.g., my-app-server), review your choices, and click Create & Buy now. Your server will be ready in about 30 seconds. Copy the IP address — you'll need it for the next step.
Step 3: Connect to Your Server via SSH
Open a terminal on your local machine and connect to your new Hetzner server:
ssh root@YOUR_SERVER_IP
Replace YOUR_SERVER_IP with the IP address from the Hetzner Cloud Console. If you used an SSH key, you'll connect immediately. If you used a password, enter it when prompted.
On your first connection, you'll see a fingerprint warning. Type yes to continue. You're now logged into your server.
Initial Server Setup
Before installing anything, update your system packages:
apt update && apt upgrade -y
For production servers, it's good practice to create a non-root user and configure a basic firewall. For this beginner guide, we'll keep it simple and work as root, but you can find more details in our documentation.
Step 4: Install Docker on Hetzner
Docker is the standard way to deploy applications on a VPS. It packages your app and all its dependencies into a container that runs the same everywhere. Here's how to install it on your Hetzner server:
# Install Docker using the official convenience script
curl -fsSL https://get.docker.com | sh

# Verify the installation
docker --version

# Install Docker Compose plugin
apt install docker-compose-plugin -y

# Verify Compose
docker compose version
That's it. Docker and Docker Compose are now installed and ready to use. The convenience script handles all the repository setup, GPG keys, and package installation automatically.
If you want to learn more about deploying Docker containers on a VPS, check out our in-depth guide on deploying Docker containers without Kubernetes .
Step 5: Deploy Your First App on Hetzner
Let's deploy a real application. We'll use Uptime Kuma as our example — it's a popular self-hosted monitoring tool that's perfect for a first deployment.
Create a Docker Compose File
Create a directory for your app and add a docker-compose.yml file:
mkdir -p /opt/uptime-kuma && cd /opt/uptime-kuma

cat > docker-compose.yml << 'EOF'
services:
  uptime-kuma:
    image: louislam/uptime-kuma:1
    container_name: uptime-kuma
    restart: always
    ports:
      - "3001:3001"
    volumes:
      - uptime-kuma-data:/app/data

volumes:
  uptime-kuma-data:
EOF
Start the Application
docker compose up -d
The -d flag runs the container in the background. Docker will pull the image, create the container, and start it. Check that it's running:
docker compose ps
You should see the container in a "running" state. Open your browser and navigate to http://YOUR_SERVER_IP:3001 — you'll see the Uptime Kuma setup page.
Deploy More Applications
The same pattern works for any Docker-based application. Here are some popular apps you can deploy on your Hetzner VPS:
- WordPress — The world's most popular CMS
- Ghost — Modern publishing platform
- n8n — Workflow automation (like Zapier, but self-hosted)
- Plausible Analytics — Privacy-friendly Google Analytics alternative
- PostgreSQL — Production-grade database
You can browse our full catalog of 200+ one-click deploy templates for more options.
Adding a Domain and SSL Certificate
Running apps on an IP address and port number isn't ideal for production. You'll want a domain name with HTTPS. This requires a reverse proxy — a server that sits in front of your apps, routes traffic by domain name, and handles SSL certificates.
Traefik is the easiest reverse proxy to use with Docker. It automatically discovers your containers and provisions free SSL certificates from Let's Encrypt.
Setting up Traefik manually involves configuring Docker labels, creating a Traefik configuration file, and managing certificate storage. While doable, it's one of the more complex parts of self-hosting. If you want SSL and domains without the YAML configuration, keep reading for the easy path.
Essential Hetzner Tips for Beginners
Configure the Hetzner Firewall
Hetzner Cloud offers a free cloud firewall. Go to Firewalls in the Cloud Console and create one with these rules:
- SSH (TCP 22) — Allow from your IP only, or from anywhere if you use SSH keys
- HTTP (TCP 80) — Allow from anywhere
- HTTPS (TCP 443) — Allow from anywhere
Apply this firewall to your server. This blocks all other incoming traffic by default, which is an important security baseline.
Enable Backups
Hetzner offers automated server backups for 20% of the server price (about $0.90/month for a CX22). Enable this under your server's Backups tab. It takes daily snapshots so you can restore your server if something goes wrong.
For application-level backups, consider backing up your Docker volumes and database dumps separately. Our guide on encrypted cloud backups covers this in detail.
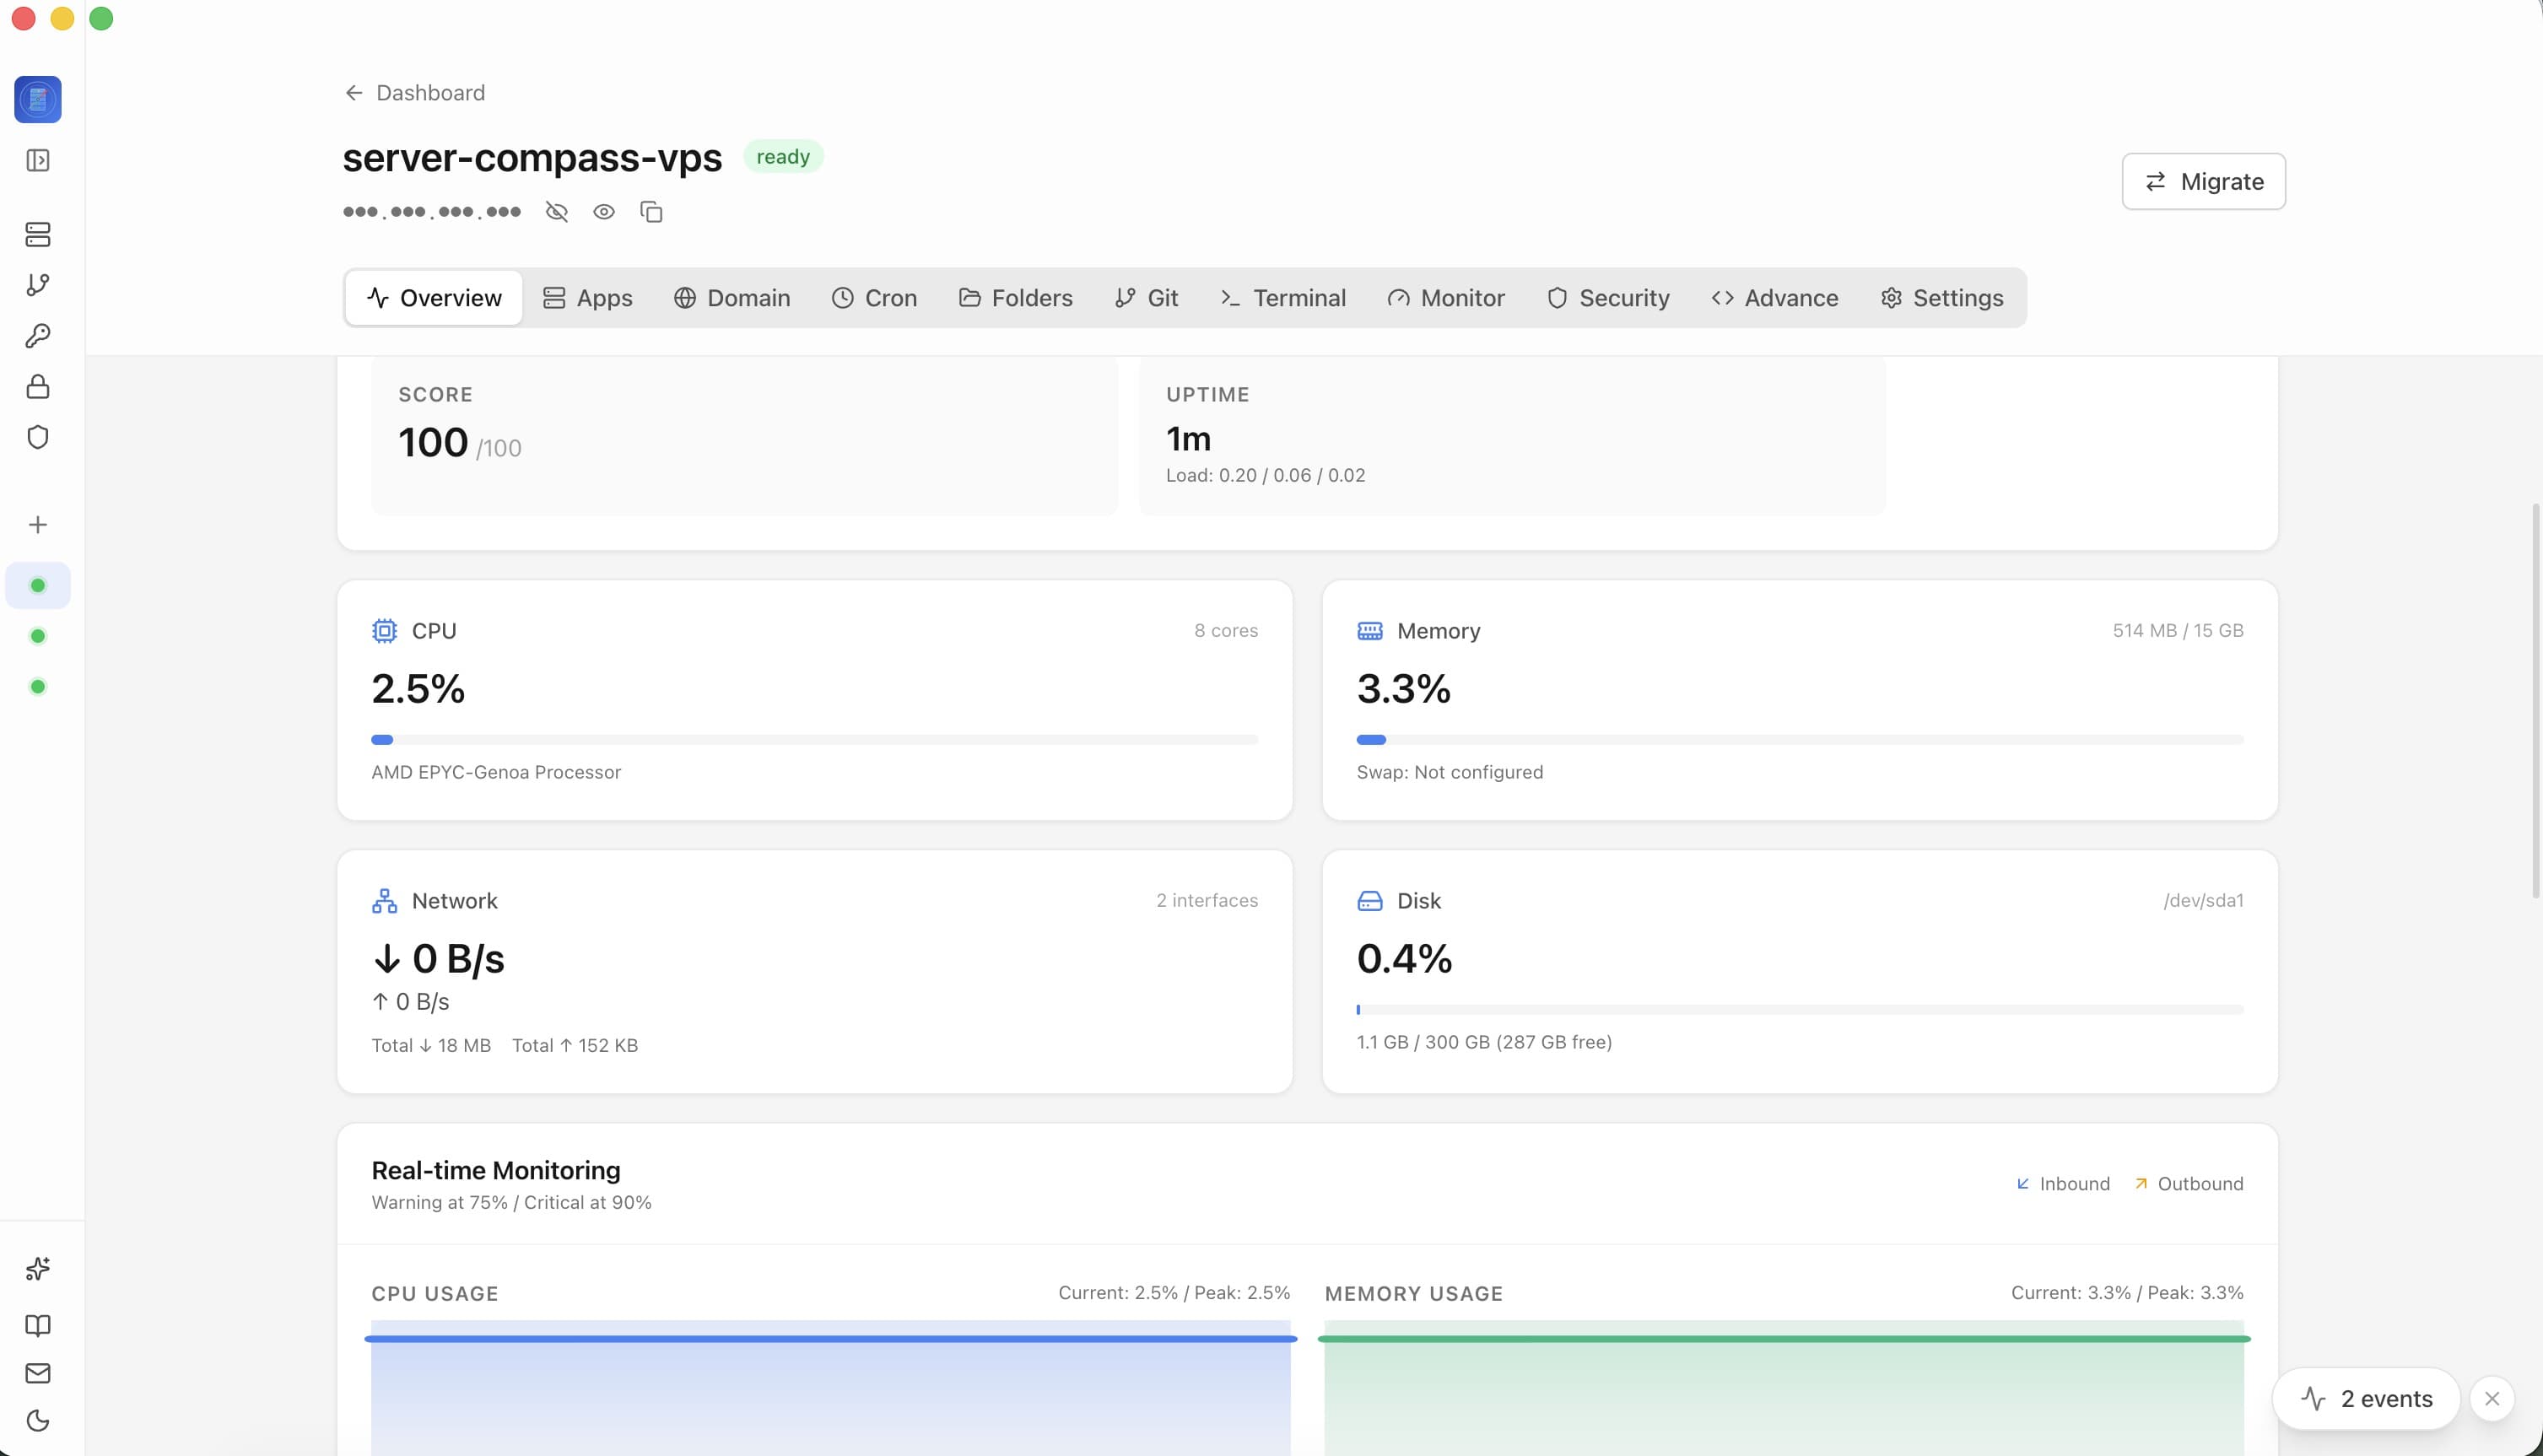
Monitor Server Resources
Hetzner provides basic graphs for CPU, disk, and network usage in the Cloud Console. For more detailed monitoring, you can deploy Uptime Kuma (as we did above) or Grafana with Prometheus for full observability.
The Easy Way: Deploy on Hetzner with Server Compass
The steps above work perfectly, but they assume you're comfortable with SSH and the command line. If you'd rather skip the terminal entirely — or you just want a faster workflow — Server Compass is a visual server management tool that connects to your Hetzner VPS and handles everything through a desktop app.
Here's what the workflow looks like with Server Compass:
- Connect your Hetzner server — Enter your server IP and password (or SSH key). Server Compass connects in seconds. No terminal required. See our connection tutorial for a walkthrough.
- Deploy apps from templates — Browse 200+ one-click templates and deploy WordPress, PostgreSQL, n8n, or any Docker app with a single click. Environment variables, volumes, and networking are pre-configured.
- Add domains with automatic SSL — Point your domain to your server IP and add it in Server Compass. SSL certificates are provisioned automatically via Let's Encrypt.
- Manage everything visually — Monitor container status, view logs, roll back deployments, and browse files — all from a clean desktop interface.
Server Compass works with any VPS provider, not just Hetzner. If you already have servers on DigitalOcean, Vultr, or Linode, you can manage them all from the same app.
We have a dedicated tutorial showing how to self-host Supabase on a Hetzner VPS using Server Compass, with no terminal commands at all.
Hetzner vs Other VPS Providers
How does Hetzner stack up against the competition? Here's a quick comparison for equivalent server specs (2 vCPUs, 4GB RAM):
Provider
Monthly Cost
Traffic Included
Storage
Hetzner CX22
~$4.50
20 TB
40 GB NVMe
DigitalOcean
$24
4 TB
80 GB SSD
Vultr
$18
3 TB
80 GB NVMe
Linode
$24
4 TB
80 GB SSD
AWS Lightsail
$20
4 TB
80 GB SSD
Hetzner's pricing is dramatically lower with generous traffic allowances. The trade-off is fewer data center locations compared to AWS or DigitalOcean, but for most applications serving European or US audiences, Hetzner's coverage is more than sufficient.
What Should You Deploy on Hetzner?
With a Hetzner VPS and Docker, you can run almost anything. Here are some popular use cases:
- Web apps and APIs — Deploy Next.js, Laravel, Django, or Express.js applications
- Self-hosted SaaS alternatives — Run n8n instead of Zapier, Plausible instead of Google Analytics, or NocoDB instead of Airtable
- Development tools — Host your own Gitea instance, CI/CD pipeline, or container management dashboard
- Databases — Run PostgreSQL, MySQL, or Redis without managed database pricing
- AI and machine learning — Self-host Ollama for local AI models on Hetzner's dedicated CPU servers
Troubleshooting Common Issues
Cannot Connect via SSH
If ssh root@YOUR_SERVER_IP hangs or times out:
- Verify the IP address is correct in the Hetzner Cloud Console
- Check that the server status is "Running"
- Make sure your Hetzner firewall allows TCP port 22
- If using a password, check your email for the root password from Hetzner
App Not Accessible in Browser
If your app is running but you cannot access it at http://YOUR_SERVER_IP:PORT:
- Ensure the Hetzner firewall allows the port your app is running on
- Verify the container is running with
docker compose ps - Check container logs with
docker compose logs - Make sure the container is binding to
0.0.0.0, not127.0.0.1
Running Out of Disk Space
Docker images and unused containers can fill up your disk. Clean them with:
docker system prune -a --volumes
For a more visual approach, our guide on disk management shows how Server Compass scans your VPS for reclaimable space and lets you clean up with one click.
Next Steps
You now have a working Hetzner VPS with Docker, ready to deploy any application. Here are some recommended next steps to level up your setup:
- Deploy Docker containers to VPS without Kubernetes — Deep dive into Docker Compose, Traefik, and production best practices
- Host multiple WordPress sites on one server — Beginner guide to running multiple sites on your Hetzner VPS
- Set up GitHub auto-deploy — Push to GitHub, auto-deploy to your Hetzner server
- Enable zero-downtime deployments — Ship updates without dropping requests
- Lock down your domains — Security headers, rate limiting, and IP allowlists
Hetzner gives you powerful, affordable infrastructure. Pair it with Docker for containerized deployments, or use Server Compass to manage everything visually without ever opening a terminal. Either way, you're in control of your own servers — no vendor lock-in, no per-seat pricing, and no surprise bills.
Related in the StoicSoft network
If you're self-hosting on a VPS or working through a deployment guide like the one above, DeployToVPS is the StoicSoft network's handbook for VPS deployment recipes — docker-compose, nginx, traefik, and common app self-hosts.
If you're choosing a VPS provider or benchmarking real-world performance like the post above explores, StoicVPS is the StoicSoft network's independent tracker for VPS pricing, performance, and migration safety.
From across the StoicSoft network
Hand-curated reads on the same topic from sister sites in the StoicSoft family.
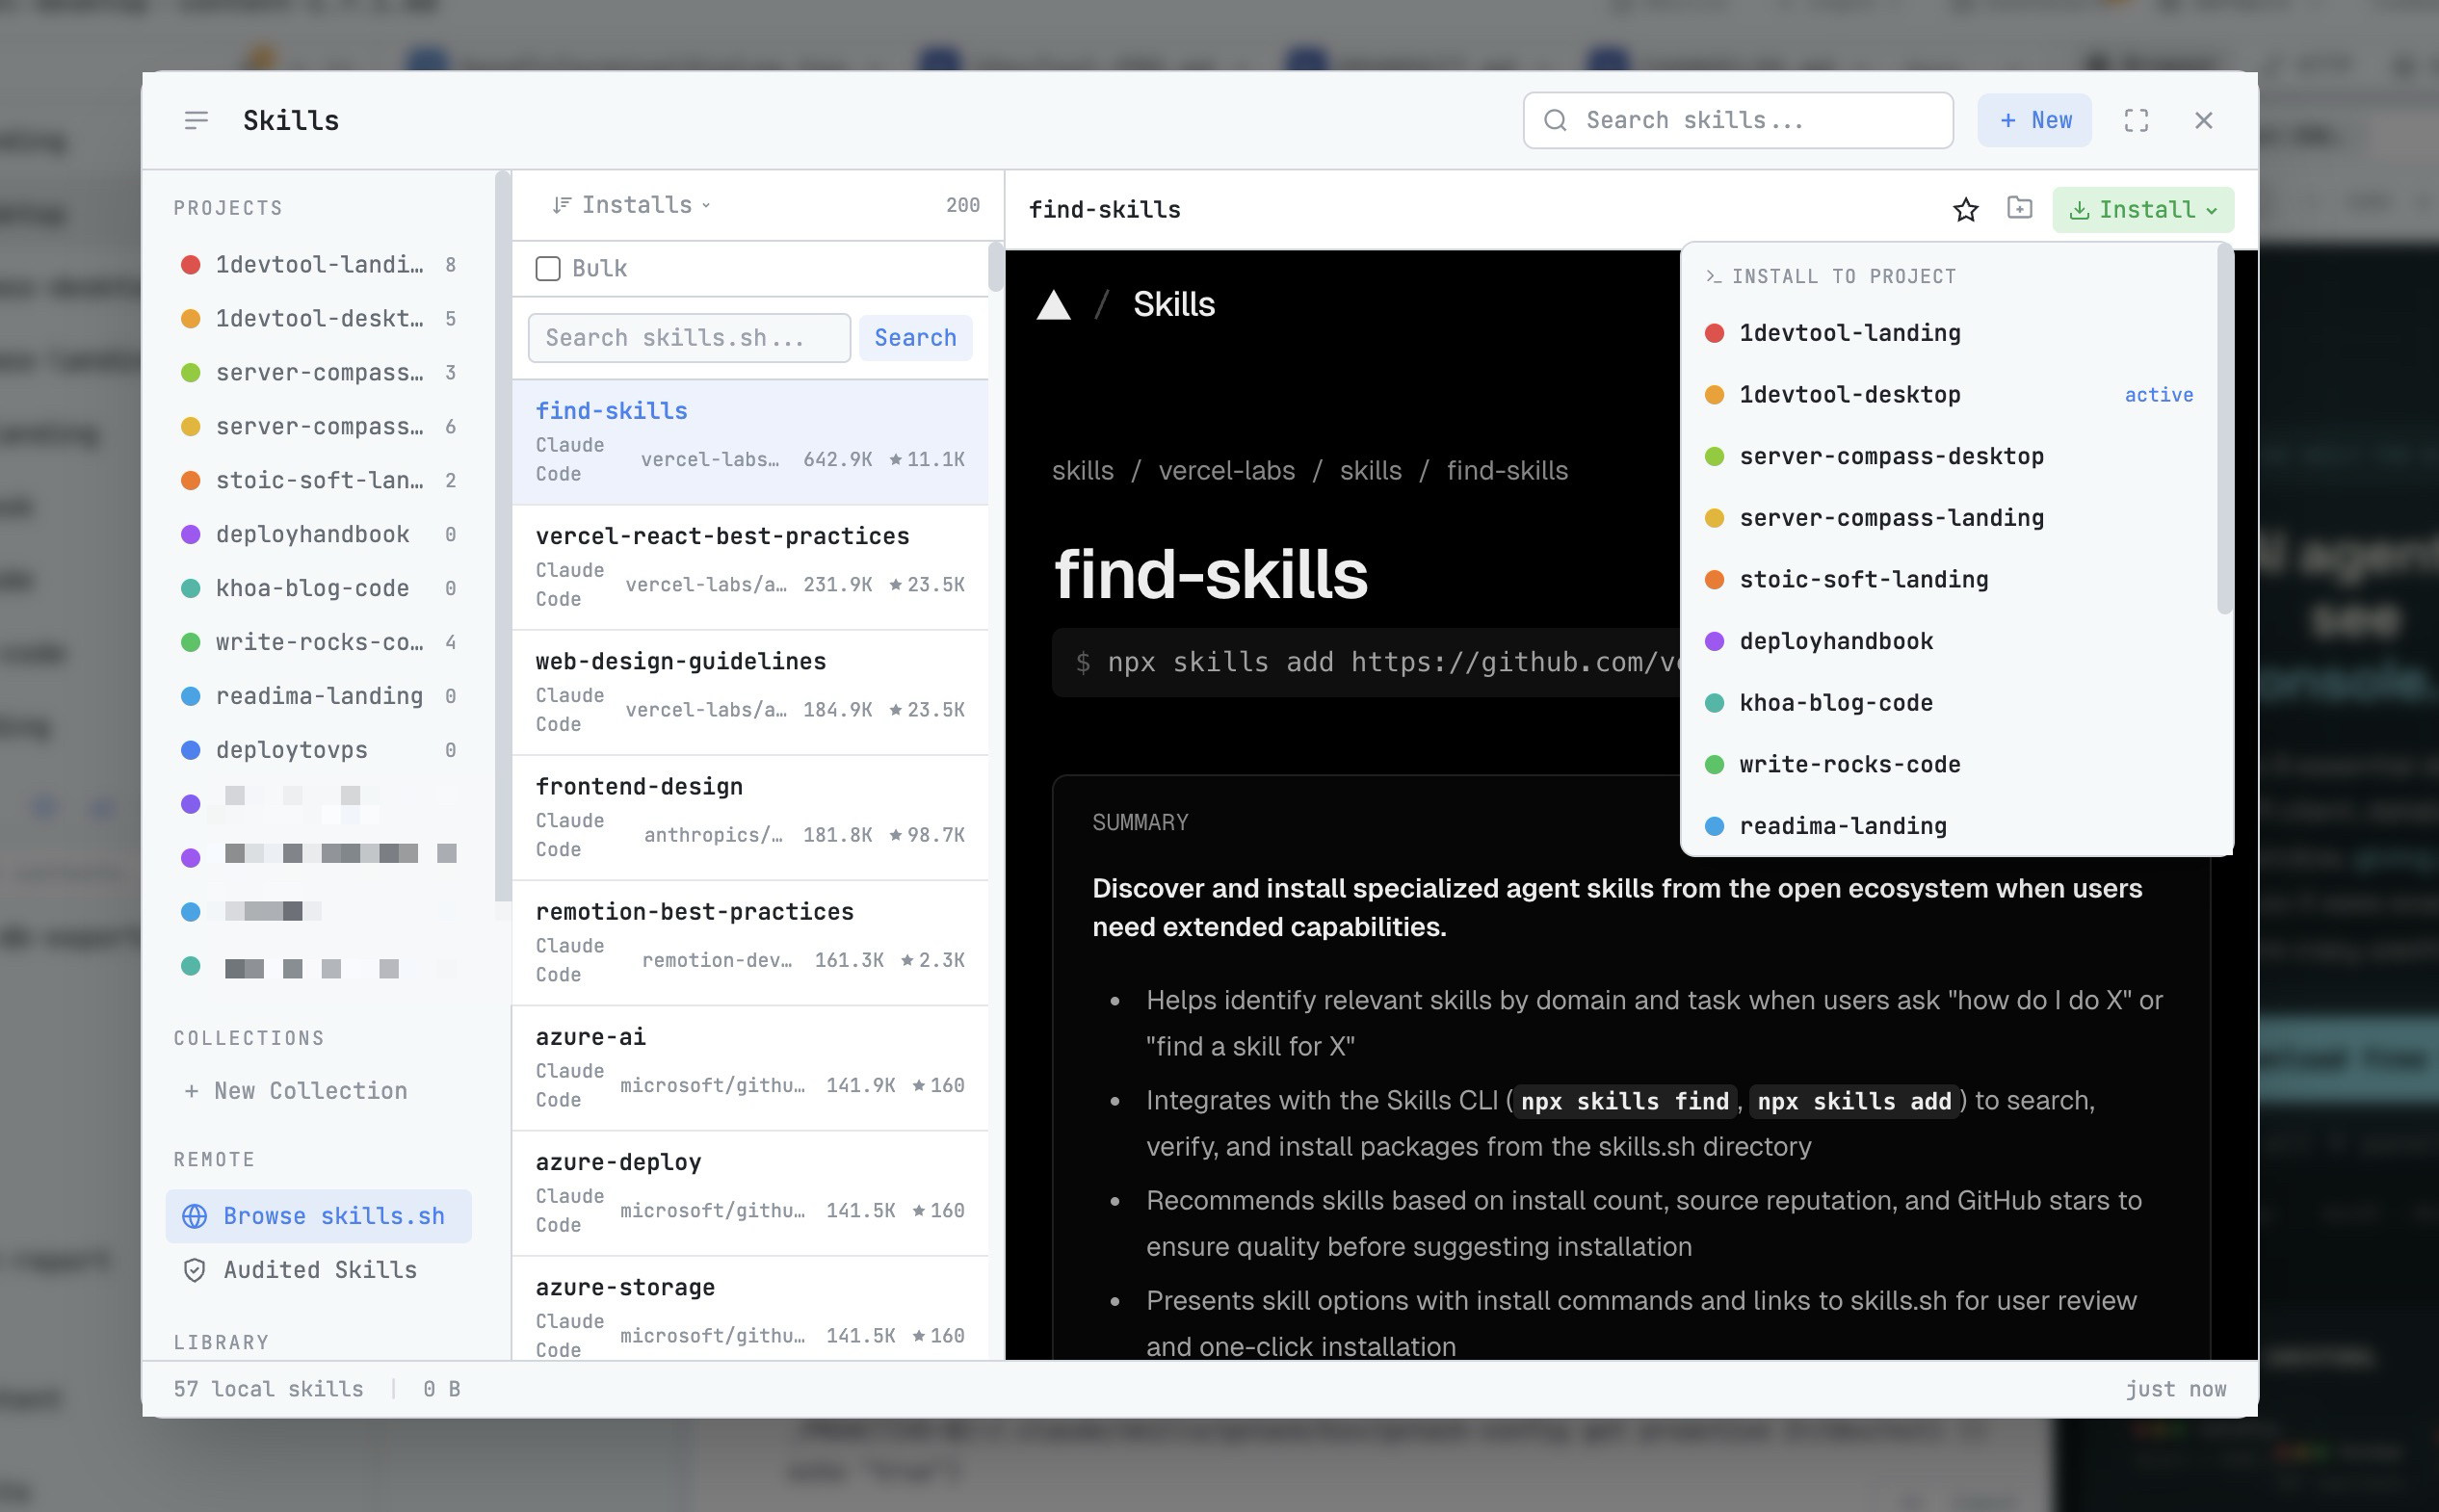 1DevTool8 min read
AI Skills Manager & Docker Deep Dive: Extend Your Agents, Monitor Your Containers
Browse, create, and install AI agent skills with built-in security scanning. Plus a redesigned Docker manager with live CPU, memory, and network monitoring for every container.
Read on 1devtool.com 1DevTool10 min read
Docker Desktop Alternatives for Developers in 2026
Developers want a Docker workflow that stays close to code, logs, and AI agents. This comparison breaks down Docker Desktop alternatives by performance, observability, and daily usability.
Read on 1devtool.com